Instrukcja obsługi AZZA Luminous 110
AZZA Komputerowe przejęcie Luminous 110
Przeczytaj poniżej 📖 instrukcję obsługi w języku polskim dla AZZA Luminous 110 (4 stron) w kategorii Komputerowe przejęcie. Ta instrukcja była pomocna dla 37 osób i została oceniona przez 4 użytkowników na średnio 4.4 gwiazdek
Strona 1/4
1
2
3
7
8
5
6
4
1
2
3
4
5
6
7
8
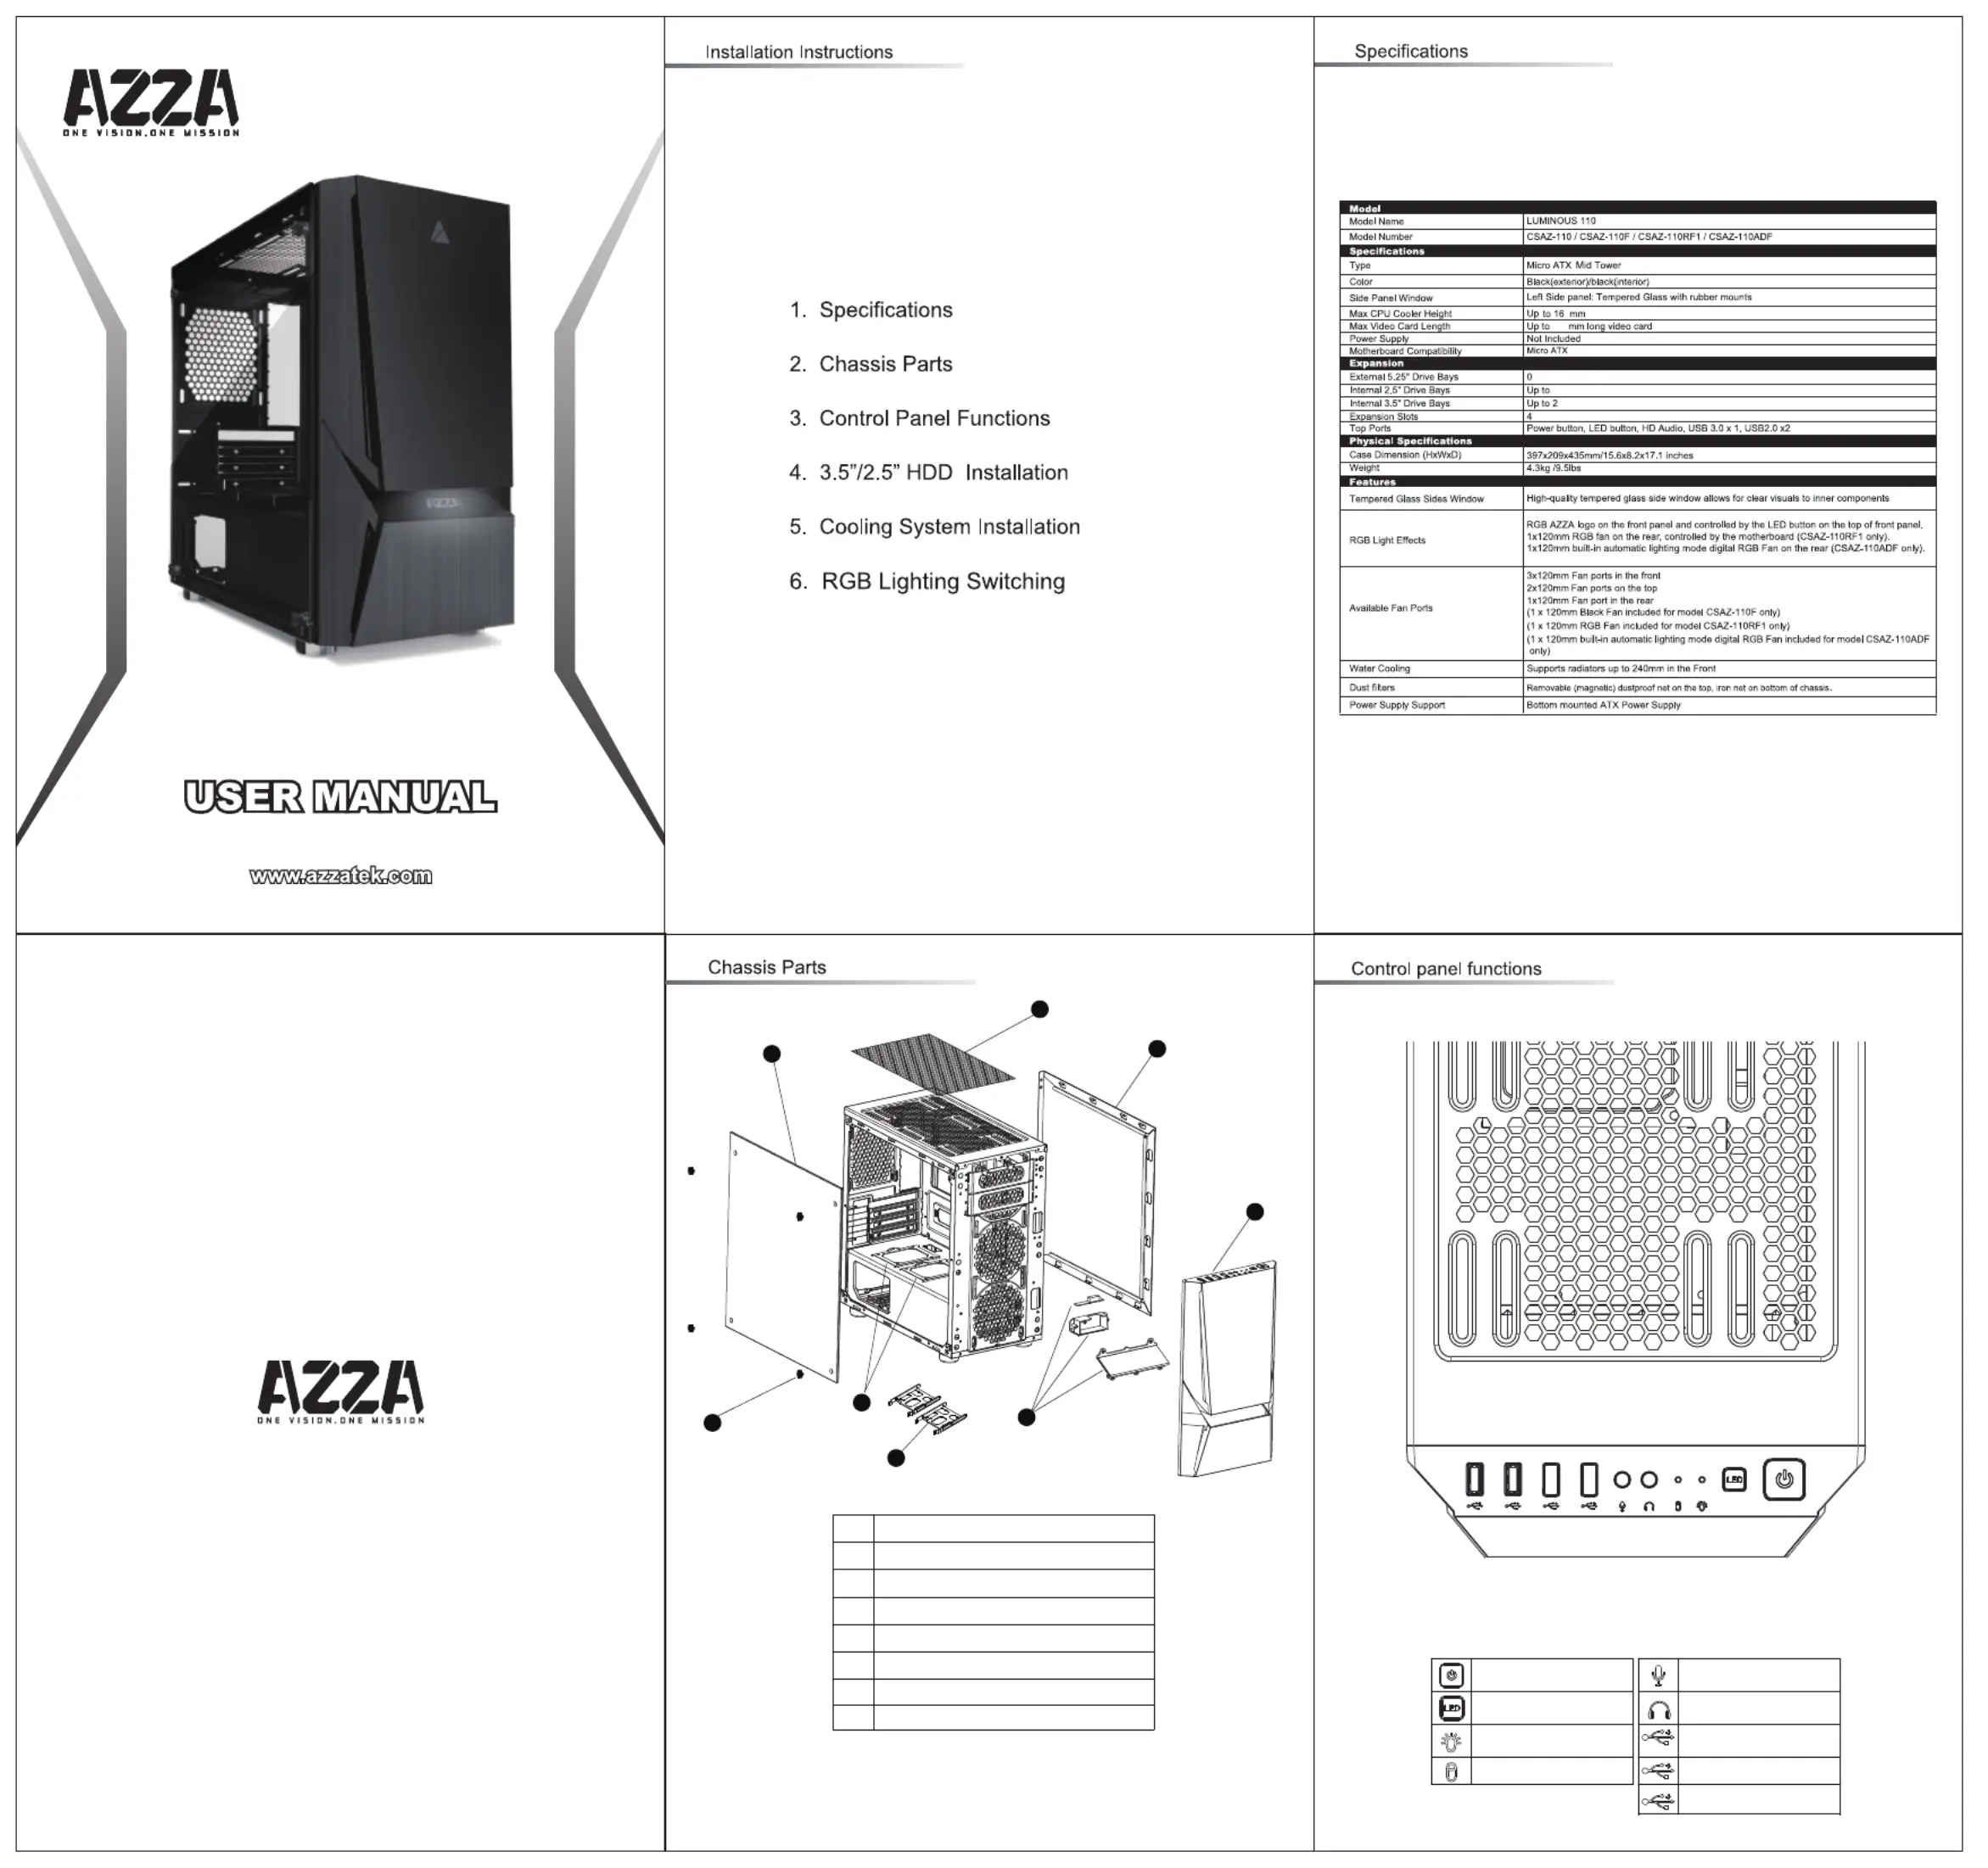
Right side panel
RGB logo plate
Front panel
Left side tempered glass panel
Screws for side glass panel
2.5"SSD brackets X2
Power button
LED changes button
Power Indicator
Hard disk Indicator
Mic
Audio
USB2.0
USB3.0(Blue)
Optional USB type C slot
Removable (magnetic) dustproof net
LUMINOUS 110
6
3.5"HDD brackets X2
5
300
Specyfikacje produktu
| Marka: | AZZA |
| Kategoria: | Komputerowe przejęcie |
| Model: | Luminous 110 |
Potrzebujesz pomocy?
Jeśli potrzebujesz pomocy z AZZA Luminous 110, zadaj pytanie poniżej, a inni użytkownicy Ci odpowiedzą
Instrukcje Komputerowe przejęcie AZZA

7 Kwietnia 2025
12 Lutego 2025
28 Stycznia 2025
5 Stycznia 2025
5 Stycznia 2025
5 Stycznia 2025
5 Stycznia 2025
5 Stycznia 2025
2 Stycznia 2025
2 Stycznia 2025
Instrukcje Komputerowe przejęcie
Najnowsze instrukcje dla Komputerowe przejęcie
9 Kwietnia 2025
5 Kwietnia 2025
3 Kwietnia 2025
1 Kwietnia 2025
1 Kwietnia 2025
1 Kwietnia 2025
30 Marca 2025
30 Marca 2025
29 Marca 2025
28 Marca 2025