Instrukcja obsługi Delta Dore Tybox 5701 FP
Delta Dore termostat Tybox 5701 FP
Przeczytaj poniżej 📖 instrukcję obsługi w języku polskim dla Delta Dore Tybox 5701 FP (25 stron) w kategorii termostat. Ta instrukcja była pomocna dla 41 osób i została oceniona przez 9 użytkowników na średnio 4.2 gwiazdek
Strona 1/25
1
Installation and User
Guide
Tybox 5701 FP pilot wire pack
www.deltadore.com
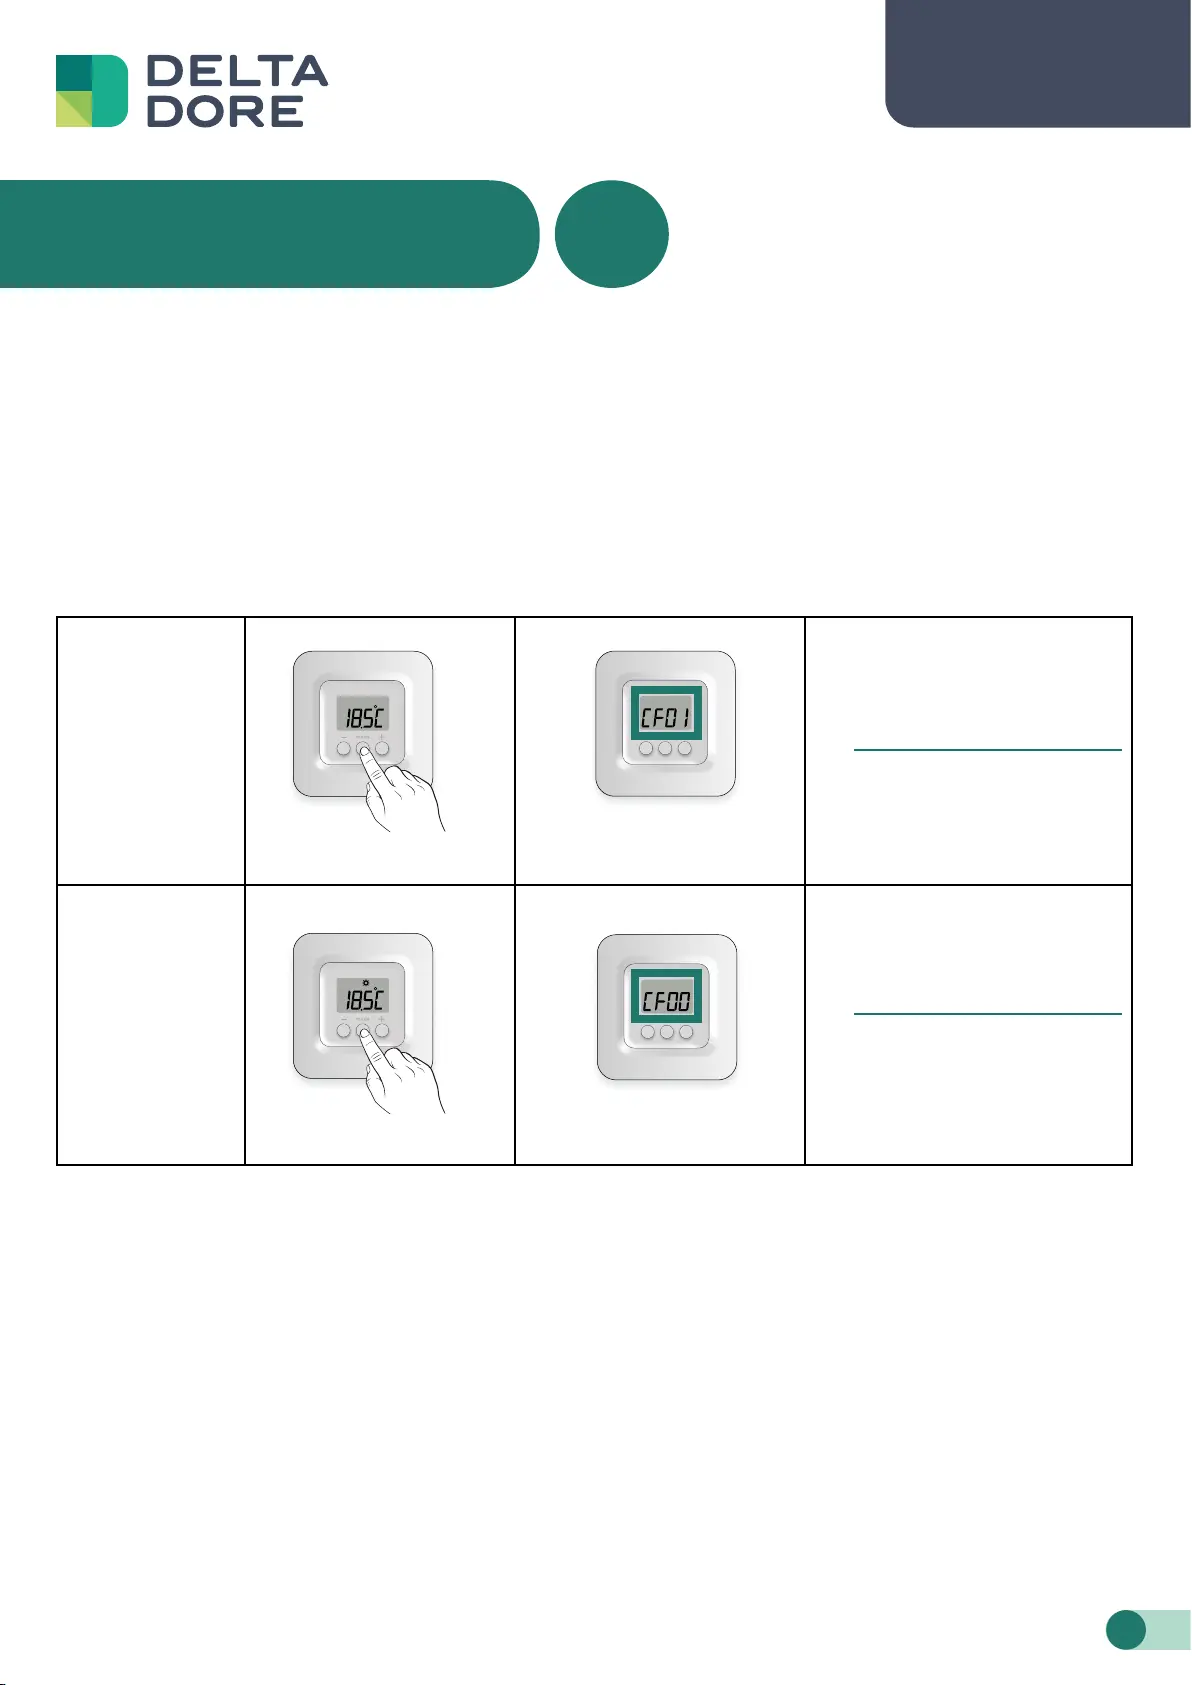
Warning
The Tybox 5701 FP pack consists of a
Tybox 5101 transmier and a 6700 FP RF receiver.
There are two versions of the Tybox 5101 transmier.
To nd out the transmier version, press the “mode” buon for several seconds until the 1st
conguration menu appears: CF00or CF01.
First
version
Second
version
>5s> 5s
3214
mode
modemode
> 5s> 5s
3214
mode
modemode
> 5s> 5s
3214
mode
modemode
Access the instructions
Access the instructions
>5s> 5s
3214
mode
modemode
Specyfikacje produktu
| Marka: | Delta Dore |
| Kategoria: | termostat |
| Model: | Tybox 5701 FP |
Potrzebujesz pomocy?
Jeśli potrzebujesz pomocy z Delta Dore Tybox 5701 FP, zadaj pytanie poniżej, a inni użytkownicy Ci odpowiedzą
Instrukcje termostat Delta Dore

29 Grudnia 2024
29 Grudnia 2024
29 Grudnia 2024
29 Grudnia 2024
29 Grudnia 2024
29 Grudnia 2024
29 Grudnia 2024
29 Grudnia 2024
29 Grudnia 2024
29 Grudnia 2024
Instrukcje termostat
Najnowsze instrukcje dla termostat
9 Kwietnia 2025
9 Kwietnia 2025
8 Kwietnia 2025
8 Kwietnia 2025
7 Kwietnia 2025
7 Kwietnia 2025
6 Kwietnia 2025
6 Kwietnia 2025
5 Kwietnia 2025
5 Kwietnia 2025