Instrukcja obsługi Extron CS 3T
Przeczytaj poniżej 📖 instrukcję obsługi w języku polskim dla Extron CS 3T (4 stron) w kategorii głośnik. Ta instrukcja była pomocna dla 58 osób i została oceniona przez 6 użytkowników na średnio 4.9 gwiazdek
Strona 1/4
CS 3T • Setup Guide
This setup guide contains installation information about the CS 3T speaker cartridge for the Extron CS 123T SpeedMount
®
Ceiling
Speaker System. The CS 3T can be installed as a standalone speaker or in conjunction with the CS 120P plenum rated enclosure.
When a CS 3T speaker is installed in a CS 120P enclosure, the entire assembly is plenum rated.
WARNING:May result in serious injury. Installation and service must be performed by authorized personnel only.
AVERTISSEMENT : L’installation et l’entretien doivent être effectués par le Risque potentiel de blessure grave.
personnel autorisé uniquement.
NOTE:Installation of conduit and conduit adapters must conform to all applicable building codes and local ordinances.
Installing the CS 3T in a Suspended Ceiling
IMPORTANT:
Refer to www.extron.com for the complete
user guide, installation instructions, and
specifications befor
e connecting the
pr
oduct to the power sour
ce.
For hard ceiling installations, see the .CS 123T User Guide
1. Remove powerfrom all devices.
NOTE:If the baffle and grille are to be painted, see the for more information.CS 3T and CS 120P User Guide
2. Cut a hole for the CS 3T.Use the provided cutout template to outline the hole to be cut in the ceiling tile as described
below.
a. Remove the ceiling tile and draw diagonal lines across the non-visible side from opposite corners to locate its center.
Mark the intersection where the lines cross.
b. Position the center hole of the cutout template directly over the center of the tile, marked in stepa.
c. Trace a circle on the ceiling tile as follows:
For installations in ceilings that are NOT fiberglass or when installing the speakers in an open back
configuration: Trace a circle around the cutout template.
NOTE:The fiberglass tile adapters are not needed and can be discarded.
For installations in a fiberglass tile ceiling with the CS 120P:
NOTE:A set of fiberglass tile adapters is provided with both the CS 3T and the CS 120P. Only one set is needed to
install the CS 3T with the CS 120P kit in fiberglass tile.
i. Place the berglass tile adapter around the outer diameter of the template that was positioned in step b.
ii. Trace a circle around the outer diameter of the adapter.
d. Cut out the circle traced in the ceiling tile.
e. Replace the ceiling tile in the ceiling.
3. Remove the adjacent ceiling tile next to the tile where the speaker will be installed.
4. Install the CS 120P or ceiling mount kit.
• If using the CS 120P, see the to install it.CS 120P Setup Guide
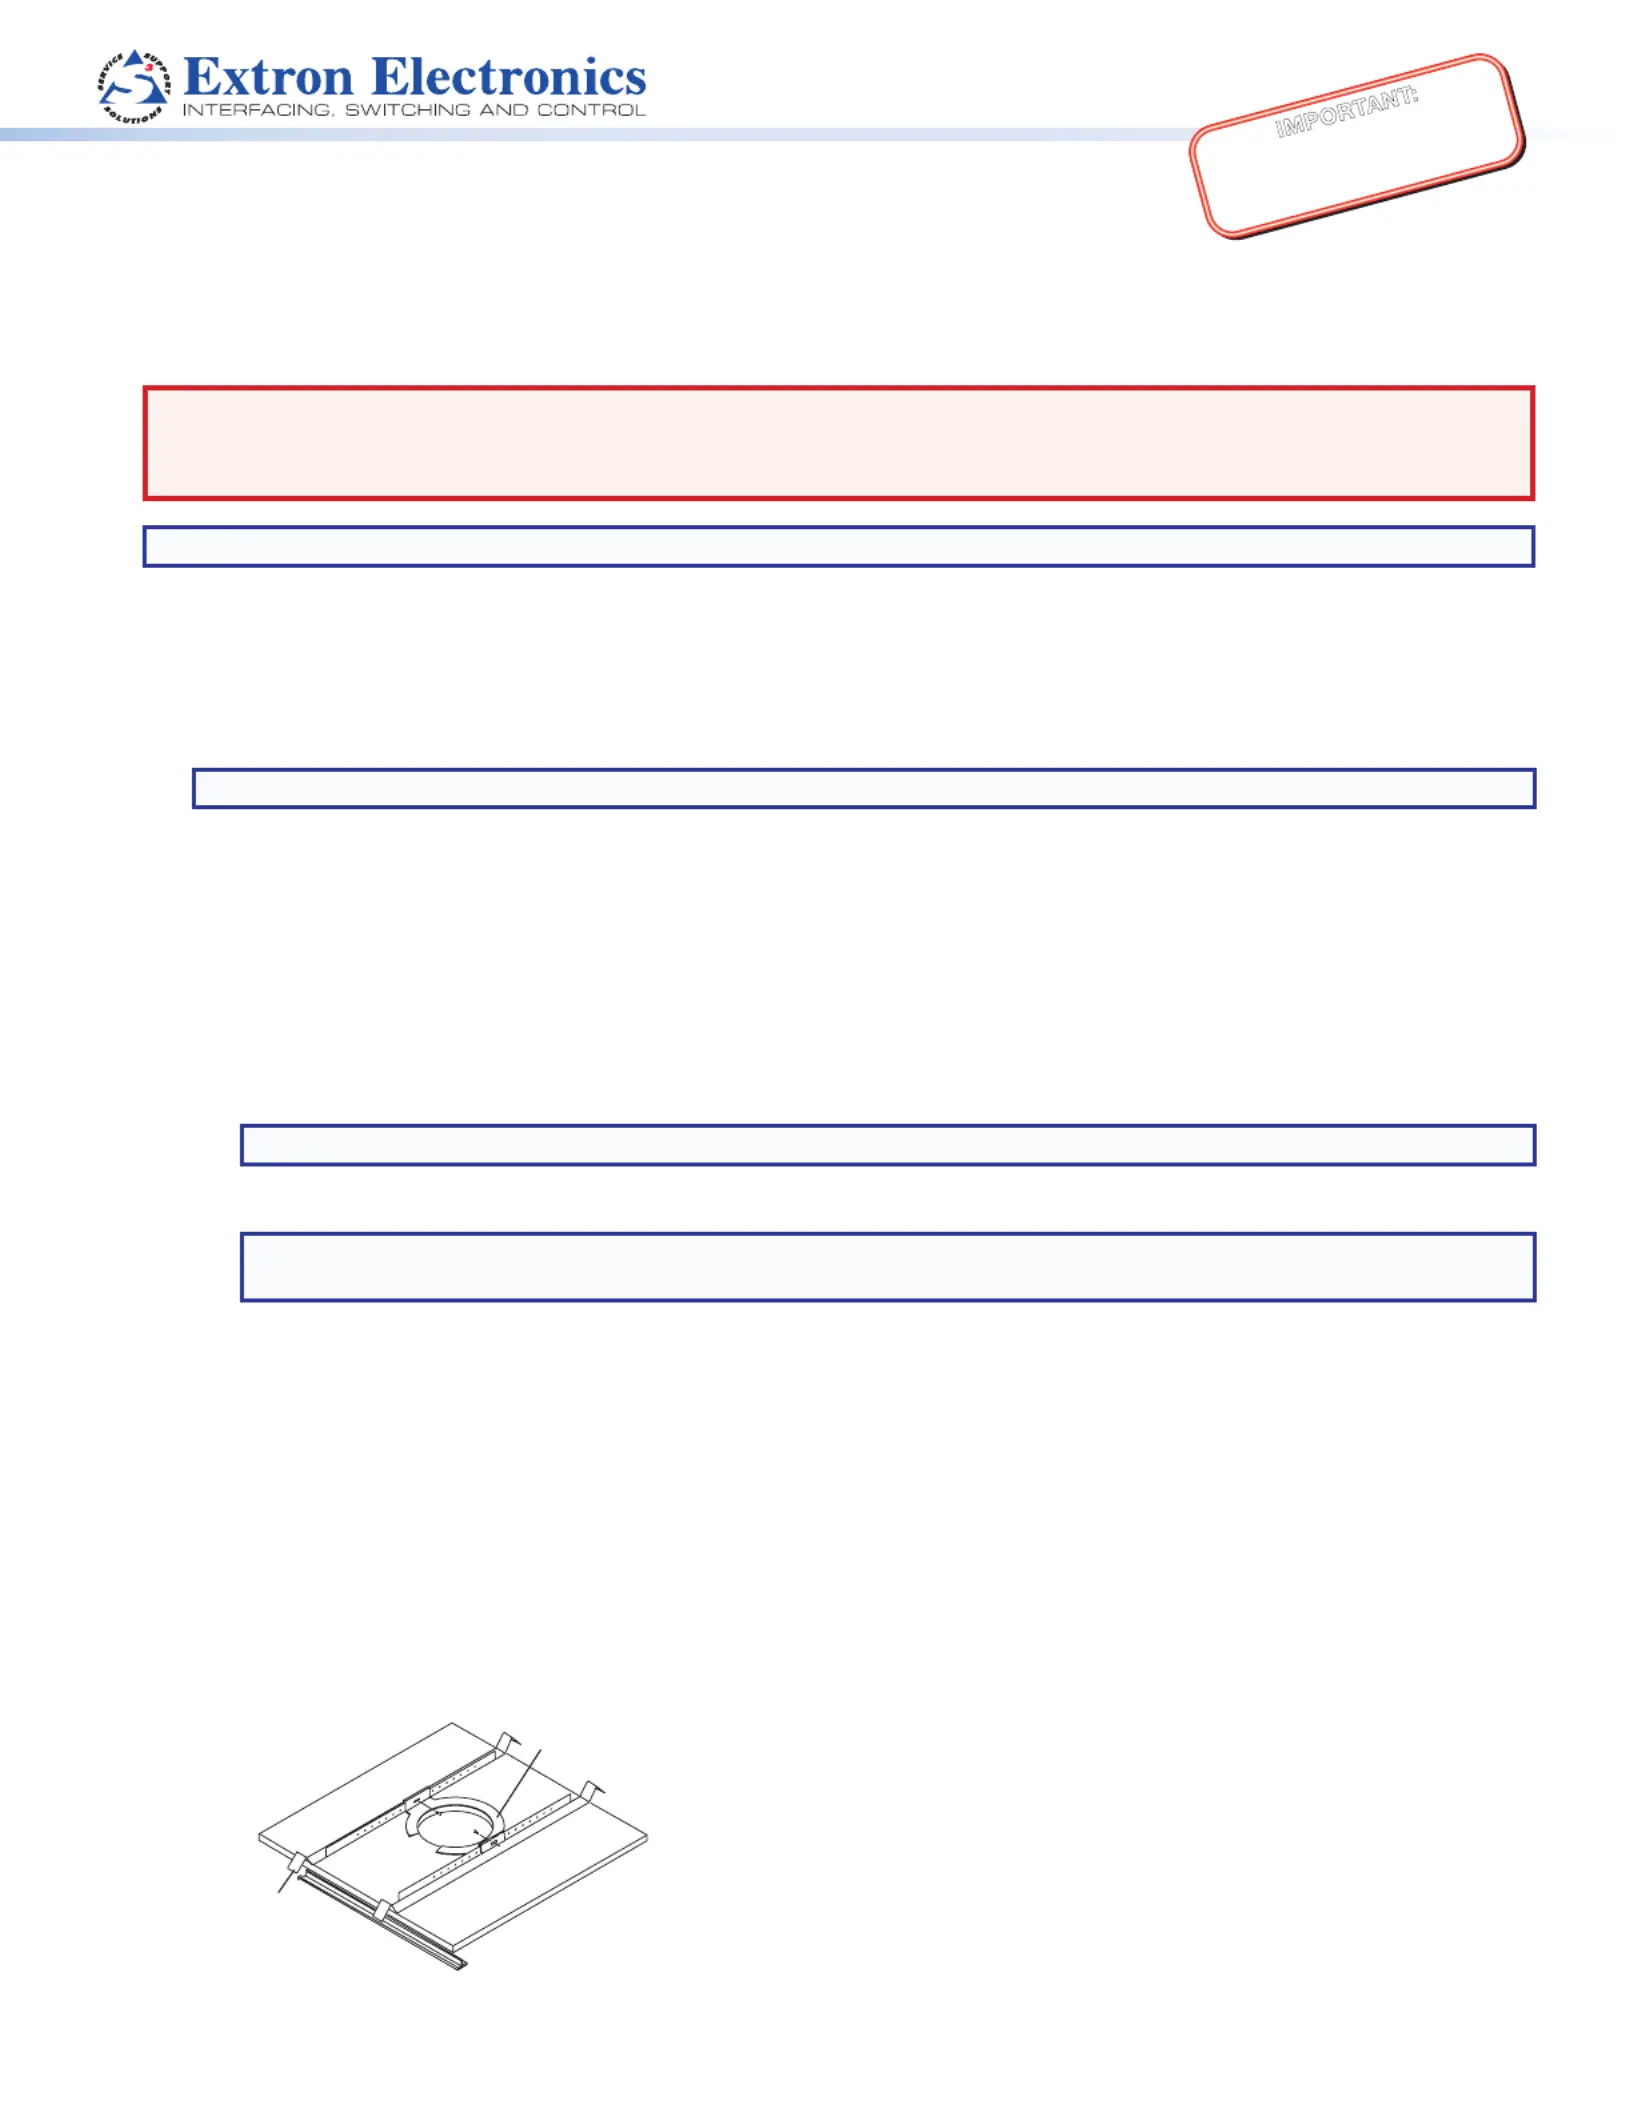
• If not using the CS120P, attach two V-rails and one C-ring across the tile above the hole that was cut in step 2 (see the
illustration below). The berglass tile adapter is not needed.
V-
rail
C-ring
1
Specyfikacje produktu
| Marka: | Extron |
| Kategoria: | głośnik |
| Model: | CS 3T |
Potrzebujesz pomocy?
Jeśli potrzebujesz pomocy z Extron CS 3T, zadaj pytanie poniżej, a inni użytkownicy Ci odpowiedzą
Instrukcje głośnik Extron

12 Marca 2025
24 Grudnia 2024
9 Października 2024
9 Października 2024
9 Października 2024
9 Października 2024
9 Października 2024
9 Października 2024
9 Października 2024
9 Października 2024
Instrukcje głośnik
Najnowsze instrukcje dla głośnik
8 Kwietnia 2025
8 Kwietnia 2025
8 Kwietnia 2025
7 Kwietnia 2025
7 Kwietnia 2025
7 Kwietnia 2025
5 Kwietnia 2025
3 Kwietnia 2025
3 Kwietnia 2025
3 Kwietnia 2025