Instrukcja obsługi Kicker 47KMFC9
Przeczytaj poniżej 📖 instrukcję obsługi w języku polskim dla Kicker 47KMFC9 (9 stron) w kategorii głośnik. Ta instrukcja była pomocna dla 22 osób i została oceniona przez 8 użytkowników na średnio 5.0 gwiazdek
Strona 1/9
EOP2020-CS2
5/17/2021
REV-A.2
47KMFC Mount Conguration Guide
Page of 19
The 47KMFC xed mounting system is designed to mount to at surface applications. The
four by 64mm) bolt pattern accepts multiple styles of fasteners providing ease of tment to 2.5” (
existing vehicles while also speeding assembly. The KMFC mount accepts either 5/16” or 8mm
bolts and nuts. Three bolting congurations are designed into the mount providing the customer
with options to best t their application:
•Bolt-thru-mounting
•Bolt--mounting to
•Stud mounting
This document addresses these congurations to provide insight into the capability of the KMFC
mounting system.
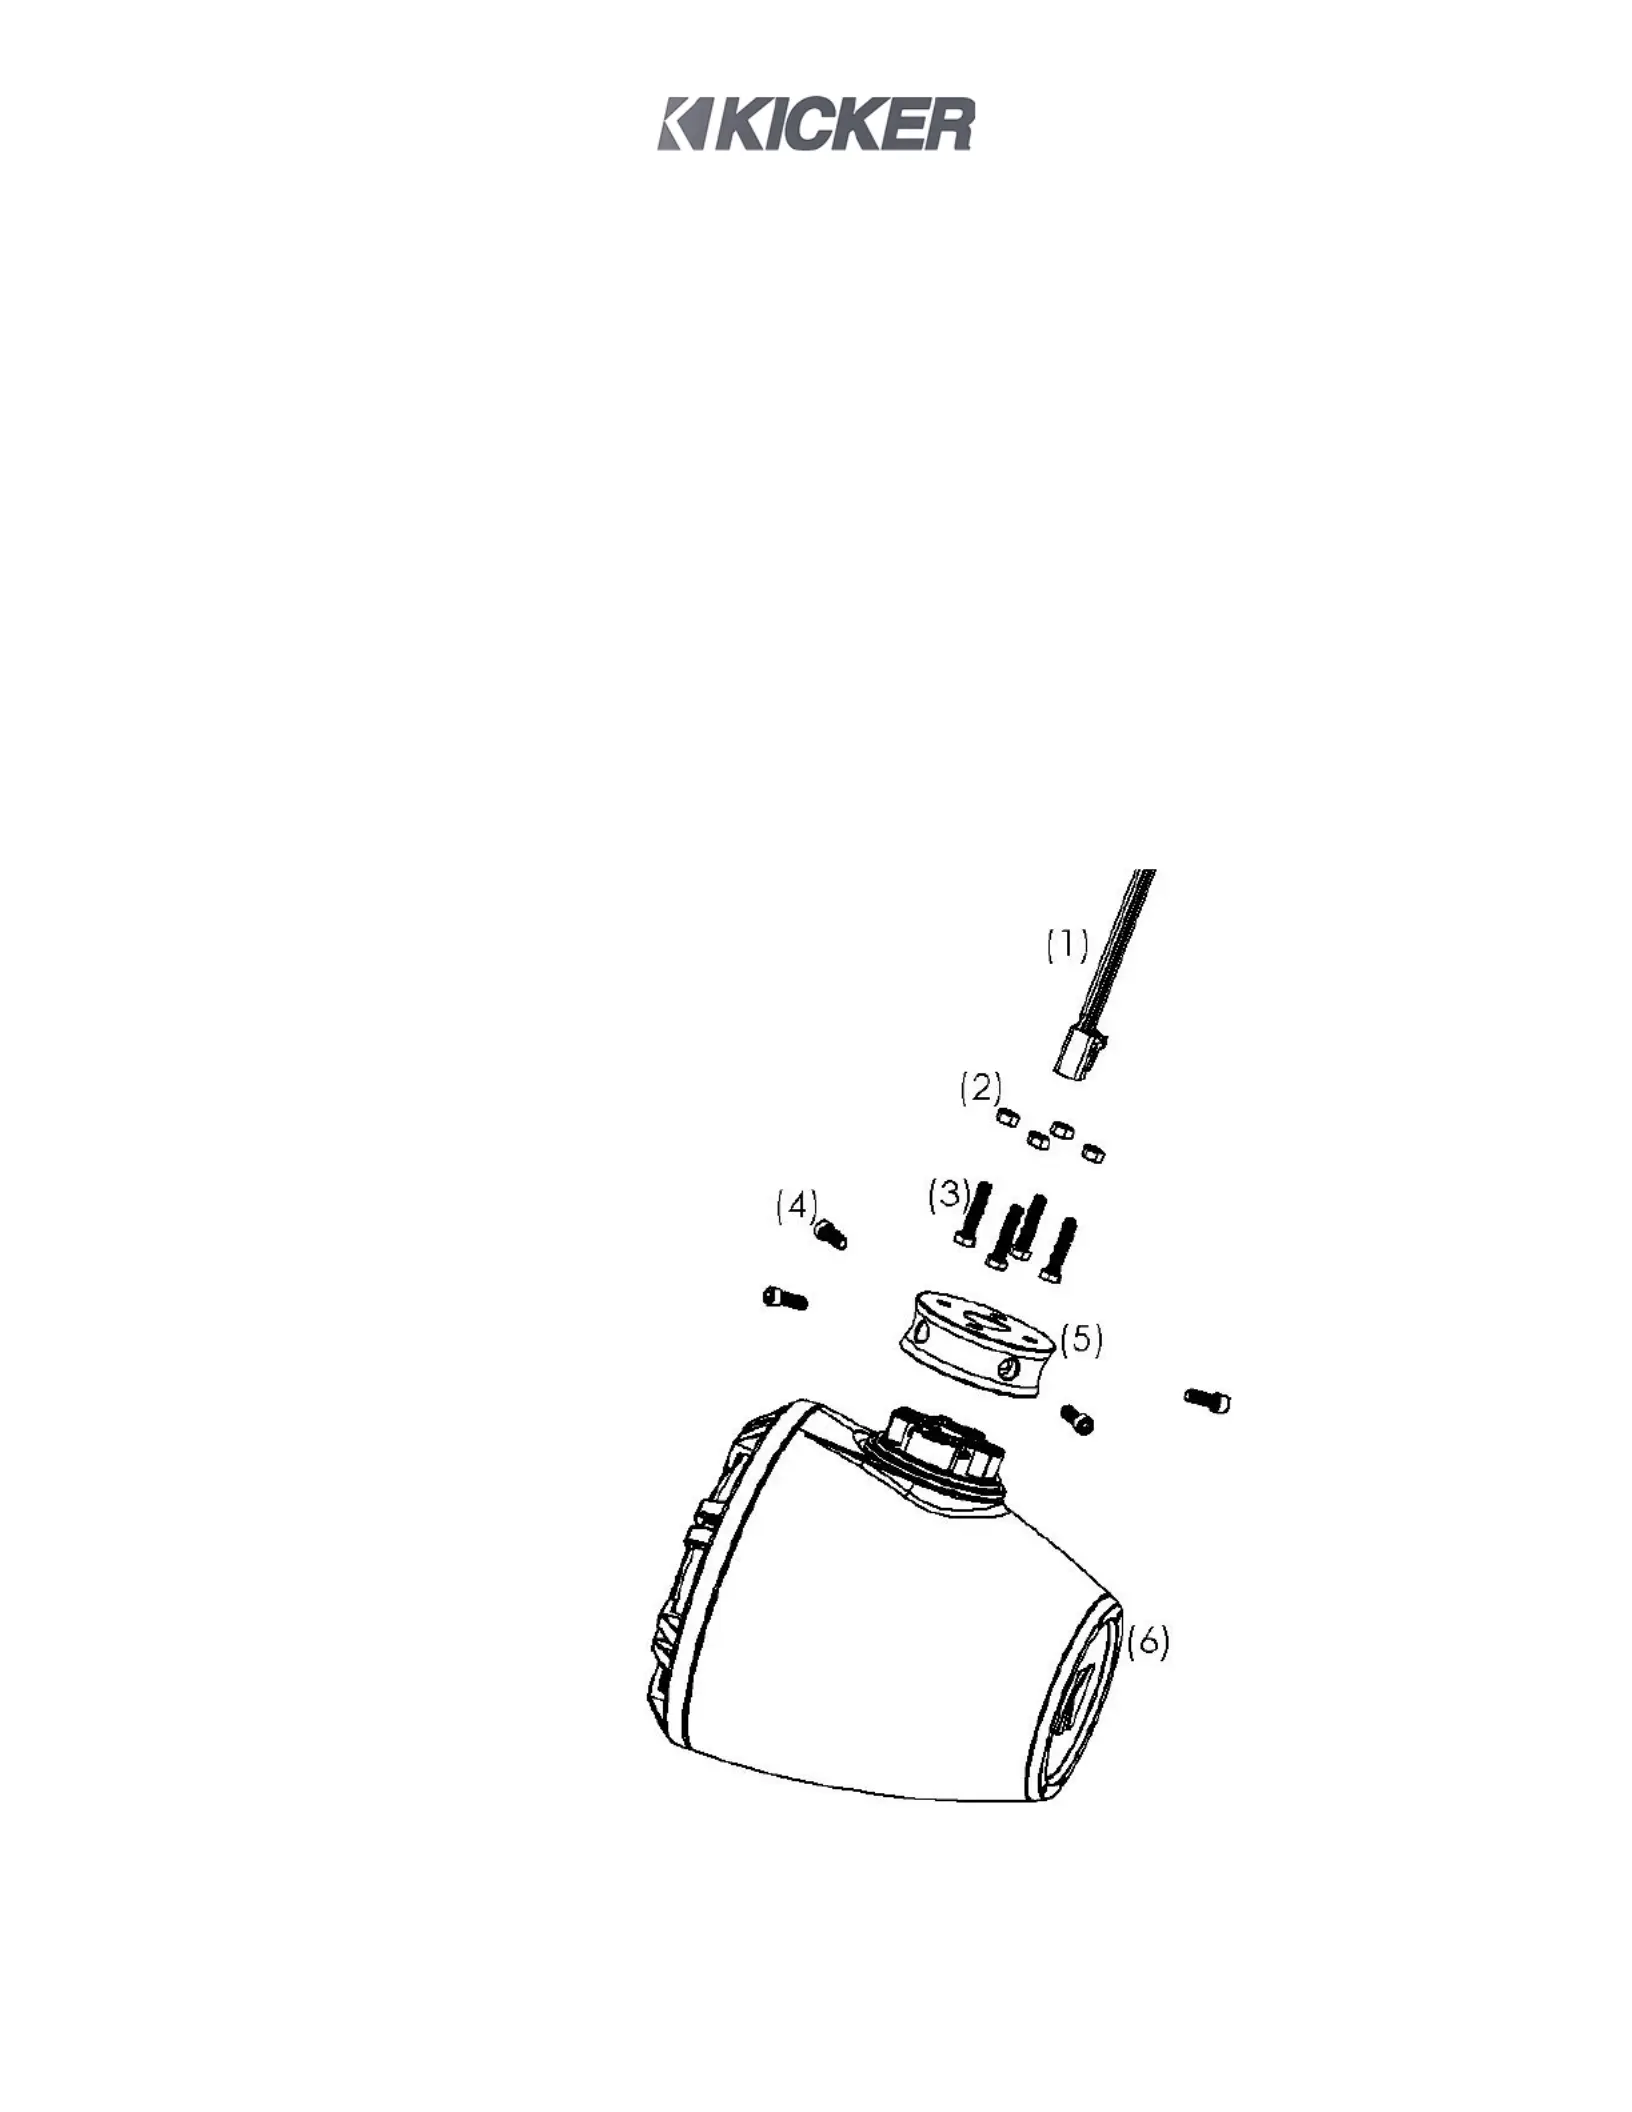
MOUNTING YOUR NEW ENCLOSURE
The use of at washers is suggested between the mounting surface and tightening
fastener. Loctite Threadlocker 271 (red) is not included but required for installation. The
following parts identied are included and required for mounting your new enclosure.
1.Electrical Connector
2.-18UNC hex nuts 5/16”
3.-18UNC hex head bolts 1½” long 5/16”
4.-18UNC socket head bolts 7/8” long 5/16”
5.Vehicle Mount
6.Speaker Enclosure
Specyfikacje produktu
| Marka: | Kicker |
| Kategoria: | głośnik |
| Model: | 47KMFC9 |
| Kolor produktu: | Czarny |
| Typ produktu: | Kontroler dostępu |
| Wysokość produktu: | 69 mm |
| Szerokość produktu: | 237 mm |
| Głębokość produktu: | 285 mm |
| Ilość na paczkę: | 1 szt. |
| Certyfikaty: | CE, FCC |
| Zakres temperatur (eksploatacja): | -20 - 65 °C |
| Typ mocowania: | Ściana |
| Kompatybilność: | Wiegand |
| Kompatybilność marki: | Hikvision |
Potrzebujesz pomocy?
Jeśli potrzebujesz pomocy z Kicker 47KMFC9, zadaj pytanie poniżej, a inni użytkownicy Ci odpowiedzą
Instrukcje głośnik Kicker

5 Lutego 2025
10 Stycznia 2025
10 Stycznia 2025
29 Grudnia 2024
29 Grudnia 2024
19 Grudnia 2024
19 Grudnia 2024
9 Października 2024
9 Października 2024
9 Października 2024
Instrukcje głośnik
Najnowsze instrukcje dla głośnik
8 Kwietnia 2025
8 Kwietnia 2025
8 Kwietnia 2025
7 Kwietnia 2025
7 Kwietnia 2025
7 Kwietnia 2025
5 Kwietnia 2025
3 Kwietnia 2025
3 Kwietnia 2025
3 Kwietnia 2025