Instrukcja obsługi Whirlpool KOED430RSS
Przeczytaj poniżej 📖 instrukcję obsługi w języku polskim dla Whirlpool KOED430RSS (14 stron) w kategorii piekarnik. Ta instrukcja była pomocna dla 16 osób i została oceniona przez 6 użytkowników na średnio 4.1 gwiazdek
Strona 1/14
1
Built-InElectricOvensControlGuide
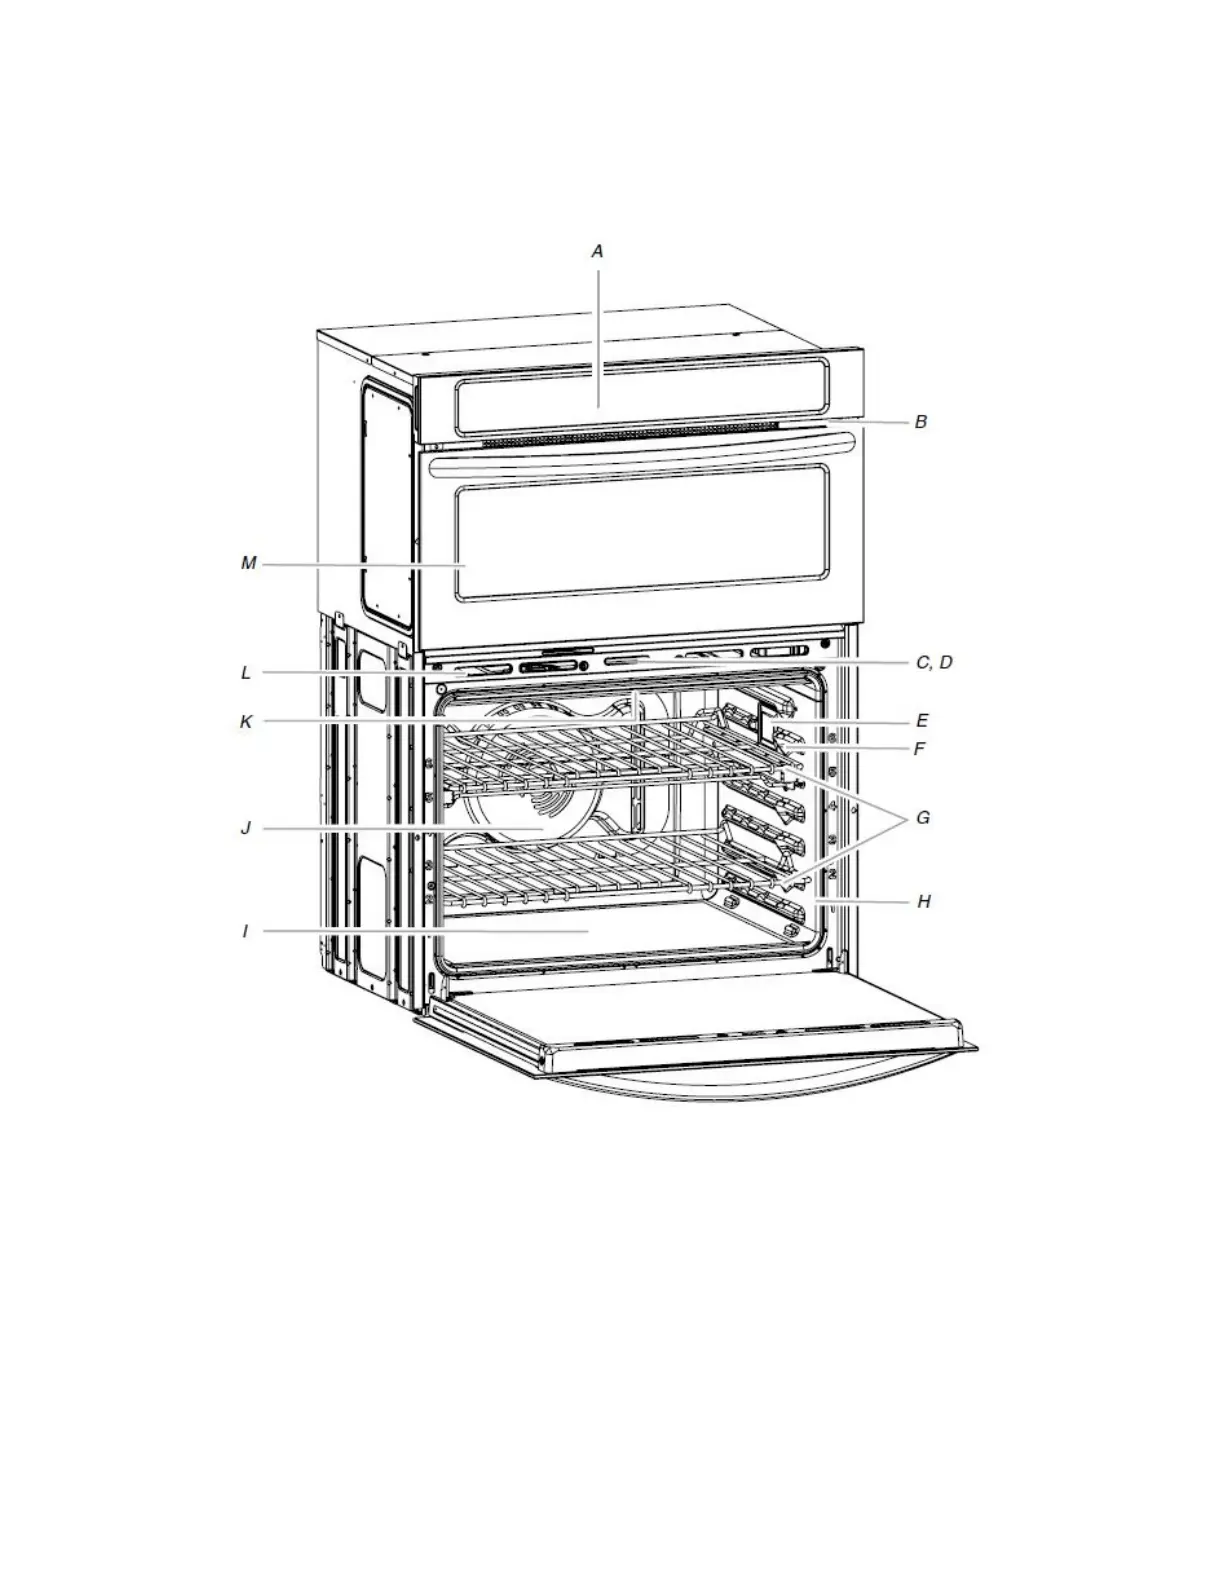
PARTSANDFEATURES
WARNING:Toreducetheriskoffire,electricshock,orinjurytopersons,readtheIMPORTANTSAFETYINSTRUCTIONS,locatedin
yourappliance'sOwner'sManual,beforeoperatingthisappliance.
Thismanualcoversdifferentmodels.Theovenyouhavepurchasedmayhavesomeoralloftheitemslisted.Thelocationsand
appearancesofthefeaturesshownheremaynotmatchthoseofyourmodel.
A.Electronicovencontrol
B.Modelandserialnumberplate(onbottomedgeofcontrol
panel,righthandside)
C.Automaticovenlightswitch
D.Ovendoorlocklatch
E.Ovenlights
F.Temperatureprobejack
G.Ovenracks(roll-outracksavailableonselectmodelsonly)
H.Gasket
I.CleanBake™bakeelement(hiddenbeneathfloorpanel)
J.Convectionelementandfan(inbackpanel)
K.Broilelements(notshown)
L.Ovenvent
M.Uppermicrowaveoven(combinationovenmodelsonly)
PartsandFeaturesnotshown
Temperatureprobe
Specyfikacje produktu
| Marka: | Whirlpool |
| Kategoria: | piekarnik |
| Model: | KOED430RSS |
Potrzebujesz pomocy?
Jeśli potrzebujesz pomocy z Whirlpool KOED430RSS, zadaj pytanie poniżej, a inni użytkownicy Ci odpowiedzą
Instrukcje piekarnik Whirlpool

9 Kwietnia 2025
8 Kwietnia 2025
7 Kwietnia 2025
7 Kwietnia 2025
7 Kwietnia 2025
6 Kwietnia 2025
6 Kwietnia 2025
6 Kwietnia 2025
4 Kwietnia 2025
4 Kwietnia 2025
Instrukcje piekarnik
Najnowsze instrukcje dla piekarnik
9 Kwietnia 2025
9 Kwietnia 2025
9 Kwietnia 2025
9 Kwietnia 2025
9 Kwietnia 2025
9 Kwietnia 2025
9 Kwietnia 2025
9 Kwietnia 2025
9 Kwietnia 2025
9 Kwietnia 2025