Instrukcja obsługi Arkon SM517
Arkon zestaw samochodowy SM517
Przeczytaj poniżej 📖 instrukcję obsługi w języku polskim dla Arkon SM517 (2 stron) w kategorii zestaw samochodowy. Ta instrukcja była pomocna dla 21 osób i została oceniona przez 4 użytkowników na średnio 4.7 gwiazdek
Strona 1/2
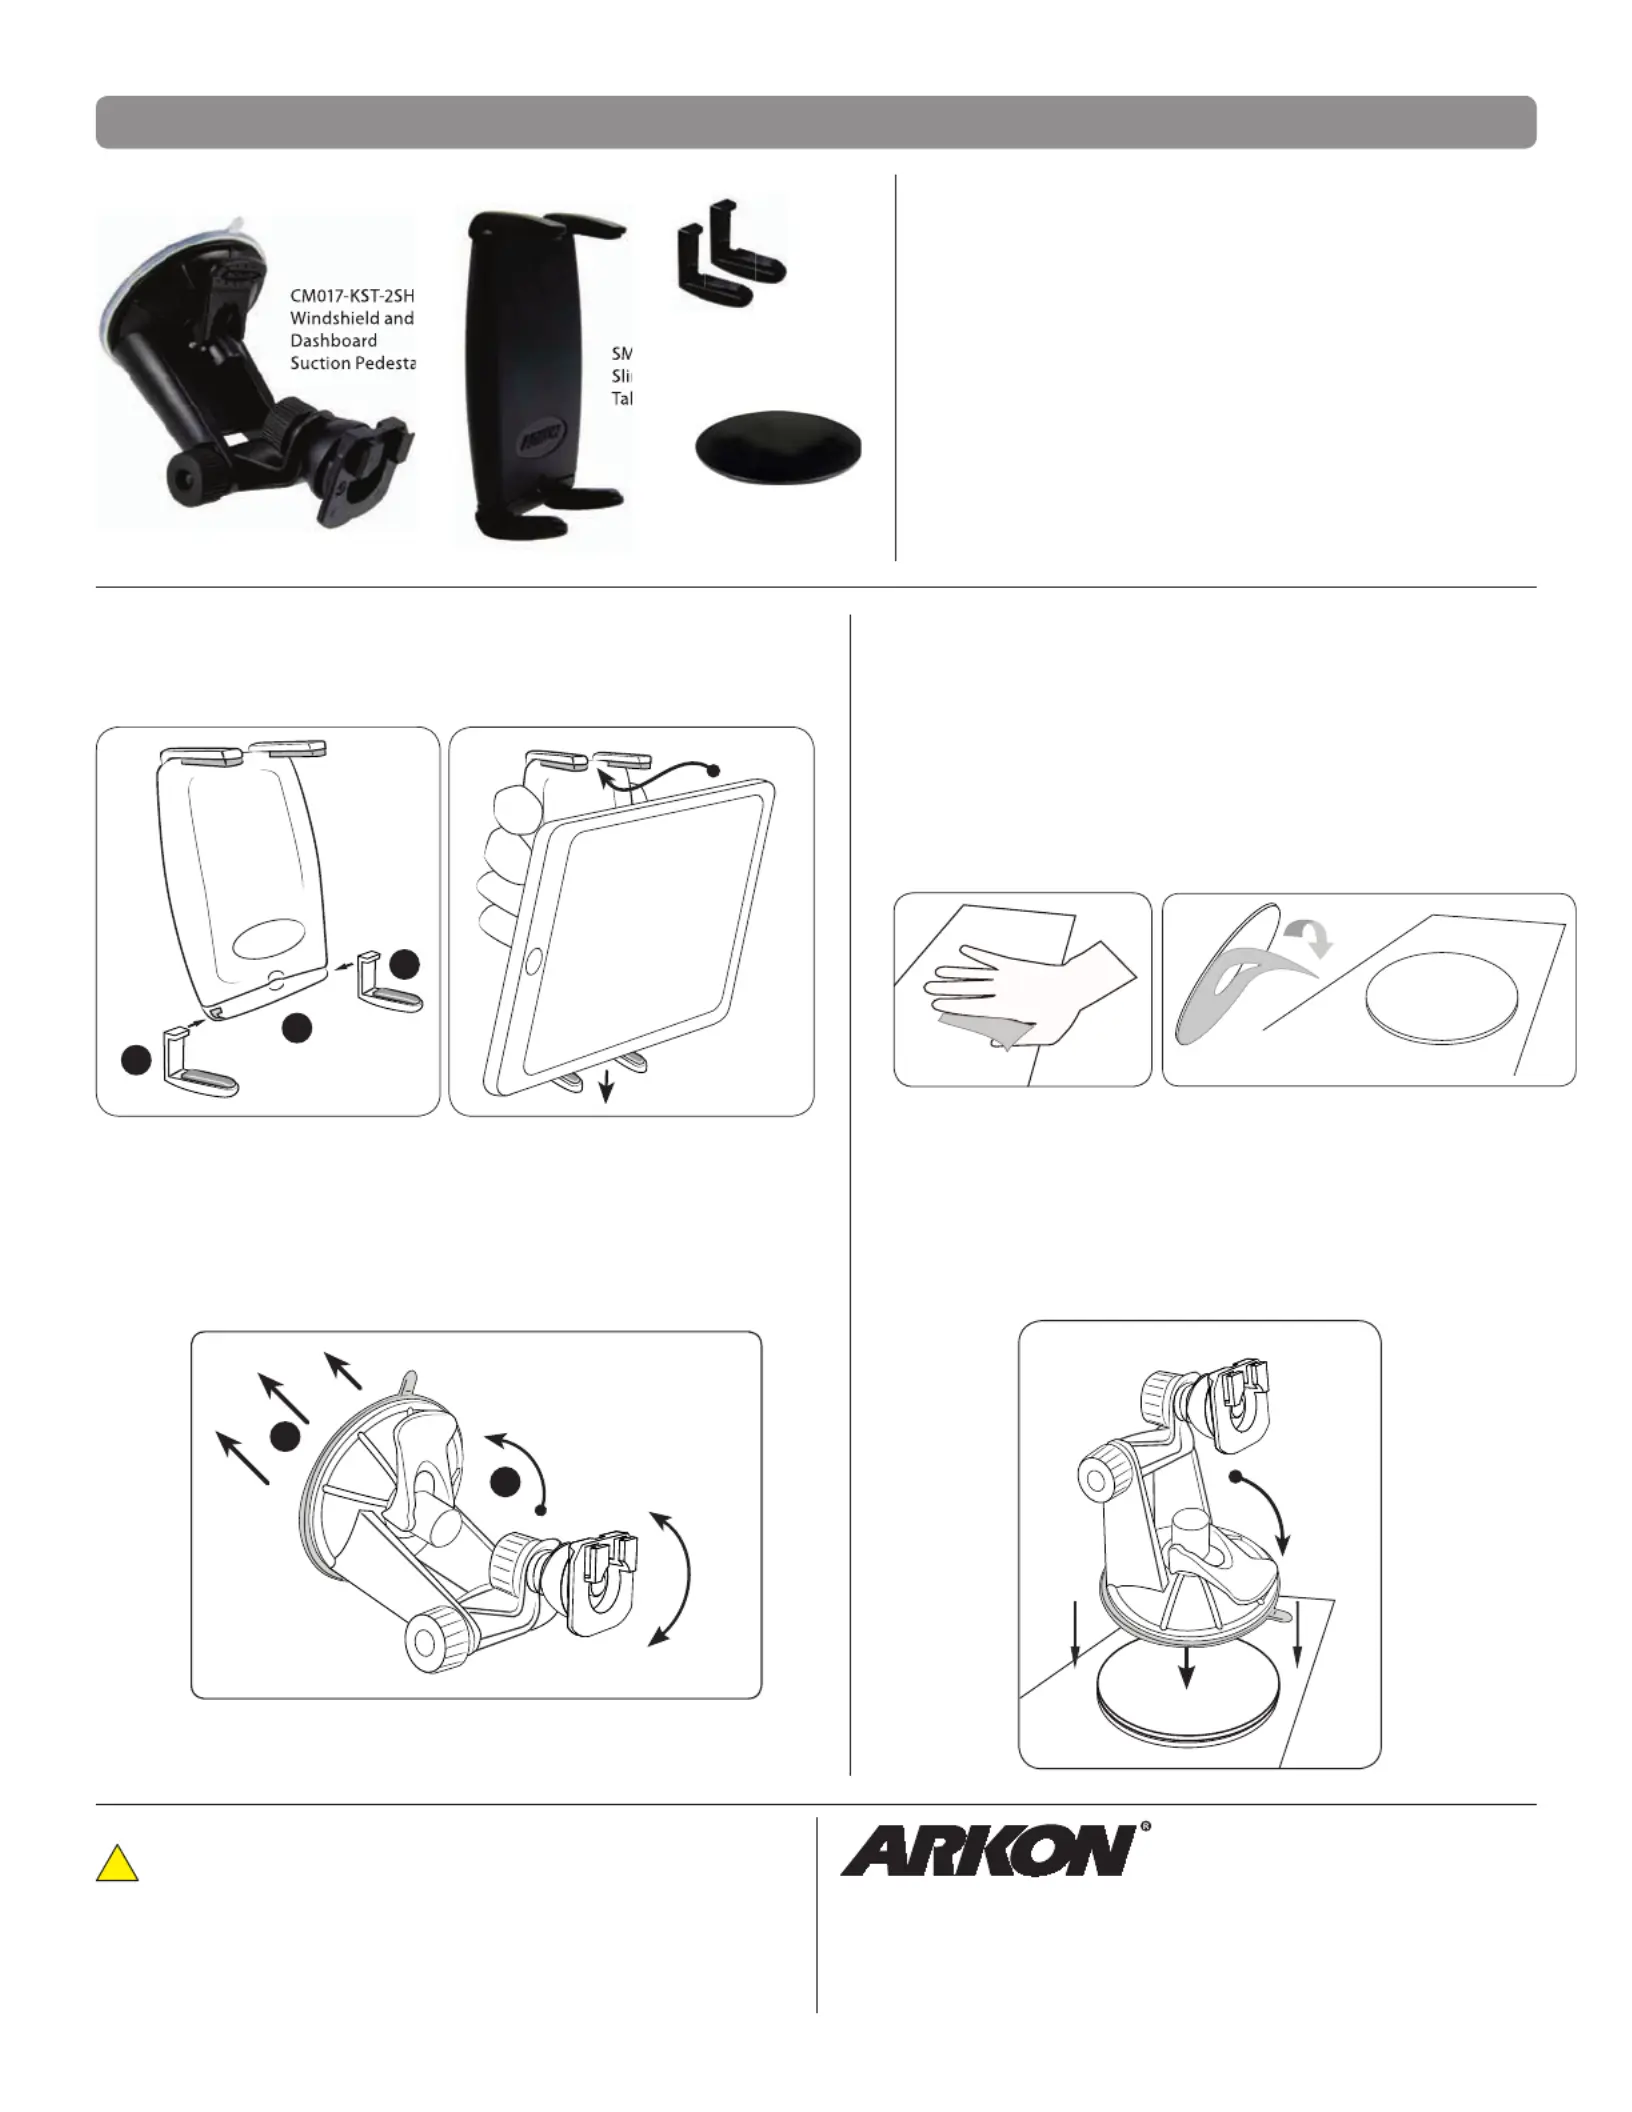
Package Contents:
(1) CM017-KST-2SH - Windshield and dashboard pedestal
(1) SM050-2 - Slim-Grip™ tablet holder
(2) Extra long support legs
(1) AP020 - Circular adhesive dashboard disc
al
SM517 | Windshield or Dashboard Mount for Samsung Galaxy Tab and other 7 “ Tablets
Windshield Mounting
Install the Support Legs to the Holder
Step 1.
Find a safe location on the interior of the vehicle’s windshield
to mount the pedestal. Firmly push the suction base (C)
against the windshield and ip the base lever down to the (D)
locked position.
!
Safety Precautions
Do not install Arkon products over an air bag cover or within the air
bag deployment zone. Arkon Resources, Inc. assumes no responsi-
bility of liability for injury or death as a result of car crashes and / or
air bag deployment.
Arkon is not responsible for any damages caused to your car, your
device, or yourself due to the installation or use of this pedestal mount.
The Mobile Mounting Specialists™
Consumer Hotline:
USA (800) 841-0884
INT’L(626) 254-9005
Monday - Friday 9 am - 5 pm, PST
www.arkon.com
Arcadia, CA 91006 USA
Designed in USA | Made in China and Taiwan
© Copyright 2010 Arkon Resources, Inc.
AP020
Circular Adhesive
Dashboard Disc
C
D
Choose a suitable location for disc (and pedestal) installation.
Do not place mount in or near an air bag deployment zone
or where it will obstruct view of the road or hinder vehicle
operation.
Clean the dashboard or console surface area thoroughly with
the included alcohol pad. Allow the area dry before applying
the mounting disc.
Remove the paper backing of the disc and place on the
cleaned surface. Press the top of the disc down rmly to allow
the adhesive to stick to the surface. Allow 24 hours for the
adhesive to cure to the surface before applying any pressure.
Step 1.
Step 2.
Step 3.
Dashboard or Console Mounting Instructions
Place the suction cup of the pedestal rmly down on the center
of the mounting disc and lower the securing lever.
Step 4.
M050-2
m-Grip™
blet Holder
Extra Long
Support Legs
(2 Pack)
A
A
B
Step 1.
Insert the extra long support legs by sliding them into the (A)
support leg grooves on the bottom of the holder.(B)
*Fits tablets with screen size 7”
Specyfikacje produktu
| Marka: | Arkon |
| Kategoria: | zestaw samochodowy |
| Model: | SM517 |
Potrzebujesz pomocy?
Jeśli potrzebujesz pomocy z Arkon SM517, zadaj pytanie poniżej, a inni użytkownicy Ci odpowiedzą
Instrukcje zestaw samochodowy Arkon

6 Października 2024
Instrukcje zestaw samochodowy
Najnowsze instrukcje dla zestaw samochodowy
3 Kwietnia 2025
3 Kwietnia 2025
3 Kwietnia 2025
3 Kwietnia 2025
1 Kwietnia 2025
31 Marca 2025
15 Stycznia 2025
30 Grudnia 2025
28 Grudnia 2024
28 Grudnia 2024