Instrukcja obsługi Artillery Sidewinder X1
Artillery drukarka 3D Sidewinder X1
Przeczytaj poniżej 📖 instrukcję obsługi w języku polskim dla Artillery Sidewinder X1 (2 stron) w kategorii drukarka 3D. Ta instrukcja była pomocna dla 59 osób i została oceniona przez 4 użytkowników na średnio 4.3 gwiazdek
Strona 1/2
Arllery 3D Printer
Sidewinder X1
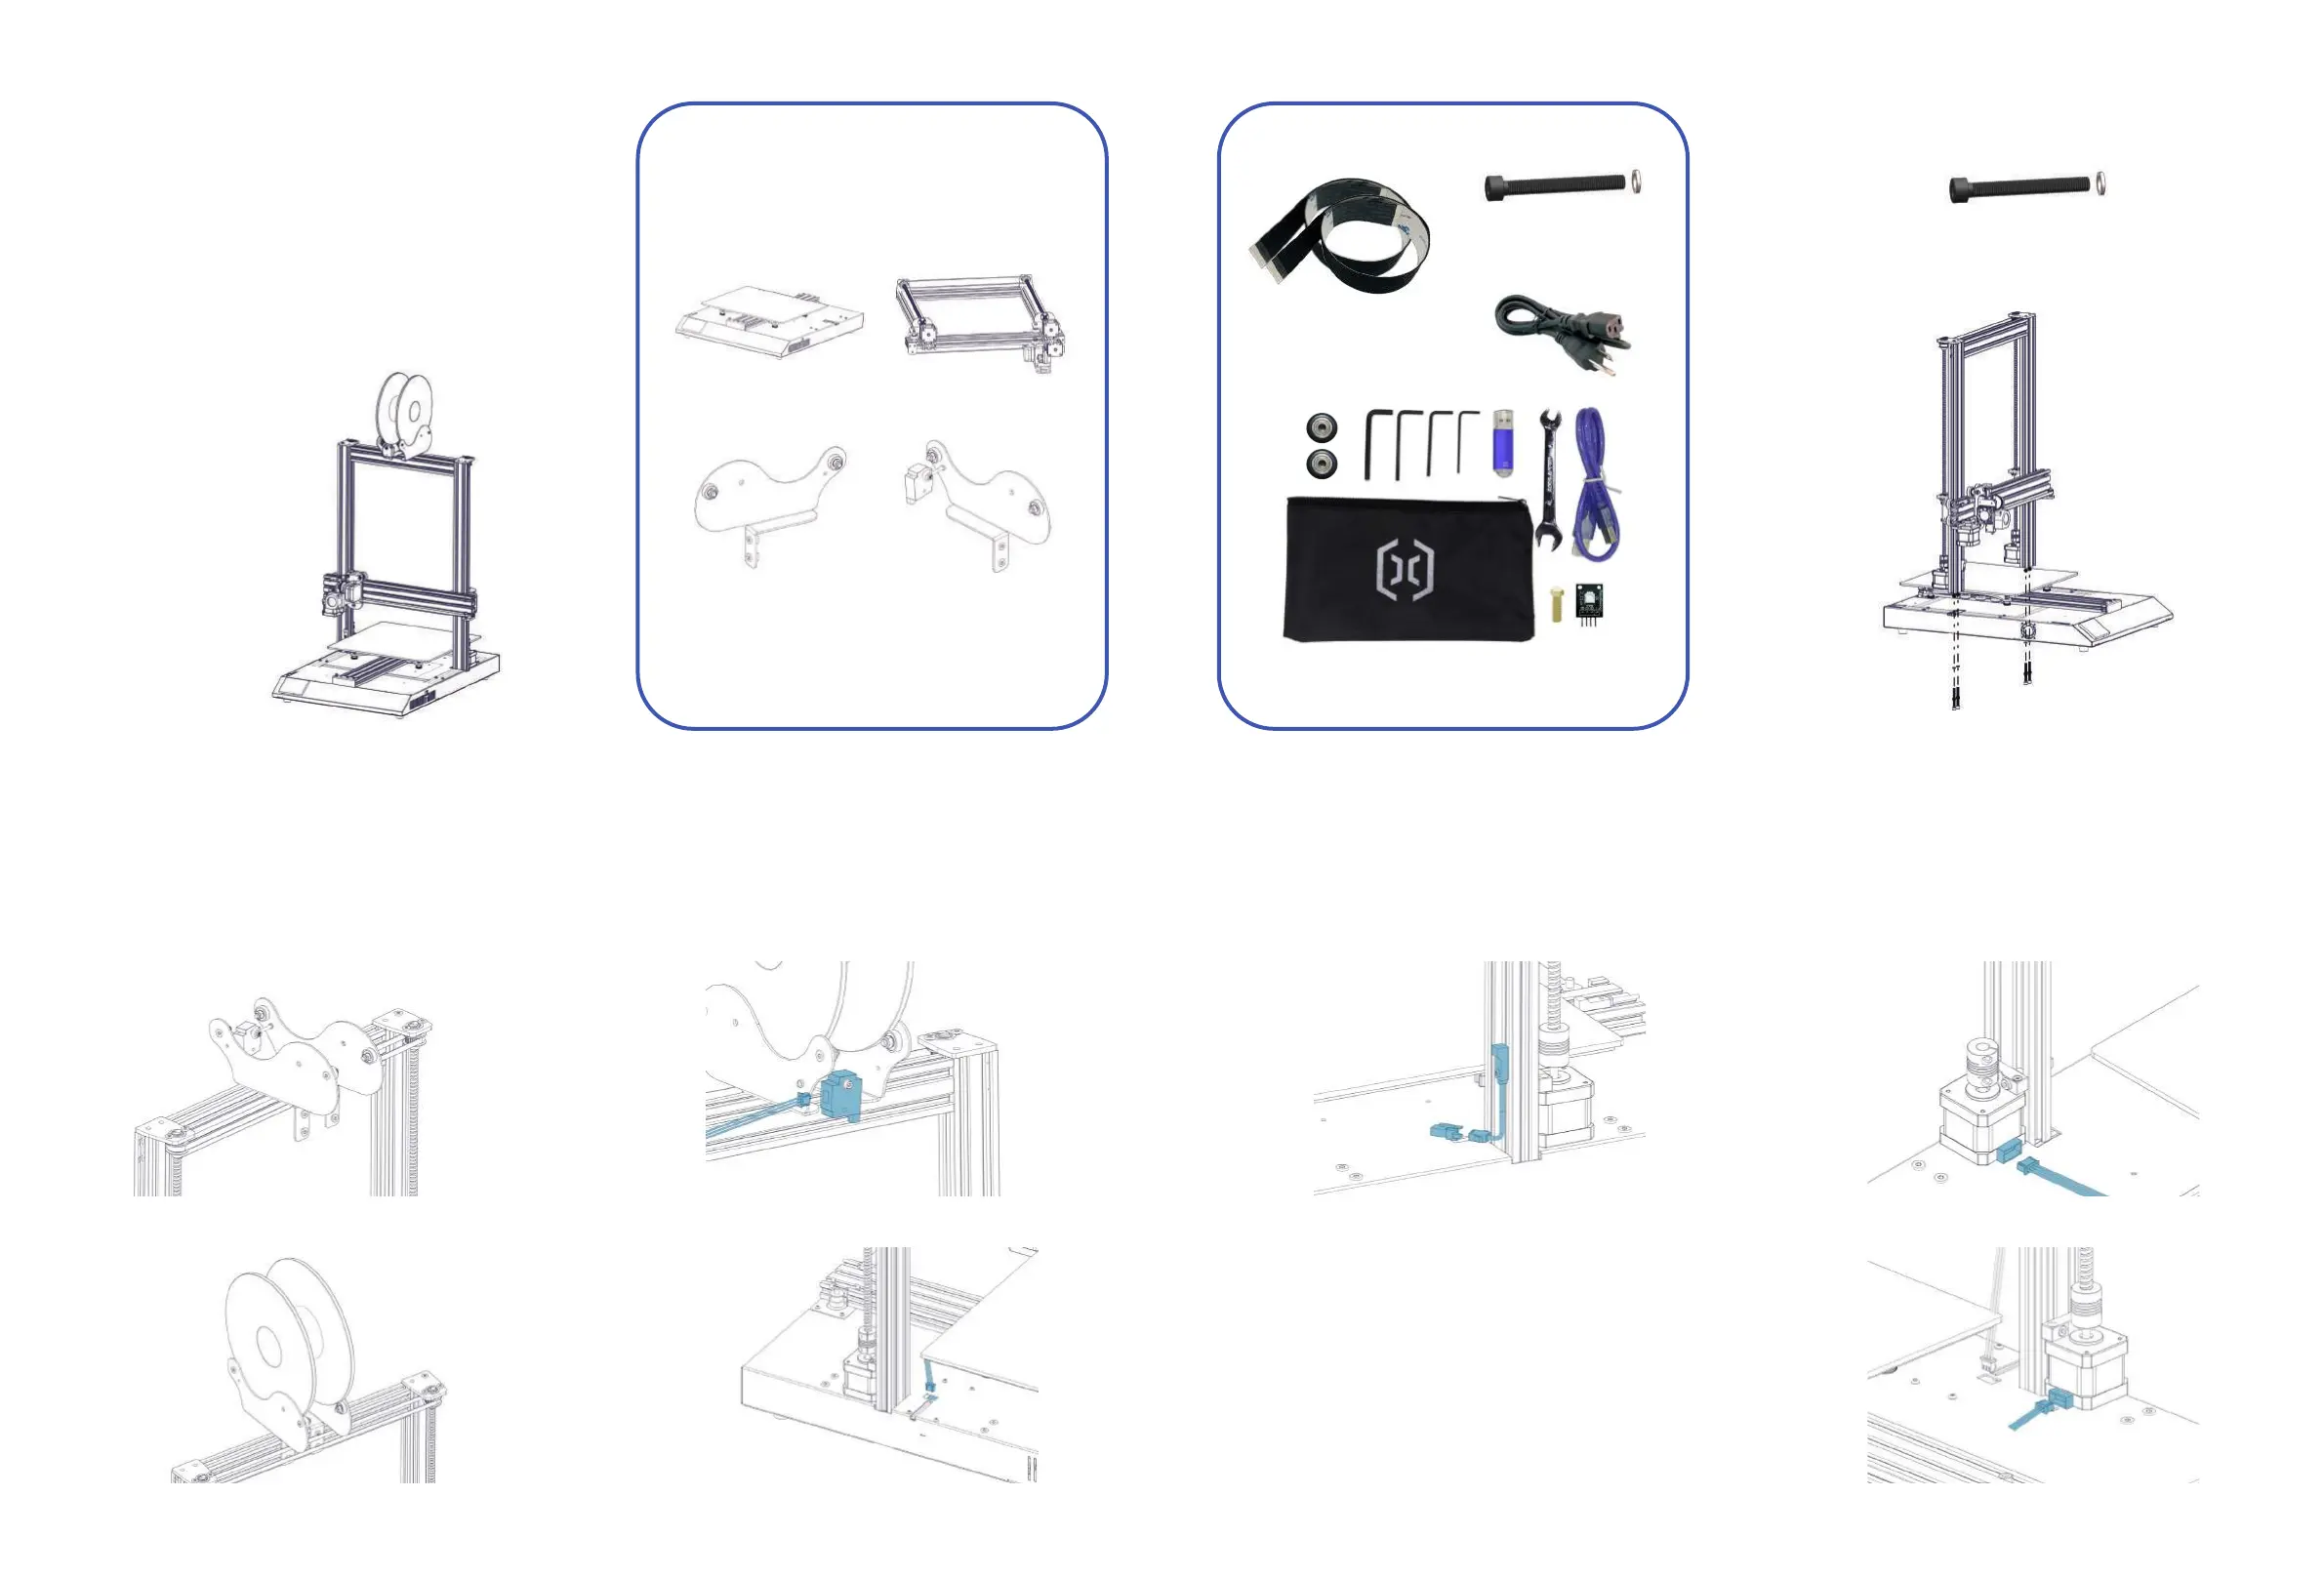
List 1 - Main Modules
List 2 - Tools & Spares
M4x45 (5pcs)
Step 1
M4x45 (4pcs)
Fix the XZ gantry to the base with 4pcs of M4x45
screws as shown in the picture below.
Step 2
Fix the spool holder to the top of the printer, adjust
the width to fit the size of your filament spool. Make
sure the filament sensor is facing forward.
Step 3
Connect the filament runout sensor as shown in
pictures below:
Step 4
Connect the Z endstop to the cable.
Step 5
Connect the Z Stepper Motors as shown in the
pictures below:
Front
30pin (1pc)
20pin (1pc)
Specyfikacje produktu
| Marka: | Artillery |
| Kategoria: | drukarka 3D |
| Model: | Sidewinder X1 |
Potrzebujesz pomocy?
Jeśli potrzebujesz pomocy z Artillery Sidewinder X1, zadaj pytanie poniżej, a inni użytkownicy Ci odpowiedzą
Instrukcje drukarka 3D Artillery

16 Września 2024
Instrukcje drukarka 3D
Najnowsze instrukcje dla drukarka 3D
2 Marca 2025
27 Stycznia 2025
25 Stycznia 2025
16 Stycznia 2025
16 Stycznia 2025
26 Grudnia 2024
26 Grudnia 2024
26 Grudnia 2024
26 Grudnia 2024
12 Grudnia 2024