Instrukcja obsługi Blackstar Fly 3 Vintage
Przeczytaj poniżej 📖 instrukcję obsługi w języku polskim dla Blackstar Fly 3 Vintage (2 stron) w kategorii odbiornik. Ta instrukcja była pomocna dla 15 osób i została oceniona przez 4 użytkowników na średnio 5.0 gwiazdek
Strona 1/2
For more information, or to download the full user handbook go to: www.blackstaramps.com
DOWNLOAD YOUR FLY 3 HANDBOOK
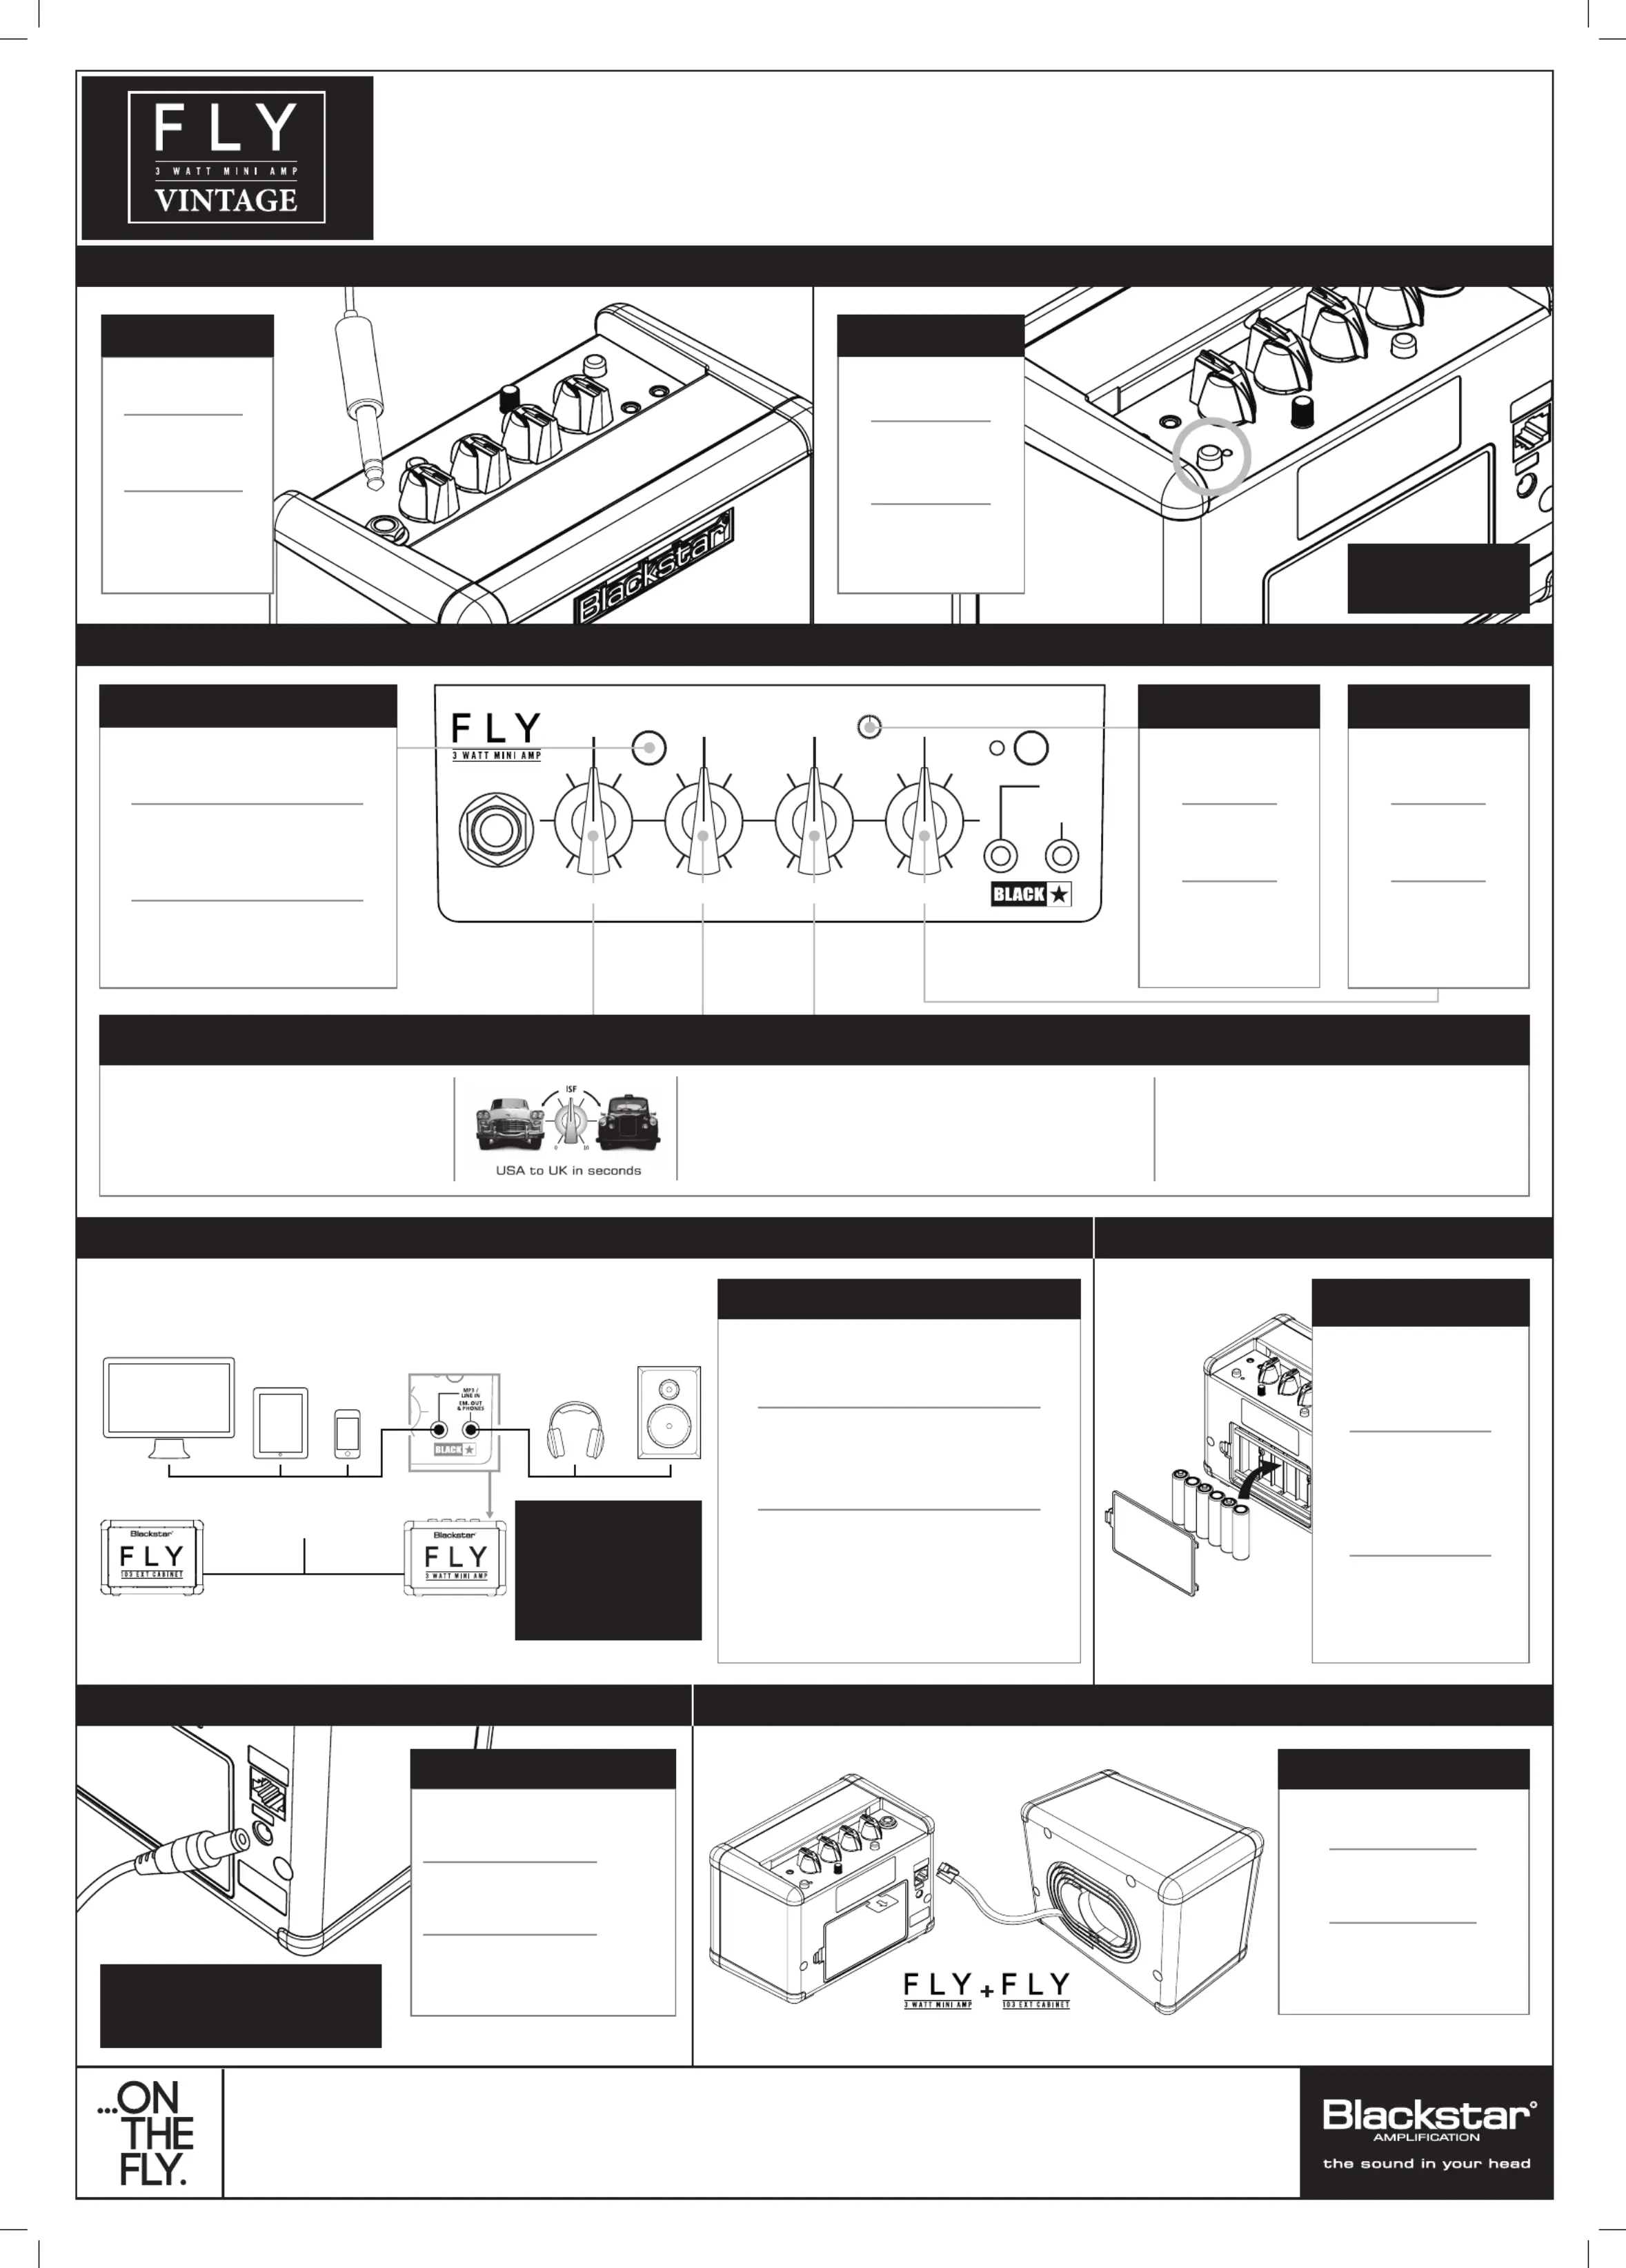
Your FLY 3 Vintage is a compact, innovative mini amp with big TONE. Combining two channels,
our patented Innite Shape Feature (ISF) and a tape delay it’s the perfect take-anywhere amp.
SETUP GUIDE-
MAKE YOUR SETUP STEREO-
Connect the optional FLY 103
for 6W a stereo set-up.
Connectez le câble optionnel
FLY 103 pour une conguration
stéréo de 6W.
FLY 103と本体をつないでご利用
いただくと、6Wのステレオサウ
ンドがお楽しみいただけます。
CONNECT TO FLY 103
FLY 103 SOLD SEPARATELY
POWER SUPPLY SOLD SEPARATELY
NOT ON THE FLY?
WARNING!
Only use a Blackstar approved
power supply unit.
Utilisez l’alimentation électrique
Blackstar pour alimenter votre FLY
3 quand vous restez à l’intérieur.
屋内でFLY 3を使用する場合、別売りの
専用アダプタを使ってお近くのコンセン
トから電源を取ることが可能です。
Use the Blackstar approved power
supply to power your FLY 3 Vintage
when you’re staying inside.
FLY PSU
Congratulations on buying this Blackstar FLY Vintage mini amplifier
We recommend using
rechargeable (NiMH) or
Alkaline batteries in your
FLY 3 Vintage to get the most
out of using it on the go.
Nous recommandons
d’utiliser des piles recharge-
ables (NiMH) ou des piles
Alcalines dans votre FLY 3
pour proter un maximum de
l’utilisation en dépacement.
繰り返し充電が可能なニッケル
水素充電池、または充電式アル
カリ電池のご使用をおすすめ
します。
BATTERIES
Play audio from your phone, MP3 player, tablet or lap-
top through the FLY 3 Vintage using an AUX cable (sold
separately) – you can also plug headphones into the
FLY 3 Vintage via the EM. OUT & PHONES jack socket.
Lecture de la musique depuis votre téléphone,
lecteur MP3, tablette ou ordinateur portable à travers
le FLY 3 en utilisant un câble AUX (vendu séparé-
ment) – vous pouvez également brancher un casque
au FLY 3 via le port appelé “EM. OUT & PHONES”.
お使いのスマートフォンやMP3プレーヤー、タブレット
PC、ラップトップPCに入っている音楽をFLY 3で再生する
には、AUXケーブルが必要です。(AUXケーブルは、本体
には付属されておりません。)
ヘッドフォンをご使用の際は、EM.OUT&PHONES のアウト
プット・ソケットにプラグを差し込んでください。
MP3 Line In & EM. OUTPhones/
10
Desktop or
Laptop computer
Tablet
Phone
Headphones
FLY 3 Vintage front panel
Connect FLY 3 Vintage to FLY 103
see ‘MAKE YOUR SET-UP STEREO’
RIGHT SPEAKERLEFT SPEAKER
PA system
NOTE:
Connect the output of
your MP3 device to your
FLY 3 Vintage.
Adjust the player’s volume
to match that of your guitar
to enable you to play along.
LEVELLEVEL
GAINMEVOLU
LEVELLEVEL
EQ
ISFISF
DELAYPOWER
TIMETIME
100100100100
EM. OUT
& PHONES
MP3 /
LINE IN
INPUT
DELAY
LEVEL
OD
Set your gain and volume — higher gain
settings give you more overdrive (distortion).
Blend your EQ between a UK and American
sound, using Blackstar’s patented ISF control.
Réglez le gain et le volume. Les réglages de gain élevés
produisent davantage de distortion. Le contrôle ISF,
breveté Blackstar, permet de passer d’une égalisation
type Anglaise (UK) à Américaine (USA).
DELAY LEVELのつまみを
回すと、ディレイエフ
ェクトのヴォリューム
調整ができます。
ゲインとボリュームを調節します。
ゲインを高めすると歪んだ音になります。
EQのISFでアメリカンサウンドからブリティッシュサウン
ドまで調節できます。
Le bouton DELAY
LEVEL change le vol
-
ume de l’effet delay.
The DELAY LEVEL dial
changes the volume
of the delay effect.
SETTING UP
2. CHOOSE YOUR SOUND
3. DELAY LEVEL
Press the OD switch in to select the
Overdrive channel
— when the switch
is out, the Clean channel is in operation.
Quand le commutateur OD est en
position haute le canal clean est
selectionné, quand il est poussé
c’est le canal OD qui est activé.
電源を入れた直後は、クリーンチャンネルに
設定されています。ODボタンを押すとオーバ
ードライブチャンネルに切り替わります。
The DELAY TIME dial
changes the tempo
of the delay effect.
Le bouton DELAY
TIME change le tem
-
po de l’effet Delay.
TIMEのつまみを回す
と、ディレイエフェク
トのテンポの調整がで
きます。
4. DELAY TIME
1. CLEAN OR OVERDRIVE
GETTING STARTED
BATTERY INFORMATION
GET CONNECTED
6 x AA BATTERIES
(NOT INCLUDED)
Plug your guitar lead
into the Input socket.
Branchez votre câble
de guitare dans le
port “Input”.
インプット・ソケット
にお使いのシールドケ
ーブルを差し込んでく
ださい。
1. input
Switch your amplier on
using the Power Switch.
Mettez l’amplicateur
sous tension grâce à
l’interrupteur.
2. POWER
パワースイッチを押し
て、本体の電源をオンに
してください。
NOTE:
The LED light will fade as
the batteries lose power.
Specyfikacje produktu
| Marka: | Blackstar |
| Kategoria: | odbiornik |
| Model: | Fly 3 Vintage |
Potrzebujesz pomocy?
Jeśli potrzebujesz pomocy z Blackstar Fly 3 Vintage, zadaj pytanie poniżej, a inni użytkownicy Ci odpowiedzą
Instrukcje odbiornik Blackstar

9 Października 2024
20 Września 2024
20 Września 2024
18 Września 2024
17 Września 2024
2 Sierpnia 2024
2 Sierpnia 2024
Instrukcje odbiornik
Najnowsze instrukcje dla odbiornik
9 Kwietnia 2025
9 Kwietnia 2025
5 Kwietnia 2025
4 Kwietnia 2025
3 Kwietnia 2025
2 Kwietnia 2025
2 Kwietnia 2025
1 Kwietnia 2025
30 Marca 2025
30 Marca 2025