Instrukcja obsługi Glide Gear POV100
Glide Gear statyw POV100
Przeczytaj poniżej 📖 instrukcję obsługi w języku polskim dla Glide Gear POV100 (3 stron) w kategorii statyw. Ta instrukcja była pomocna dla 34 osób i została oceniona przez 8 użytkowników na średnio 4.7 gwiazdek
Strona 1/3
POV 100
1
PLEASE NOTE:
For use with cameras weighing up to 2.5lbs or
1.15kg including the lens
The POV100 comes in 2 sizes: M (5460cm/21.25--
23.6”) and L (5662cm/2224.4--”)
Recommended use with wide angle lenses set to
innity focus for best results
For more informaon please visit our website: www.glidegear.net
2
Fig A
4
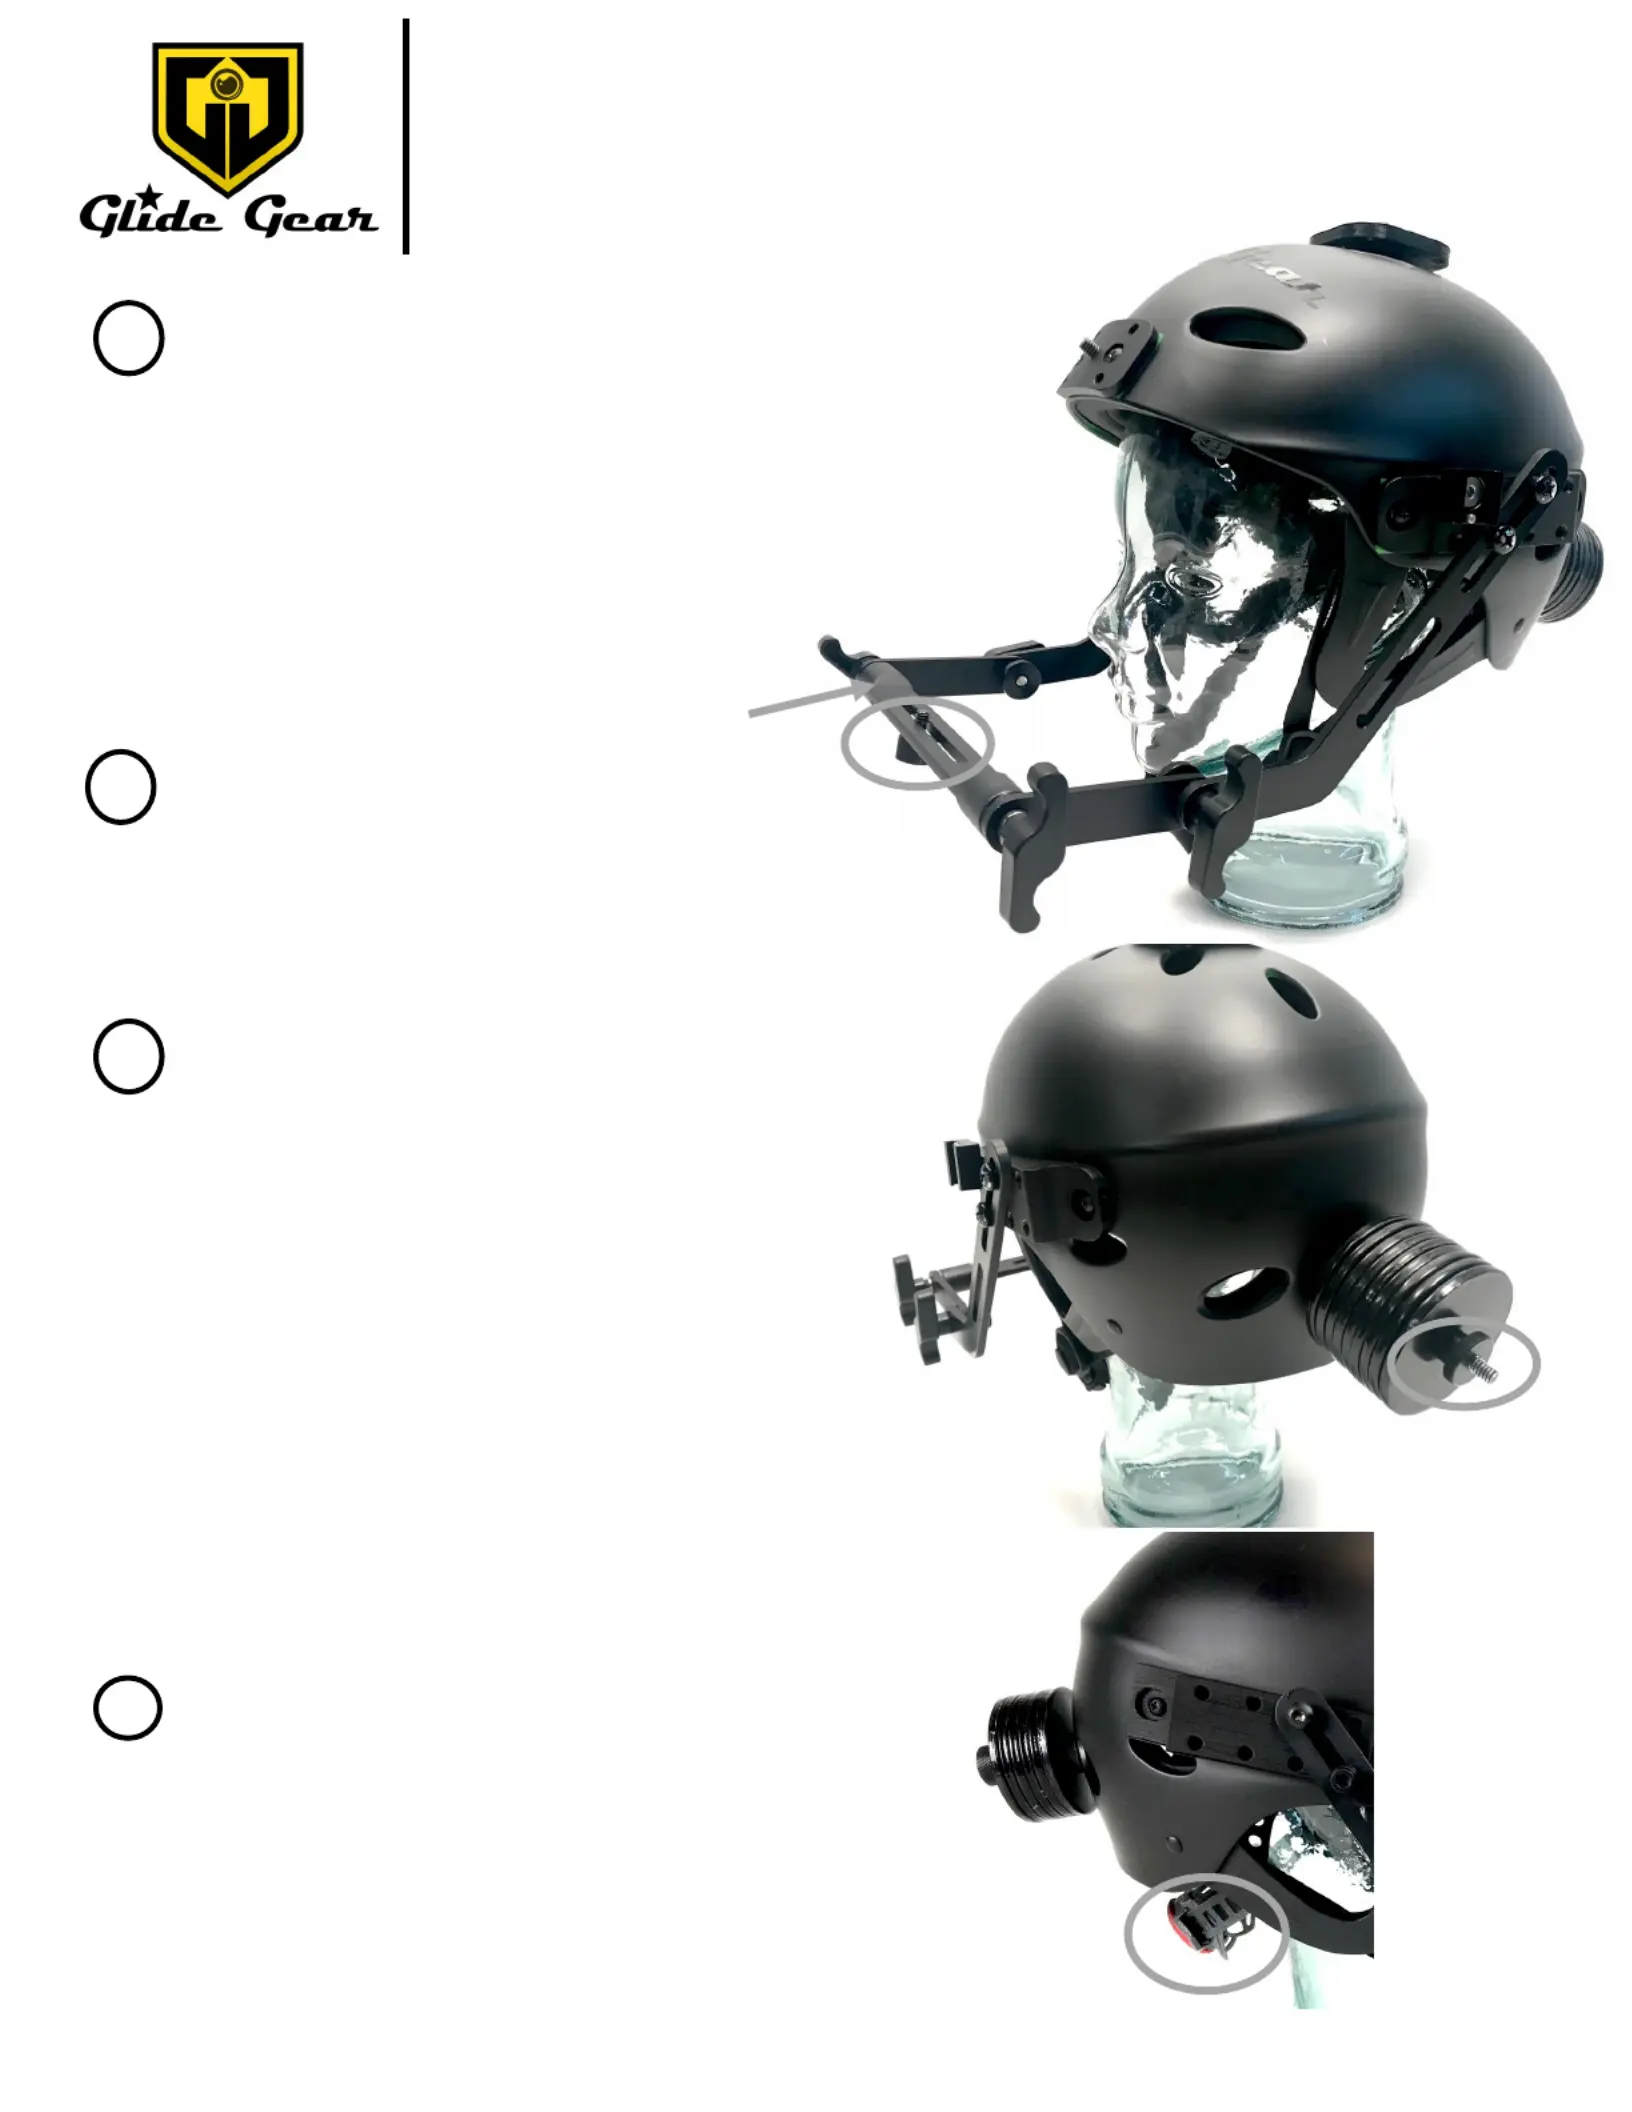
Mount your camera using the screw
inside the slot in the crossbar in the
front of the helmet. See Fig A.
Crossbar
Mounng
screw
3
Included with the POV 100 are 10 weight plates. With
the camera mounted in the front, your head will be
leaning forward. Add weight plates to the back of the
helmet to balance your head and ease the strain on
your neck. Use the supplied thumb nut to secure the
weight plates in an unloose posion. See Fig. B
Fig C
Hint: Weigh your camera and use the appropriate
number of plates to get as close as possible to the
camera weight knowing that 1 plate weighs about
4oz (or 100g).
Example: For a camera weighing 1.6lbs, add 6-7
plates to the back.
Thumb nut
In the rear inside of the helmet, you will nd a knob.
Use the knob to ghten or loosen the helmets inside ’
frame so that the helmet ts ghtly on your head.
The knob in queson is circled on Fig. C.
Fig B
Specyfikacje produktu
| Marka: | Glide Gear |
| Kategoria: | statyw |
| Model: | POV100 |
Potrzebujesz pomocy?
Jeśli potrzebujesz pomocy z Glide Gear POV100, zadaj pytanie poniżej, a inni użytkownicy Ci odpowiedzą
Instrukcje statyw Glide Gear

3 Kwietnia 2025
7 Października 2024
4 Sierpnia 2024
Instrukcje statyw
Najnowsze instrukcje dla statyw
4 Kwietnia 2025
4 Kwietnia 2025
4 Kwietnia 2025
4 Kwietnia 2025
4 Kwietnia 2025
4 Kwietnia 2025
2 Kwietnia 2025
2 Kwietnia 2025
2 Kwietnia 2025
2 Kwietnia 2025