Instrukcja obsługi HQ Power PROMIX66N
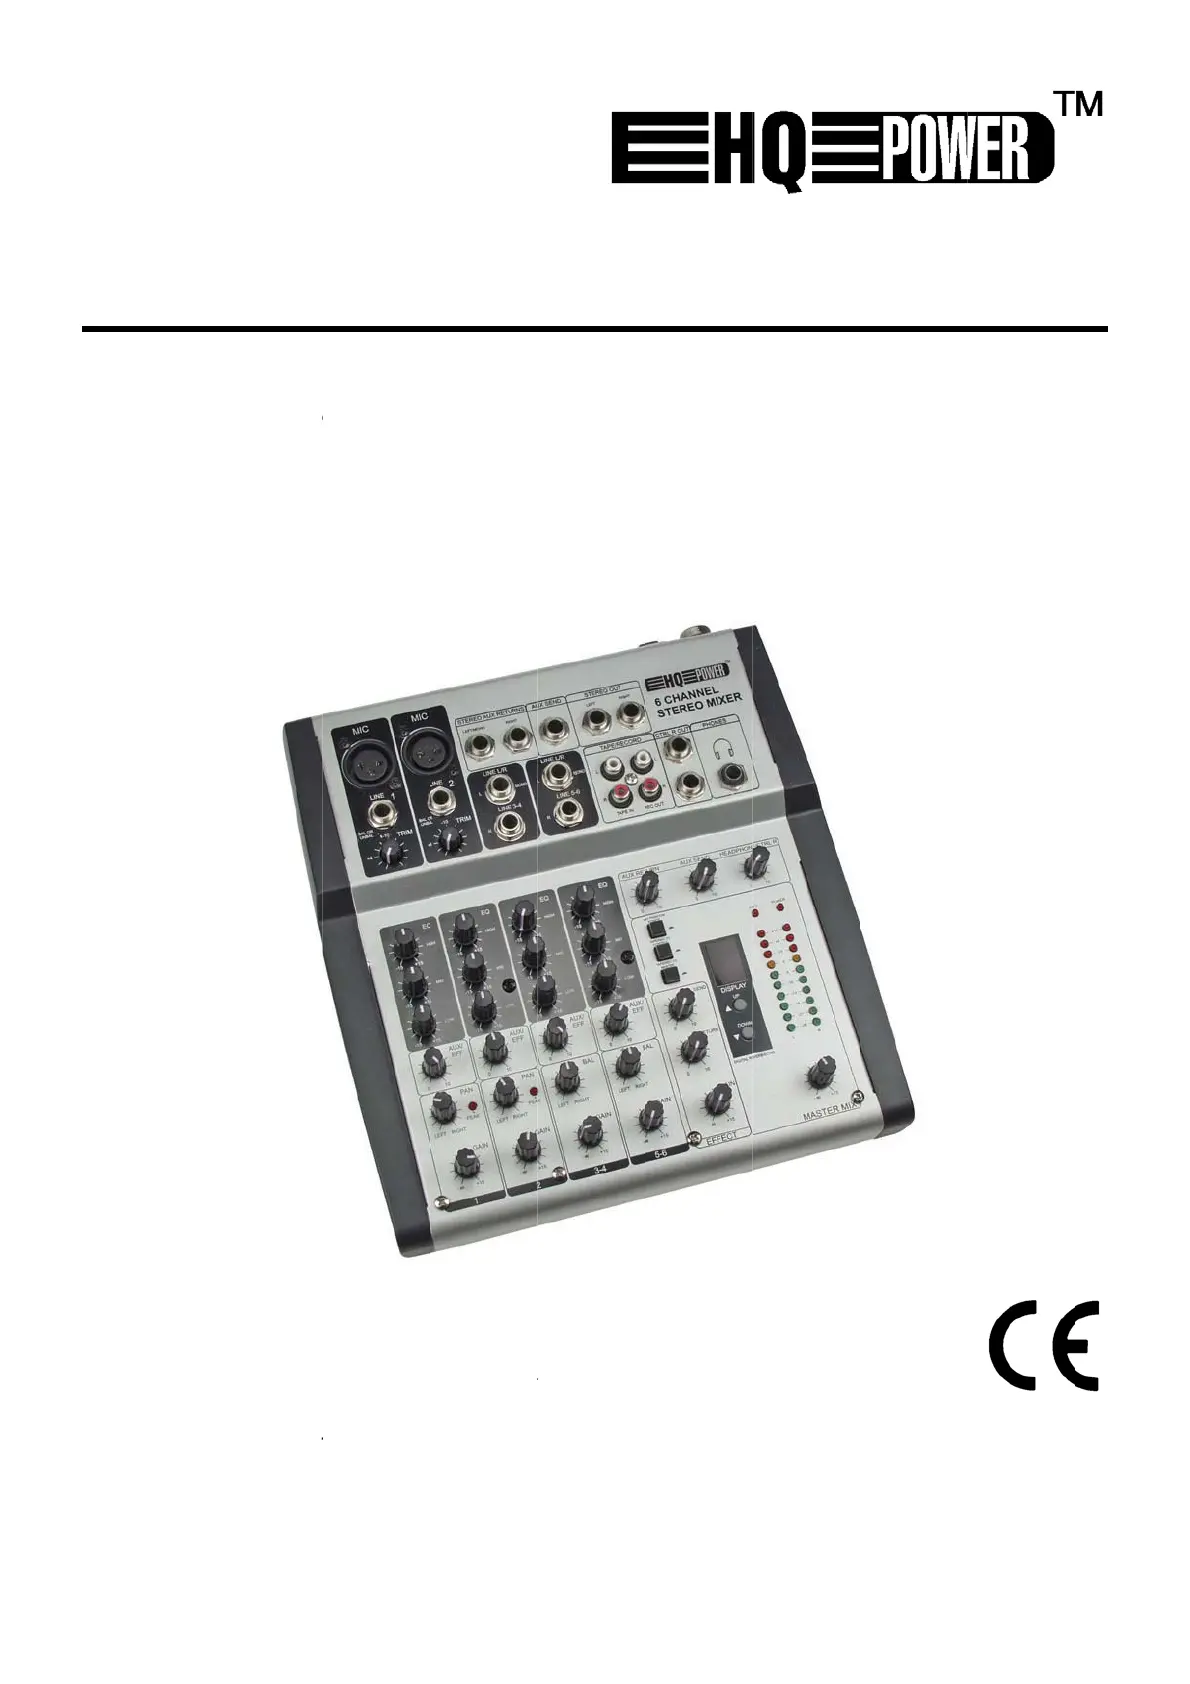
HQ Power
Konsola miksująca
PROMIX66N
Przeczytaj poniżej 📖 instrukcję obsługi w języku polskim dla HQ Power PROMIX66N (38 stron) w kategorii Konsola miksująca. Ta instrukcja była pomocna dla 12 osób i została oceniona przez 6.5 użytkowników na średnio 4.4 gwiazdek
Strona 1/38

P
6
-
P
R
T
A
M
P
R
P
R
U
S
G
E
M
O
M
A
B
E
I
N
P
RO
M
-
CHAN
N
R
OFESSI
A
BLE D
E
ESA DE
R
OFES
S
R
OFESJ
S
ER MAN
E
BRUIKE
R
O
DE D’E
M
A
NUAL D
E
DIENUN
N
STRUKC
J
M
IX6
6
N
EL/8-C
ONEEL
6
E
MIXA
G
MEZCL
A
S
IONEL
L
ONALN
Y
UA
L
R
SHAND
L
M
PLOI
EL USUA
R
GSANLEI
T
J
A OBSŁ
U
6
N/P
R
HANNE
L
6
-KANAA
L
G
E
À
6/
A
S PRO
L
ES 6-K
A
Y
MIKS
E
L
EIDING
R
IO
T
UNG
U
GI
R
OM
I
L
PROF
E
L
S / 8-K
A
8 CANA
FESIO
N
A
NAL-
/
E
R 6-CI
2
8
1
4
19
25
31
I
X88
N
E
SSION
A
NAALS
M
UX
N
AL DE
6
/
8-KA
N
O/8-MI
4
N
AL MIX
M
ENGPA
6
/8 CA
N
N
AL-MI
S
O KAN
A
ER
NEE
L
N
ALES
S
CHPUL
T
A
ŁOWY
T

V.
1
.
T
o
I
m
Th
If
t
2
.
Re
•
•
•
•
•
•
3
.
M
O
1.
Ea
s
w
(g
r
2.
Th
dr
u
su
c
lin
e
an
N
o
si
m
01 – 30/10/2
.
Intr
o
o
all reside
n
m
portant e
n
This
har
m
shou
distri
If in
ank you for
t
he device
w
.
Safe
t
Be v
e
Ind
o
put
o
Alwa
are
p
fer to the V
e
Damage c
a
dealer will
A qualified
Do not sw
i
device ag
a
Do not ex
p
device.
Note that
d
Keep the
d
.
Des
c
O
NO Inp
u
MIC Input
ch mono in
p
w
itchable +4
8
r
ound), pin
2
LINE IN
e LINE inpu
t
u
m machine
c
h as those
e
input, the
n
d the sleev
e
o
te: Either t
h
m
ultaneousl
y
012
o
duction
n
ts of the
E
n
vironmen
t
symbol on t
h
m
the enviro
n
ld be taken
t
butor or to
a
doubt, co
n
choosing H
Q
w
as damage
d
t
y Instr
u
e
ry careful
d
o
or use onl
y
o
bjects filled
ys disconne
c
p
erformed.
H
e
lleman®
S
a
used by di
s
not accept
r
technician
s
i
tch the devi
a
inst damag
e
p
ose the de
v
d
amage cau
d
evice away
c
ription
u
t Chann
p
ut channel
o
8
V phanto
m
2
(positive (
t
is designe
d
s or sample
r
from an un
b
n
a 1/4" TR
S
e
(ground).
h
e MIC or t
h
y
to the sa
m
E
uropean U
n
t
al informa
t
h
e device o
r
n
ment. Do n
t
o a speciali
a
local recy
c
n
tact your l
Q
Power™! P
l
d
in transit,
u
ctions
d
uring the i
n
y
. Keep this
with liquid
s
c
t mains po
w
H
andle the p
S
ervice an
d
s
regard of c
e
r
esponsibilit
y
s
hould insta
ce on imme
e
by leaving
v
ice to liquid
sed by user
from childr
e
el (fig. 1
o
ffers a bal
a
m
power sup
+)) and pin
d
to accept
b
r
s. There is
b
alanced mi
c
S
(stereo) p
h
h
e LINE inpu
m
e channel.
PROMI
X
USE
n
ion
t
ion about
t
r
the packag
ot dispose
o
zed compan
c
ling service
.
ocal waste
l
ease read t
h
don't install
n
stallation: t
o
device awa
y
s
on top of o
w
er when d
e
ower cord b
d
Q
uality
W
e
rtain guidel
y
for any en
ll and servi
c
diately afte
r
it switched
s and make
modificatio
n
e
n and unau
t
)
a
nced micro
p
ply for cond
e
3 (negative
b
alanced or
u
enough gai
n
c
rophone or
h
one plug s
h
t of a given
X
66N/PRO
2
R MA
N
t
his produ
c
e indicates
t
o
f the unit (
o
y for recycli
.
Respect th
e
disposal a
h
e manual t
h
or use it an
o
uching live
y
from rain,
r close to th
e
vice not in
u
y the plug
o
W
arranty on
ines in this
m
suing defec
t
c
e this devic
e
r
it has been
off until it h
a
sure not to
n
s to the de
v
t
horised us
e
p
hone input
e
nser micro
p
(-)).
u
nbalanced
n
available o
guitar outp
u
h
ould be wir
e
channel ca
n
MIX88N
N
UAL
c
t
t
hat disposa
o
r batteries)
ng. This de
v
e
local envi
r
uthorities.
h
oroughly b
e
d contact y
o
wires can c
a
moisture, s
e device.
u
se or when
o
nly.
the last pa
g
m
anual is n
o
t
s or proble
m
e
.
exposed to
a
s reached
r
place any o
b
v
ice is not c
o
e
rs.
via the XLR
p
hones. Th
e
line level si
g
n the line in
u
t. If a bala
n
e
d for the ti
p
n
be connec
t
l of the devi
as unsorte
d
v
ice should
b
r
onmental r
u
e
fore bringi
n
o
ur dealer.
a
use life-th
r
plashing an
d
servicing o
r
g
es of this
m
o
t covered b
m
s.
changes in
r
oom tempe
b
ject contai
n
o
vered by t
h
connector
a
e
XLR jack is
g
nals such a
s
put to acce
p
n
ced signal i
p
(positive (
t
ed at one ti
m
ce after its l
d
municipal
w
b
e returned
t
u
les.
n
g this devi
c
r
eatening el
e
d
dripping li
q
r
maintenan
m
anual.
y the warra
n
temperatur
e
rature.
n
ing liquid o
h
e warranty.
a
nd also fea
t
configured
f
s
those fro
m
p
t even low
e
s to be con
n
+)), the rin
g
m
e. Never c
©Vellema
n
ifecycle cou
l
w
aste; it
t
o your
c
e into servi
c
e
ctroshocks.
q
uids. Neve
r
ce activities
n
ty and the
e
. Protect th
n top of the
t
ures a
f
or pin 1
m
keyboards
,
e
r level sign
a
n
ected to th
e
g
(negative
(
onnect both
n
nv
l
d
c
e.
r
e
,
a
ls
e
(
-))

PROMIX66N/PROMIX88N
V. 01 – 30/10/2012 3 ©Velleman nv
3. TRIM Control
The TRIM control adjusts the input sensitivity (channel gain) of the MIC and LINE inputs
on the mono input channels. This control can be adjusted to accommodate input signals
from a wide variety of sources, from the high outputs from keyboards or drum machines
to the small signal outputs of microphones. This wide range eliminates the need for MIC /
LINE switching. The best S/N balance and dynamic range will be achieved if you adjust
the TRIM control on each channel separately so that the PEAK LED (7) for that channel
lights occasionally.
Note: This control should always be turned fully anticlockwise whenever you connect or
disconnect a signal source to one of the inputs.
4. EQUALIZER Controls
All mono input channels are fitted with three-band EQ. The upper (HIGH) and lower
(LOW) shelving controls have their frequencies fixed at 12 kHz and 80 Hz respectively.
The midrange control has a peaking response, with Q fixed at 2 octaves and the
frequency at 2.5 kHz. All three bands have up to 15 dB of cut and boost with a centre
detent for “off”.
5. AUX / EFF SEND Control
The AUX / EFF controls are mono and post-EQ and post-fader. The signal level sent to
the AUX / EFF bus will be affected by the channel fader setting. The AUX configuration is
ideal for almost all monitoring purpose e.g. for a separate stage monitor mix in live
performances or a studio room monitor in recording applications, such as for a
headphone cue system. The EFF controls the adjustment of level sent by each channel to
the internal DSP (Digital Sound Processor).
6. PAN Control
The channel PAN positions the output of the channel in the stereo field of the Master Mix.
Its constant-power design ensures there are no level discrepancies whether a signal is
hard-panned, centre-stage or somewhere in-between.
7. PEAK Indicator
The PEAK LED illuminates when a channel is going into overload. It detects the peak level
after the EQ and will light at 3 dB before clipping to warn that the signal is approaching
overload. You do not want the PEAK LED to light except very intermittently during a take
or a mix. If it does light persistently, reduce input gain with the TRIM control (3).
8. CHANNEL GAIN Control
The channel GAIN controls determine the output signal level to the master mix bus.
There is no PFL function on the mixer. In order to audition any single channel for proper
gain, you can turn off the gain control of all the other channels (fully anticlockwise) and
set both the auditioned channel and MASTER MIX control (29) to unity gain (0 dB). The
LED OUTPUT meter (21) should read around 0 dB.
STEREO Input Channel (fig. 2)
4. EQUALIZER Controls
The stereo channel EQs operate in the same manner as those in the mono channels. The
left and right signals will be affected equally. A stereo equalizer is generally preferable to
using two mono equalizers when equalizing a stereo signal as it avoids possible
discrepancies between the left and right settings.
5.AUX / EFF SEND Control
These are the same as for the mono channels. Note that a mono sum is taken from the
stereo input.
8. CHANNEL GAIN CONTROL
The channel GAIN controls determine the output signal level to the MASTER MIX bus.
There is no PFL function on the mixer. In order to audition any single channel for proper
gain you can turn off the gain control of all the other channels (fully anticlockwise) and
set both the auditioned channel and MASTER MIX control (29) to unity gain (0 dB). The
LED OUTPUT meter (21) should read around 0 dB.
Specyfikacje produktu
Marka: | HQ Power |
Kategoria: | Konsola miksująca |
Model: | PROMIX66N |
Potrzebujesz pomocy?
Jeśli potrzebujesz pomocy z HQ Power PROMIX66N, zadaj pytanie poniżej, a inni użytkownicy Ci odpowiedzą
Instrukcje Konsola miksująca HQ Power
22 Września 2024
22 Września 2024
21 Września 2024
21 Września 2024
20 Września 2024
19 Września 2024
17 Września 2024
6 Września 2024
4 Września 2024
4 Września 2024
Instrukcje Konsola miksująca
- Konsola miksująca NutriBullet
- Konsola miksująca Zolid
- Konsola miksująca Steren
- Konsola miksująca Shure
- Konsola miksująca Ariete
- Konsola miksująca Martin
- Konsola miksująca Avid
- Konsola miksująca Showtec
- Konsola miksująca JB Systems
- Konsola miksująca Alto Professional
- Konsola miksująca Marquant
- Konsola miksująca Sunbeam
- Konsola miksująca CAD Audio
- Konsola miksująca Mesko
- Konsola miksująca Proel
Najnowsze instrukcje dla Konsola miksująca
9 Kwietnia 2025
6 Kwietnia 2025
3 Kwietnia 2025
3 Kwietnia 2025
3 Kwietnia 2025
2 Kwietnia 2025
2 Kwietnia 2025
31 Marca 2025
31 Marca 2025
30 Marca 2025