Instrukcja obsługi James 63SA-4
Przeczytaj poniżej 📖 instrukcję obsługi w języku polskim dla James 63SA-4 (2 stron) w kategorii głośnik. Ta instrukcja była pomocna dla 23 osób i została oceniona przez 4 użytkowników na średnio 4.1 gwiazdek
Strona 1/2
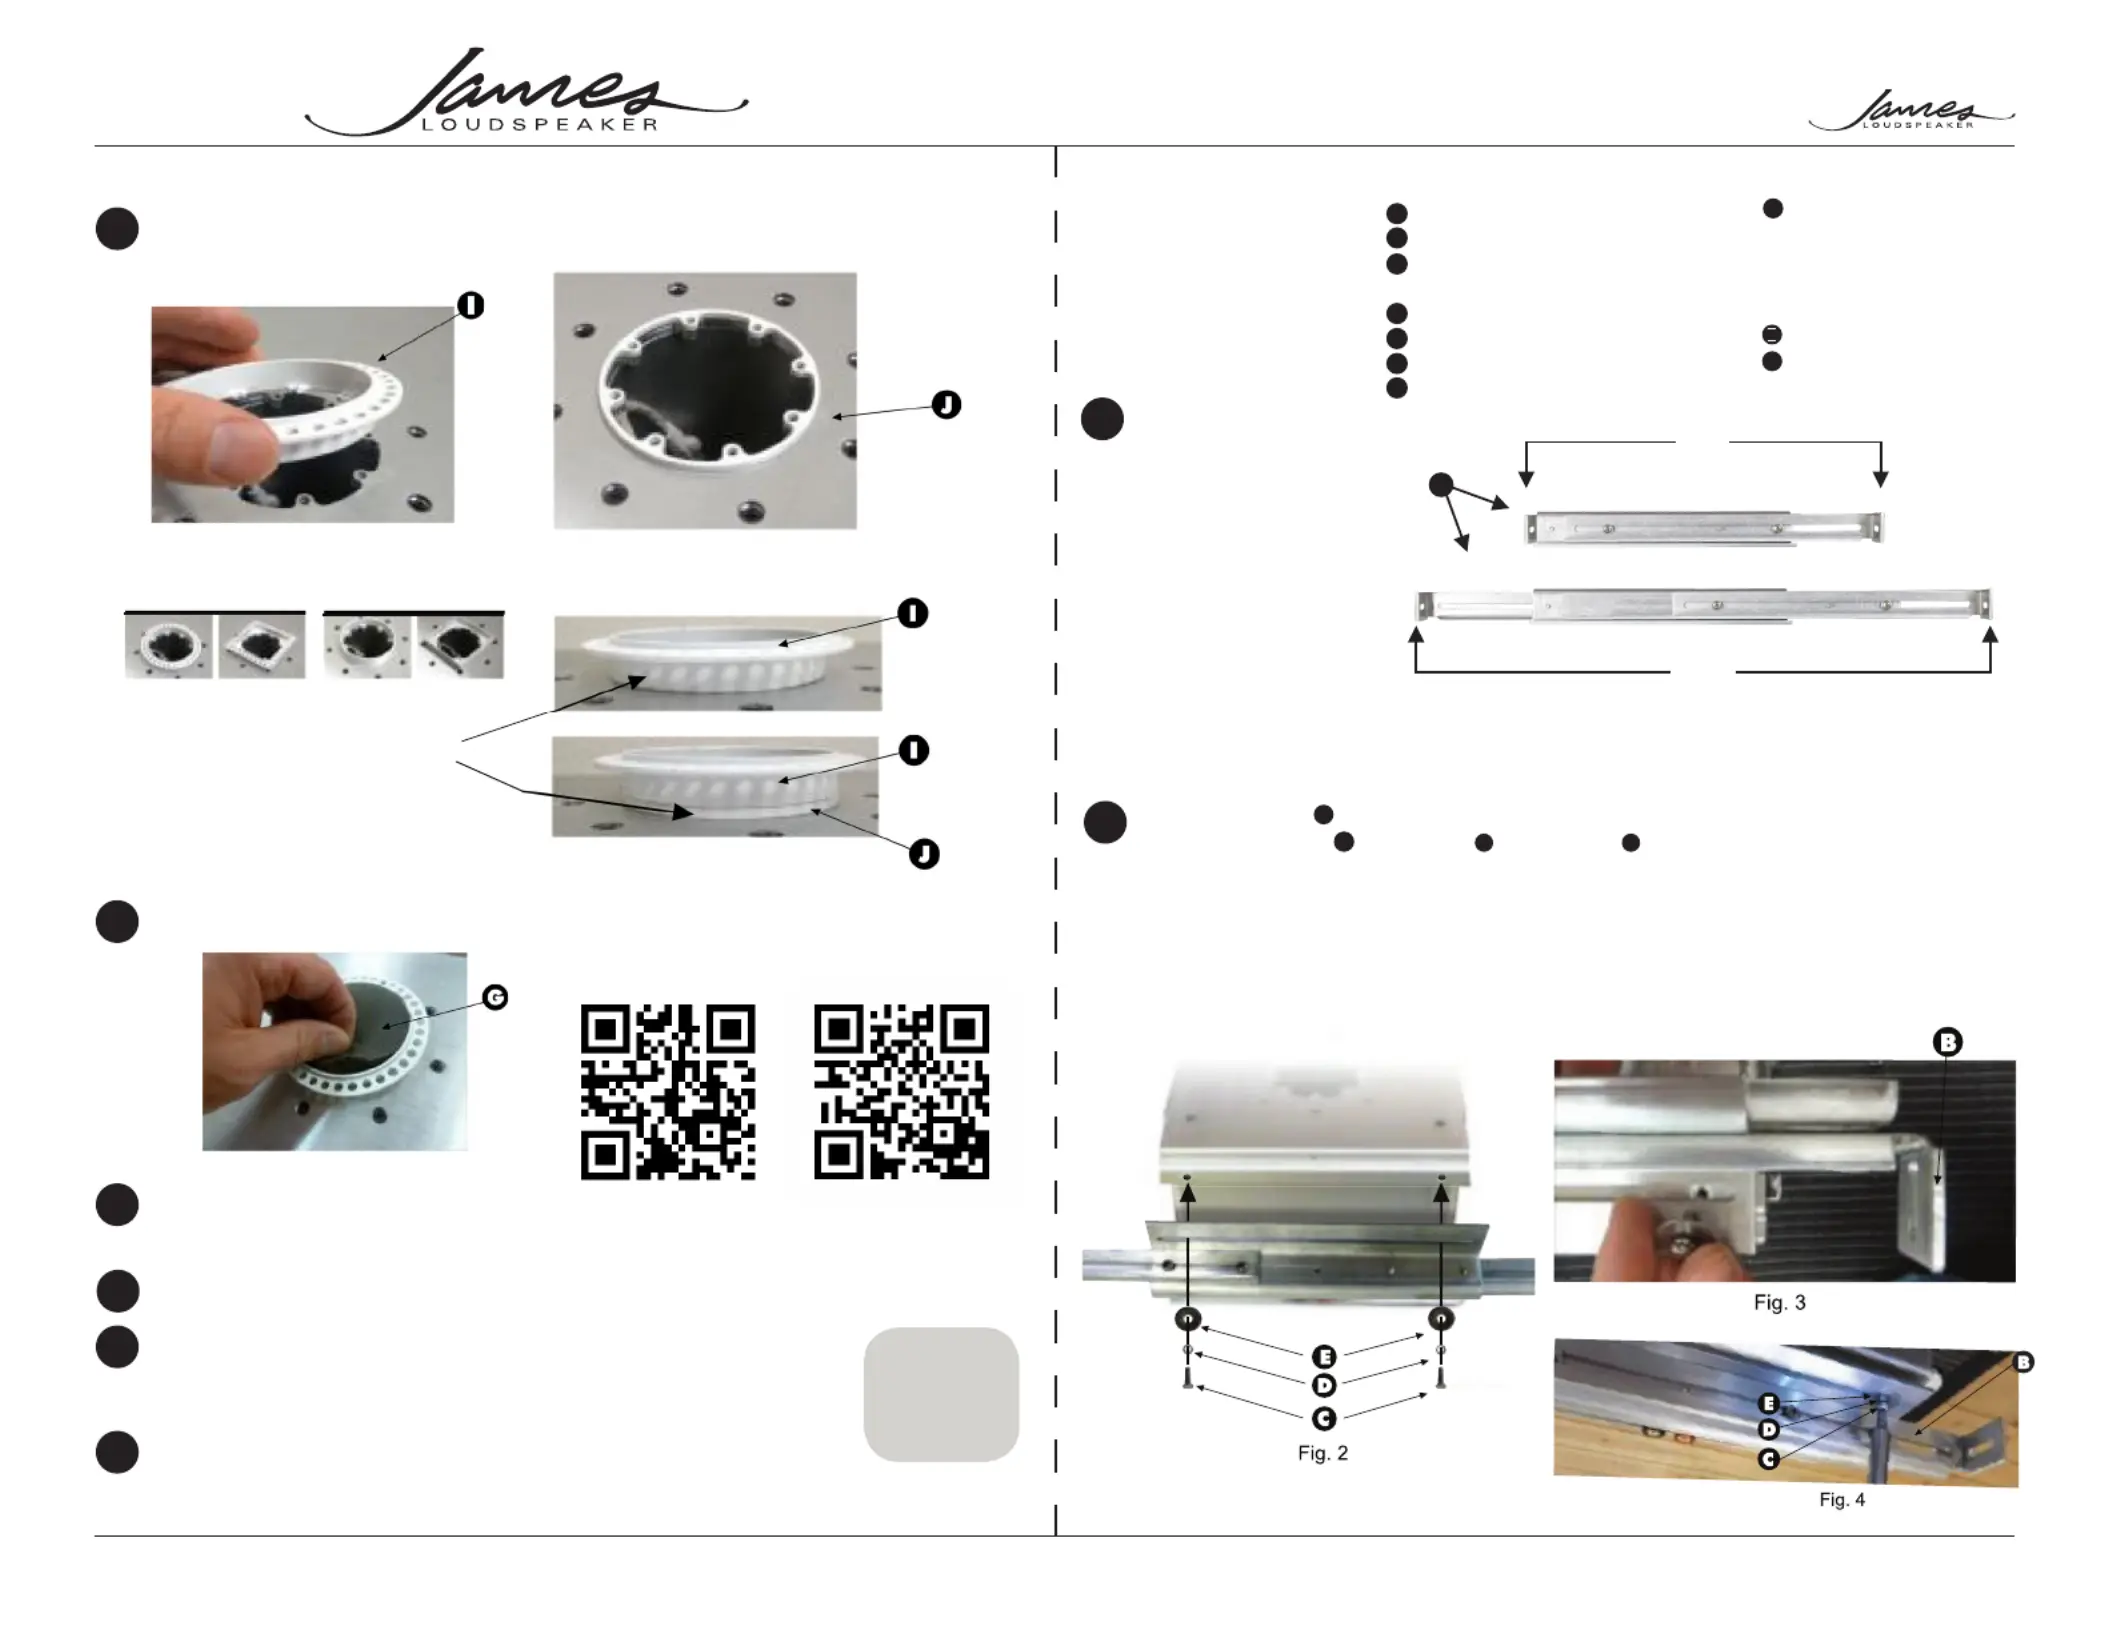
2
Attach the brackets to the speaker using the
B
C
D
E
PAGE 4PAGE 1
®
®
20190308
535 Airpark Road, Napa, California 94558 • Phone: 707.265.6343 | Fax: 707.265.6334 • www.jamesloudspeaker.com
Installation guide for the 63SA-4/63SA-7HO/63SA-8HO.8 In-Ceiling Small Aperture
®
Speaker
1) #2 Phillips screwdriver
or drill with #2 Phillips
drill bit
2) Straight edge or level
3) Wood or drywall screws
The brackets (Part No.
SA-BRKT-11-22) are
designed for 16” On-center
constructions, however can
be adjusted to accommodate
construction from 11” to
22.5” joist spacing (Fig. 1).
Tools Required:
Assemble the parts
1
4 - 1.25” Wood or drywall
screws
Parts List: Supplied by Installer
H
1 - 63SA-4/63SA-7HO/63SA-8HO.8
2 - Mounting Brackets
4 - 8-32 x 1/2 Pan Head
Machine Screws
4 - #8 Lock Washers
4 - #8 Flat Washers
4 - 6/32 Course Head Screws
1 - Foam Dust Guard
Parts List: Supplied
A
B
C
D
E
F
G
1 - Trim Kit
Spacer Ring(s)
I
J
Tighten these screws just enough to allow
movement for adjustment during installation.
Note: brackets can be mounted to either the sides
of the ends of the speaker enclosure for added
installation flexibility.
P/N SA63-SP-0.125
Recommend testing sub to assure all
10
11
12
13
14
15
Fig. 1
B
13”
25.5”
There are four trim kits
avilable to choose from
Products suitable for use in
dry outdoor environments
*63SA-4 Sensitivity: 87dB @ 2.83V/1M
Fig. 15
Fig. 18
Fig. 20
SA63-3S-SRSA63-3R-SRSA63-3S-WSA63-3R-W
For 1/2” Drywall omit spacer (a)
For 5/8” Drywall use spacer (b)
If the drywall is in excess of 5/8”
add additional 1/8” spacers as
needed
Fig. 17
Freq. RESPONSE
IMPEDANCE
SENSITIVITY
AMP RANGE
RMS POWER
40-22kHz ±3dB
4 Ohms
88dB @ 2.83V/1M
25-125 Watts
50 Watts
Small Aperture
Installation
Video
Trim Kit
Finishing
Playlist
Fig. 16
Fig. 19
Specyfikacje produktu
| Marka: | James |
| Kategoria: | głośnik |
| Model: | 63SA-4 |
Potrzebujesz pomocy?
Jeśli potrzebujesz pomocy z James 63SA-4, zadaj pytanie poniżej, a inni użytkownicy Ci odpowiedzą
Instrukcje głośnik James

4 Stycznia 2025
4 Stycznia 2025
4 Stycznia 2025
4 Stycznia 2025
4 Stycznia 2025
4 Stycznia 2025
4 Stycznia 2025
4 Stycznia 2025
4 Stycznia 2025
4 Stycznia 2025
Instrukcje głośnik
Najnowsze instrukcje dla głośnik
8 Kwietnia 2025
8 Kwietnia 2025
8 Kwietnia 2025
7 Kwietnia 2025
7 Kwietnia 2025
7 Kwietnia 2025
5 Kwietnia 2025
3 Kwietnia 2025
3 Kwietnia 2025
3 Kwietnia 2025