Instrukcja obsługi Kidde AccessPoint 001827
Przeczytaj poniżej 📖 instrukcję obsługi w języku polskim dla Kidde AccessPoint 001827 (4 stron) w kategorii szczelina. Ta instrukcja była pomocna dla 16 osób i została oceniona przez 8 użytkowników na średnio 4.8 gwiazdek
Strona 1/4
1
P/N 10092676P1-01 Rev C • September 2012
© 2012 Kidde. All rights reserved.
The TouchPoint
™
Lock is a pushbutton access control device that permits authorized entry into cabinets, drawers or other locking enclosures.
The TouchPoint Lock is easy to install on a variety of cabinets or enclosures and is intended for both indoor and outdoor applications.
The TouchPoint Lock can be ordered as a single component, or with optional mounting hardware including mounting brackets for sheet
metal or thick panels, 90° or 180° stop cams, a straight cam (1-1/8” length), or offset cam (1-5/8” length, 5/16” offset). The variations
depend on the type of cabinet or enclosure to which the lock is mounted.
TouchPoint
™
Lock
Mounting Instructions
Tools Needed/Recommended:
• Drill
• Hole saw (For Top Mount Option)
• Router (For Flush Mount Options)
• File
• Philips screwdriver
• T15 Torx driver
• Pen or pencil
I. Mounting Options:
The TouchPoint Lock can be oriented vertically or horizontally to permit a wide range
of locking options.
The TouchPoint Lock has three mounting options: top mount, ush mount with a
sheet metal bracket, and ush mount with a thick panel bracket. In the top mount
option, the back face of the Lock housing is mounted on the front face of the cabi-
net or enclosure. In the two ush mount options, the front face of the Lock housing
is aligned ush with the front face of the cabinet or enclosure, secured by a bracket
inside a hole cut into the cabinet surface.
In each of these options, the lock is secured to the panel or bracket through the use
of thread rolling.
screws into bosses on the Lock housing. Any mounting scheme should be designed
so that the mounting fasteners cannot be removed or tampered with when the Lock
is mounted and the cabinet or enclosure is closed and locked.
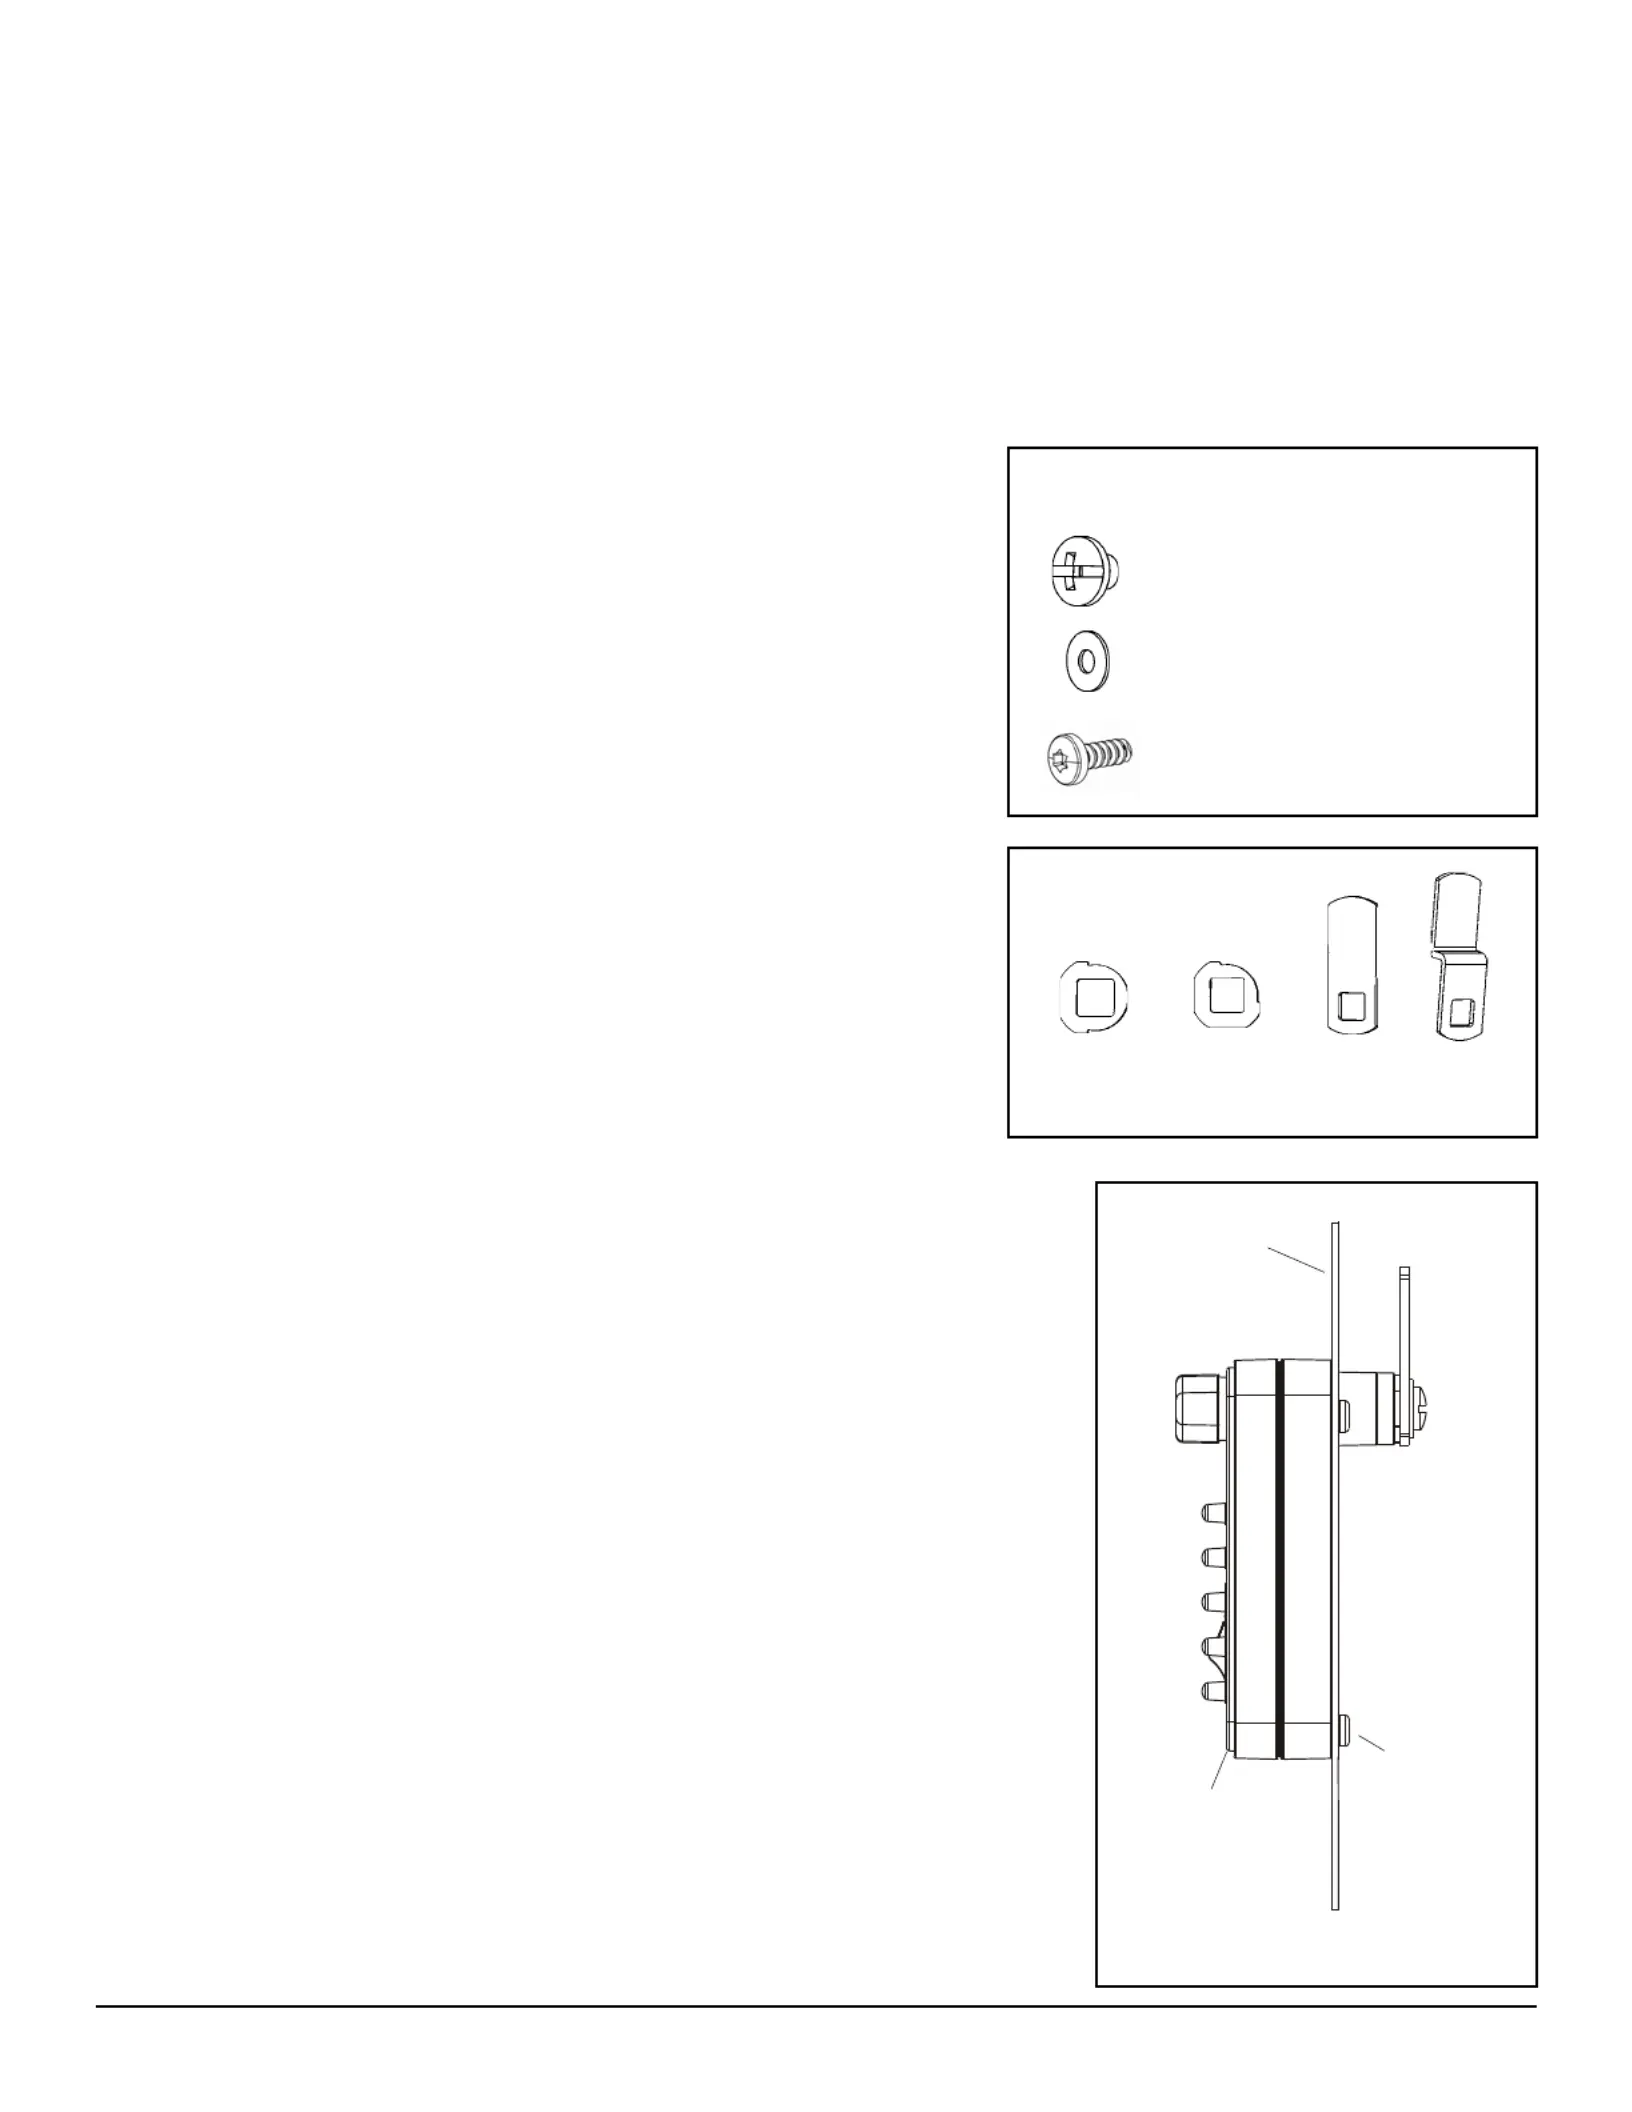
#10-24 x 1/4” Cam Screw,
combination drive (1)
180° Stop
Washer
90° Stop
Washer
Straight
Cam
Offset
Cam
Available
Hardware
#10 Round at washer (1)
Standard Hardware Provided
II. Mounting Instructions
Option A - Top Mount
(For use on panels of 1/8” thickness or less)
1. If the cabinet has an existing lock, remove the existing lock cylinder. If the open-
ing is too small for the protrusion on the back of theTouchPoint lock, use a le to
round out the lock tail hole.
2. If the cabinet does not have an existing lock, use Template A to determine the
dimensions and hole locations.
4. Position the Lock over the holes and install the four body screws through the back
of the cabinet and into the Lock body. Do not exceed 15 in-lb. of torque.
Note: The screws are designed to cut threads into the Lock body as they are installed.
5. Proceed to Cam Installation (Section III).
Cabinet
Body Screw (4)
Top Mount - Side View
Lock Body
#6-32 x 5/16” Body Screw,
T15 torx drive (4)
Specyfikacje produktu
| Marka: | Kidde |
| Kategoria: | szczelina |
| Model: | AccessPoint 001827 |
Potrzebujesz pomocy?
Jeśli potrzebujesz pomocy z Kidde AccessPoint 001827, zadaj pytanie poniżej, a inni użytkownicy Ci odpowiedzą
Instrukcje szczelina Kidde

10 Grudnia 2024
4 Września 2024
Instrukcje szczelina
Najnowsze instrukcje dla szczelina
8 Kwietnia 2025
29 Marca 2025
29 Marca 2025
29 Marca 2025
29 Marca 2025
29 Marca 2025
27 Marca 2025
13 Marca 2025
11 Marca 2025
10 Marca 2025