Instrukcja obsługi Lauten Audio Rim Mount
Lauten Audio
statyw
Rim Mount
Przeczytaj poniżej 📖 instrukcję obsługi w języku polskim dla Lauten Audio Rim Mount (1 stron) w kategorii statyw. Ta instrukcja była pomocna dla 12 osób i została oceniona przez 6.5 użytkowników na średnio 4.8 gwiazdek
Strona 1/1
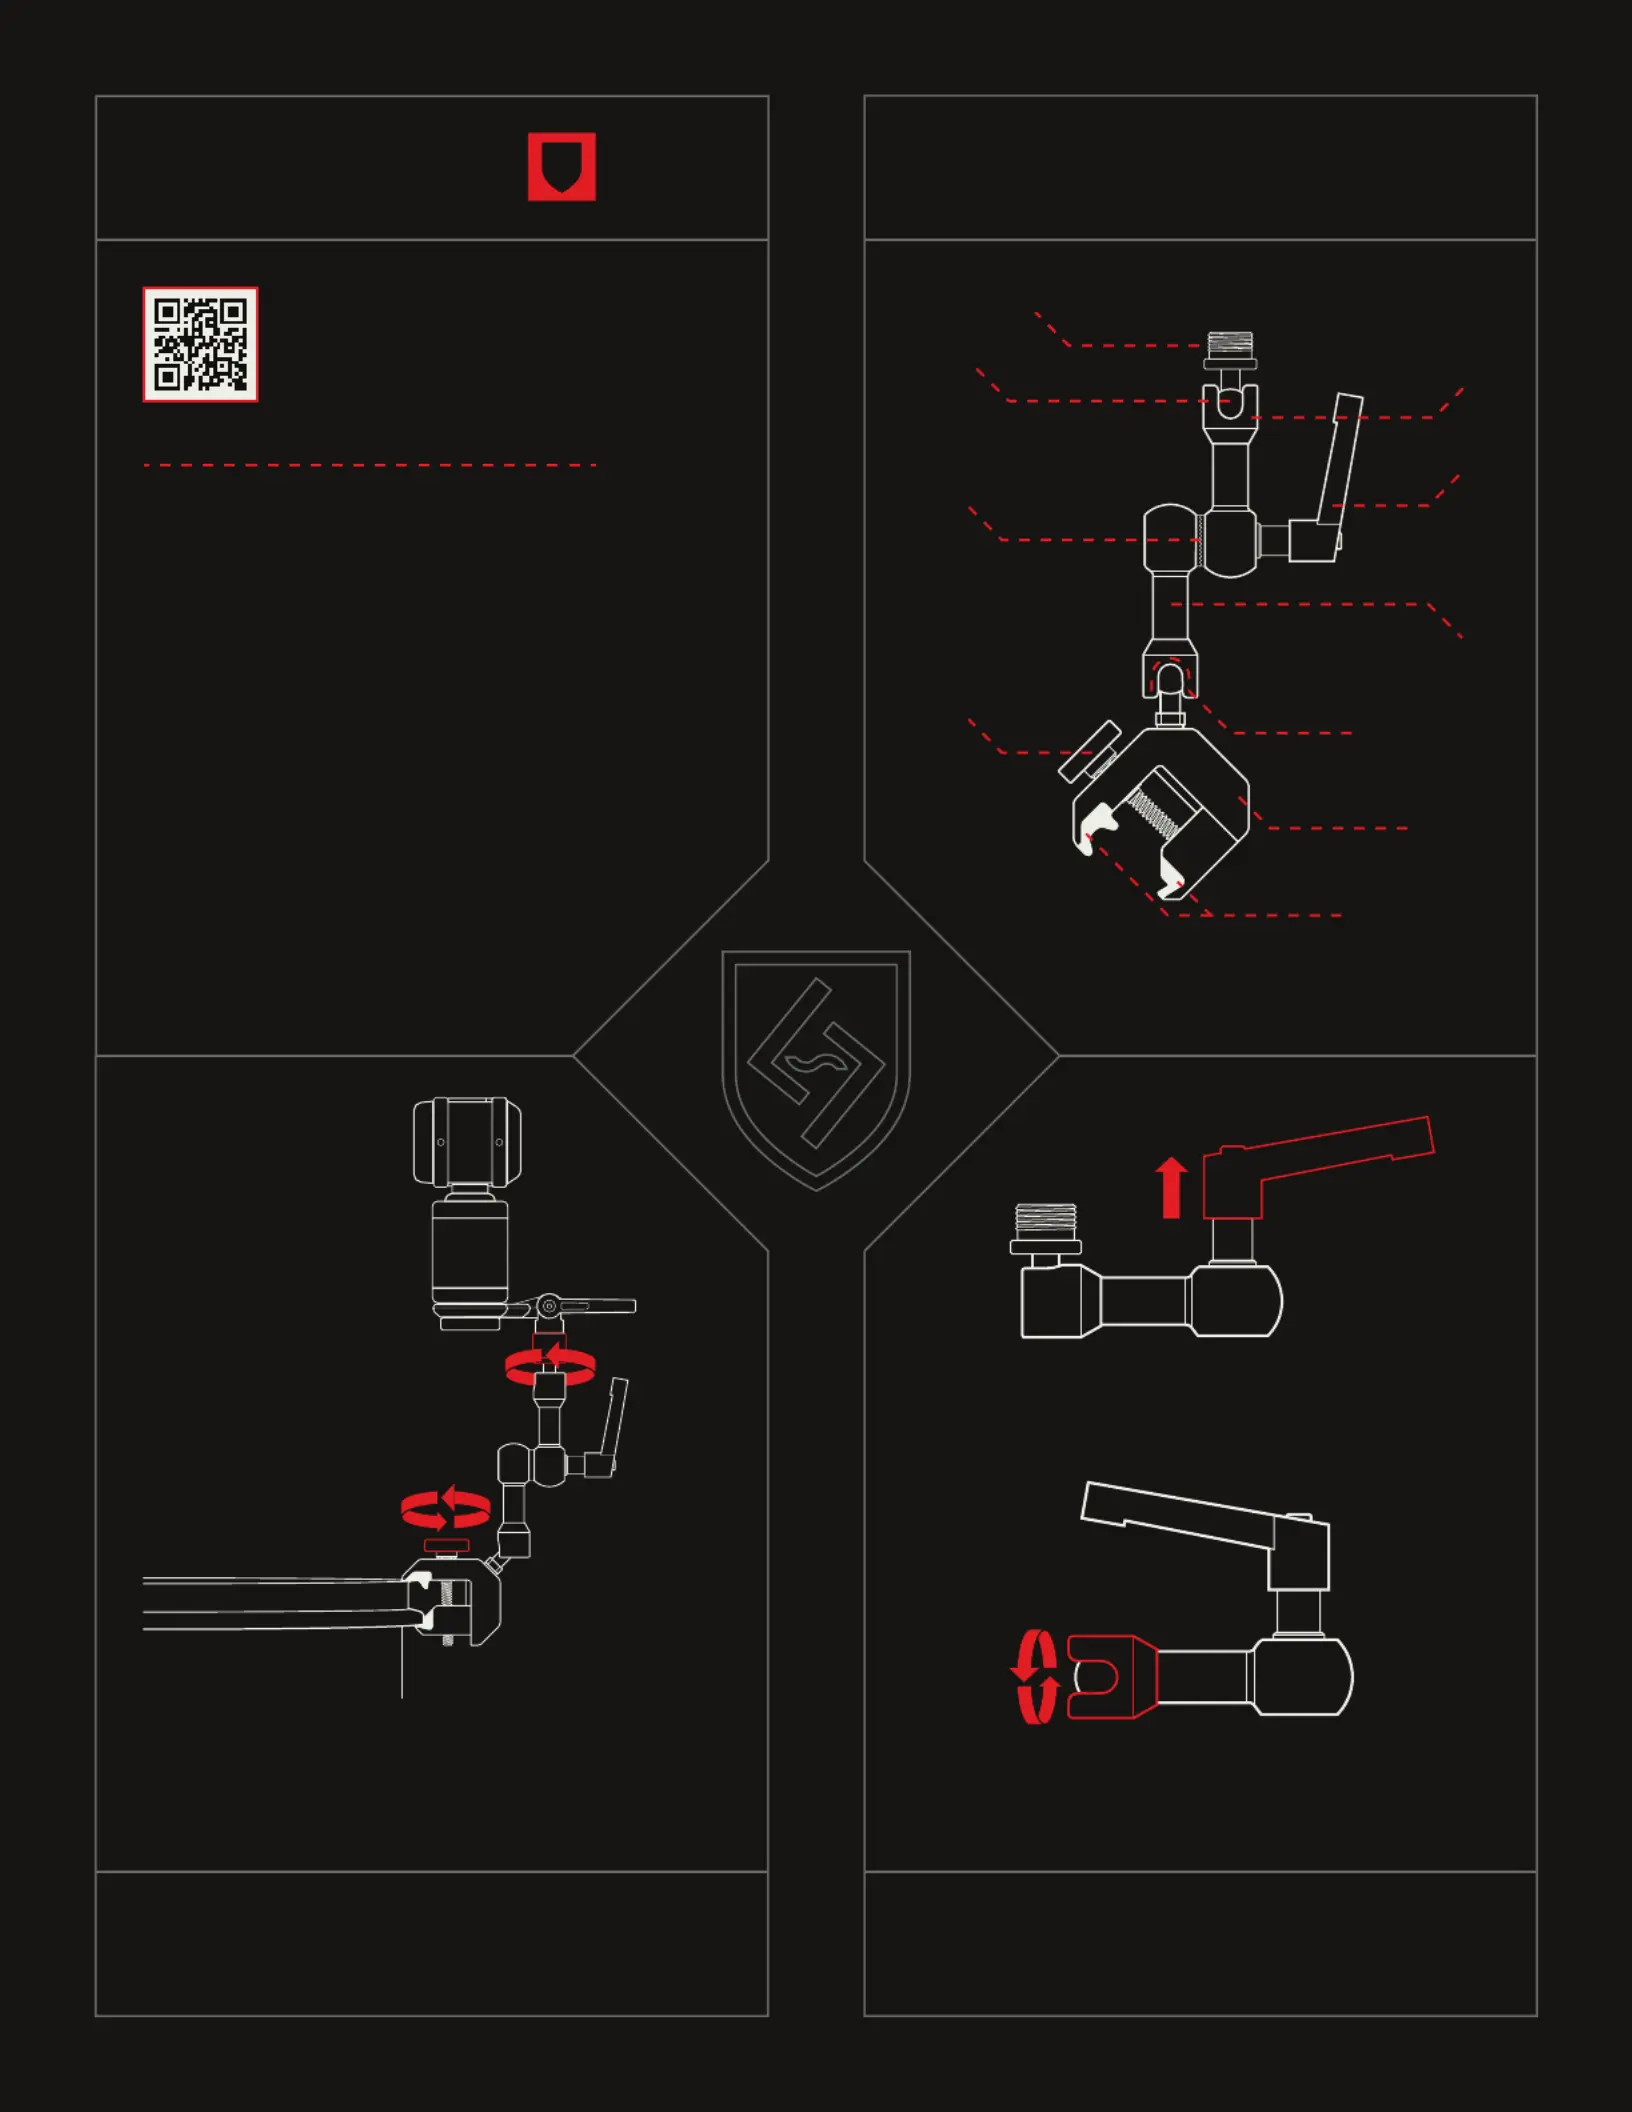
RIM MOUNT ANATOMY
TIGHTEN TIPS
THREAD TO MIC CLIP
CUFF
BALL JOINT
ARM
ELBOW JOINT
CLAMP TEETH
CLAMP
CUFF NOTCH
THUMB SCREW
Rim Mount’s max load capacity is 3.3 LBS. It easily holds
larger industry classics like the SM57, MD421, 414, and
more. Please visit www.lautenaudio.com/faq for more
details and frequently asked questions.
Your new Rim Mount includes
a three-year limited warranty.
Please scan the code for
warranty details.
Cuffs can rotate independently of arms and provide
additional positioning options and notch locations.
After tightening, pull up on the handle and rotate to
avoid obstacles.
Firmly tighten the thumb screw. Often times an extra
turn or two is necessary as the Rim Mount teeth
compress against the rim of the drum.
Firmly tighten the threads
that connect the mic clip to
the Rim Mount arm.
WWW.LAUTENAUDIO.COM/RIM-MOUNTLAUTEN AUDIO OFFICIAL RIM MOUNT QUICK START GUIDE
HANDLE
Specyfikacje produktu
| Marka: | Lauten Audio |
| Kategoria: | statyw |
| Model: | Rim Mount |
Potrzebujesz pomocy?
Jeśli potrzebujesz pomocy z Lauten Audio Rim Mount, zadaj pytanie poniżej, a inni użytkownicy Ci odpowiedzą
Instrukcje statyw Lauten Audio

28 Stycznia 2025
Instrukcje statyw
- Auray
- Røde
- Sevenoak
- Kaiser Fototechnik
- Oben
- Celly
- Alpine
- Redrock Micro
- REVO
- Falcon Eyes
- Ruggard
- Hama
- IOptron
- Miller
- Cam Caddie
Najnowsze instrukcje dla statyw

4 Kwietnia 2025

4 Kwietnia 2025

4 Kwietnia 2025

4 Kwietnia 2025

4 Kwietnia 2025

4 Kwietnia 2025

3 Kwietnia 2025

2 Kwietnia 2025

2 Kwietnia 2025

2 Kwietnia 2025