Instrukcja obsługi Leviton 68A02-2
Leviton Kamera monitorująca 68A02-2
Przeczytaj poniżej 📖 instrukcję obsługi w języku polskim dla Leviton 68A02-2 (2 stron) w kategorii Kamera monitorująca. Ta instrukcja była pomocna dla 39 osób i została oceniona przez 5 użytkowników na średnio 4.2 gwiazdek
Strona 1/2
Do not attempt to disasmble se
the camera. If the camera does
not function, plea contact se
Leviton.
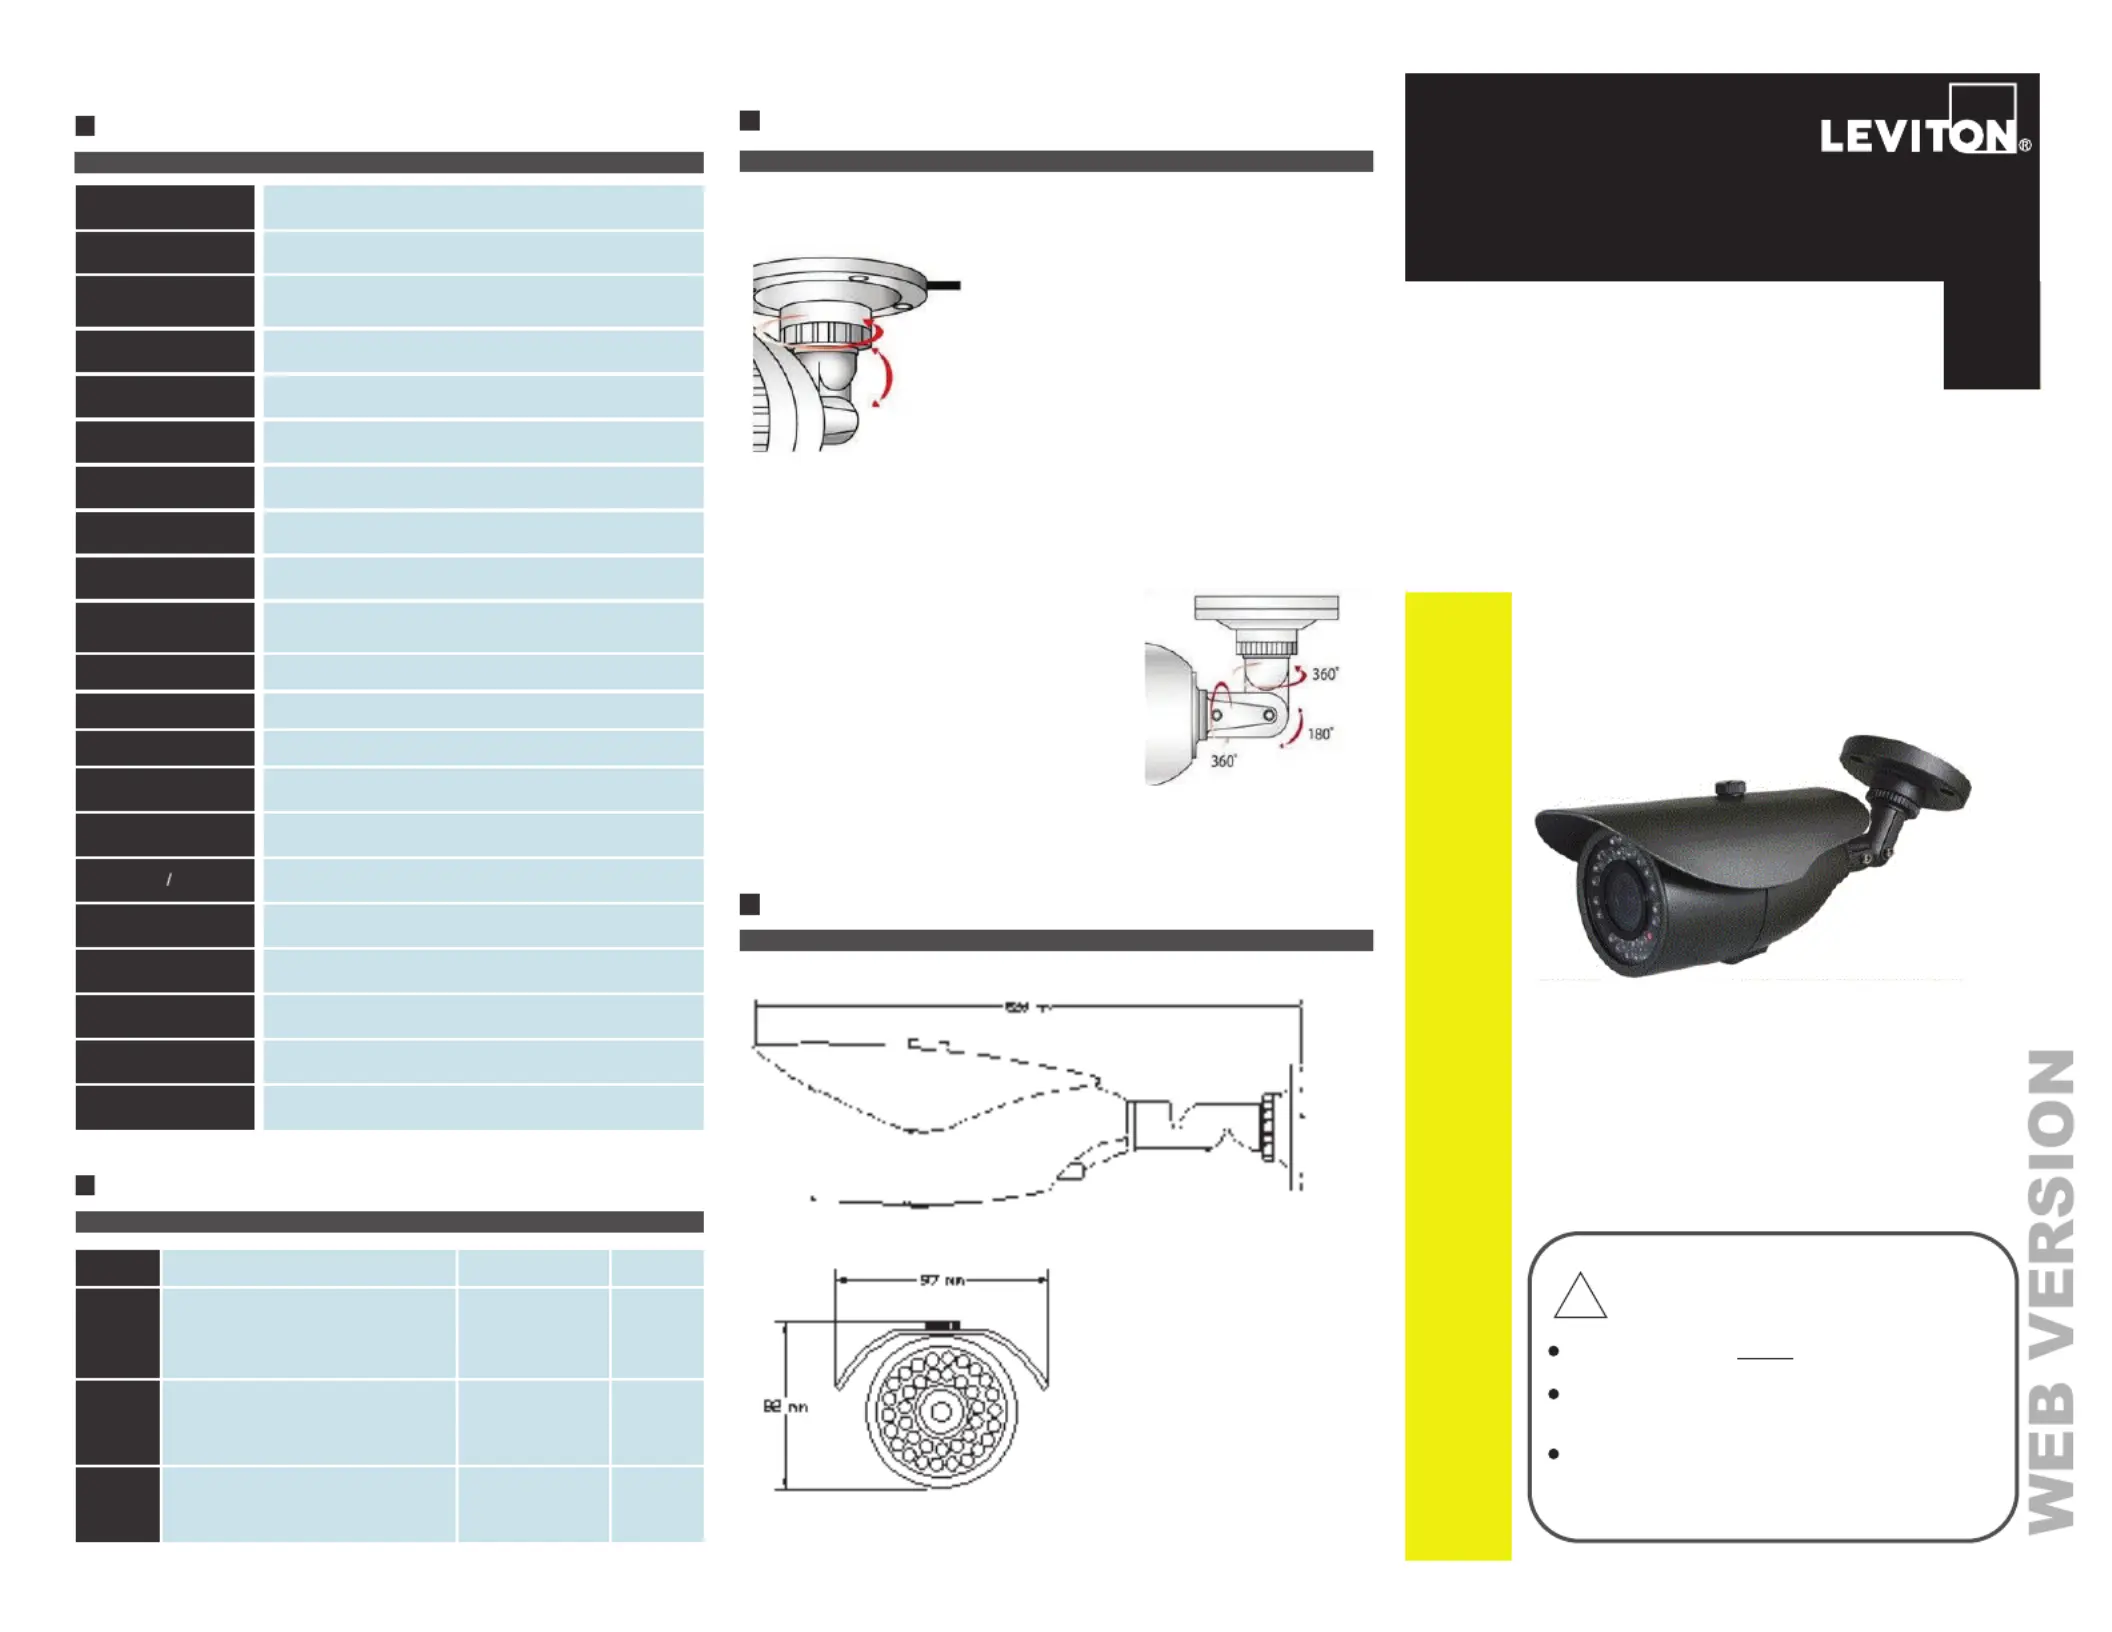
Installation
1. Locate and choose the position where the
camera will be mounted.
2. Disassemble the mounting plate (the plate
with three holes) from the base.
3. Mark the threholes according to the e
mounting plate placement.
4. Drill three holes, then insert anchors into the
drilled holes.
5. Attach the camera base to the ceiling or wall using the supped li
screws.
6. Connect power / video wires.
7. Assemble the camera back to the mounting
plate and lock it in place by using the locking
screw located between the mounting plate
and the camera.
8. Loosen the locking screws. Adjust angle to
desired positions.
9. Combine each bracket part and tighn each te
section using the supplied installation tool.
Dimensis on
68A02-2
Day/Night IR Bullet Camera
Day/Night IR Bullet Camera
(2.8 - mManual Zoom Lens) 10m
IMPORTANT INFORMATION
Must use a regulated
12VDC power supply.
Must use correct DC type plug for power lead.
If camera cables are spliced, the warranty will be void.
Do not face the camera directly into sunght or a li
strong light, as it will damage the CCD d cause the an
camera to malfunction.
Installati Mal onnua
!
Specification
Pacisking Lt
No
Name Model Number
1.
Day/Night IR Buet Camera ll
68A02-2 1
2.
Installation Manual 68I02-2
1
3.
Installation Tool
1
Melod
68A02-2
Pick up Element
1/ SONY CCD 3"
Etive Picture ffec
Elements (H×V)
NTSC: 7 (H) × (V) 68494
Horizontal
Resolution
560ne TV Lis
Minimum
Illumination
0 Lux (with IR illumition) na
S/N Ratio
More t 48dB han
Sing Systemcann
2:1 interlace
Synchronous
System
Internal, tive sync. nega
Auto Electronic
Serhutt
NTSC: 1/60s - 1/100,s 000
Gama
Charteristicac
0.45
IR Distance
100eeed ft with infrar LED illumition na
IR Status
Under 10 x by CDS Lu
IR Power On
CDS AUTO Control
Video Output
1V, pp75Ω
Auto Gain Control
Auto
PowerCuent/rr
12400VDC, mA
Lens
2.8 - Ml Zm Ls 10mmanuaooen
Dimension
9” (W) x 3.8” (H) x 3.2” (D)
Weight
2.6 lb
Storage
Temperature
-22ºF - 0ºF, RH 95%, Max 14
Operating
Temperature
23ºF - 4ºF, RH 95%, Max 10
DI-021-SU682-05A
(68I02-2)
Specyfikacje produktu
| Marka: | Leviton |
| Kategoria: | Kamera monitorująca |
| Model: | 68A02-2 |
Potrzebujesz pomocy?
Jeśli potrzebujesz pomocy z Leviton 68A02-2, zadaj pytanie poniżej, a inni użytkownicy Ci odpowiedzą
Instrukcje Kamera monitorująca Leviton

28 Grudnia 2024
Instrukcje Kamera monitorująca
Najnowsze instrukcje dla Kamera monitorująca
28 Stycznia 2025
25 Stycznia 2025
17 Stycznia 2025
17 Stycznia 2025
15 Stycznia 2025
13 Stycznia 2025
13 Stycznia 2025
13 Stycznia 2025
12 Stycznia 2025
12 Stycznia 2025