Instrukcja obsługi Metra 95-6551
Metra zestaw samochodowy 95-6551
Przeczytaj poniżej 📖 instrukcję obsługi w języku polskim dla Metra 95-6551 (4 stron) w kategorii zestaw samochodowy. Ta instrukcja była pomocna dla 17 osób i została oceniona przez 8 użytkowników na średnio 4.7 gwiazdek
Strona 1/4
Metra. The World’s Best Kits.®MetraOnline.com © COPYRIGHT 2019 METRA ELECTRONICS CORPORATION REV. 1/30/19 INST95-6551
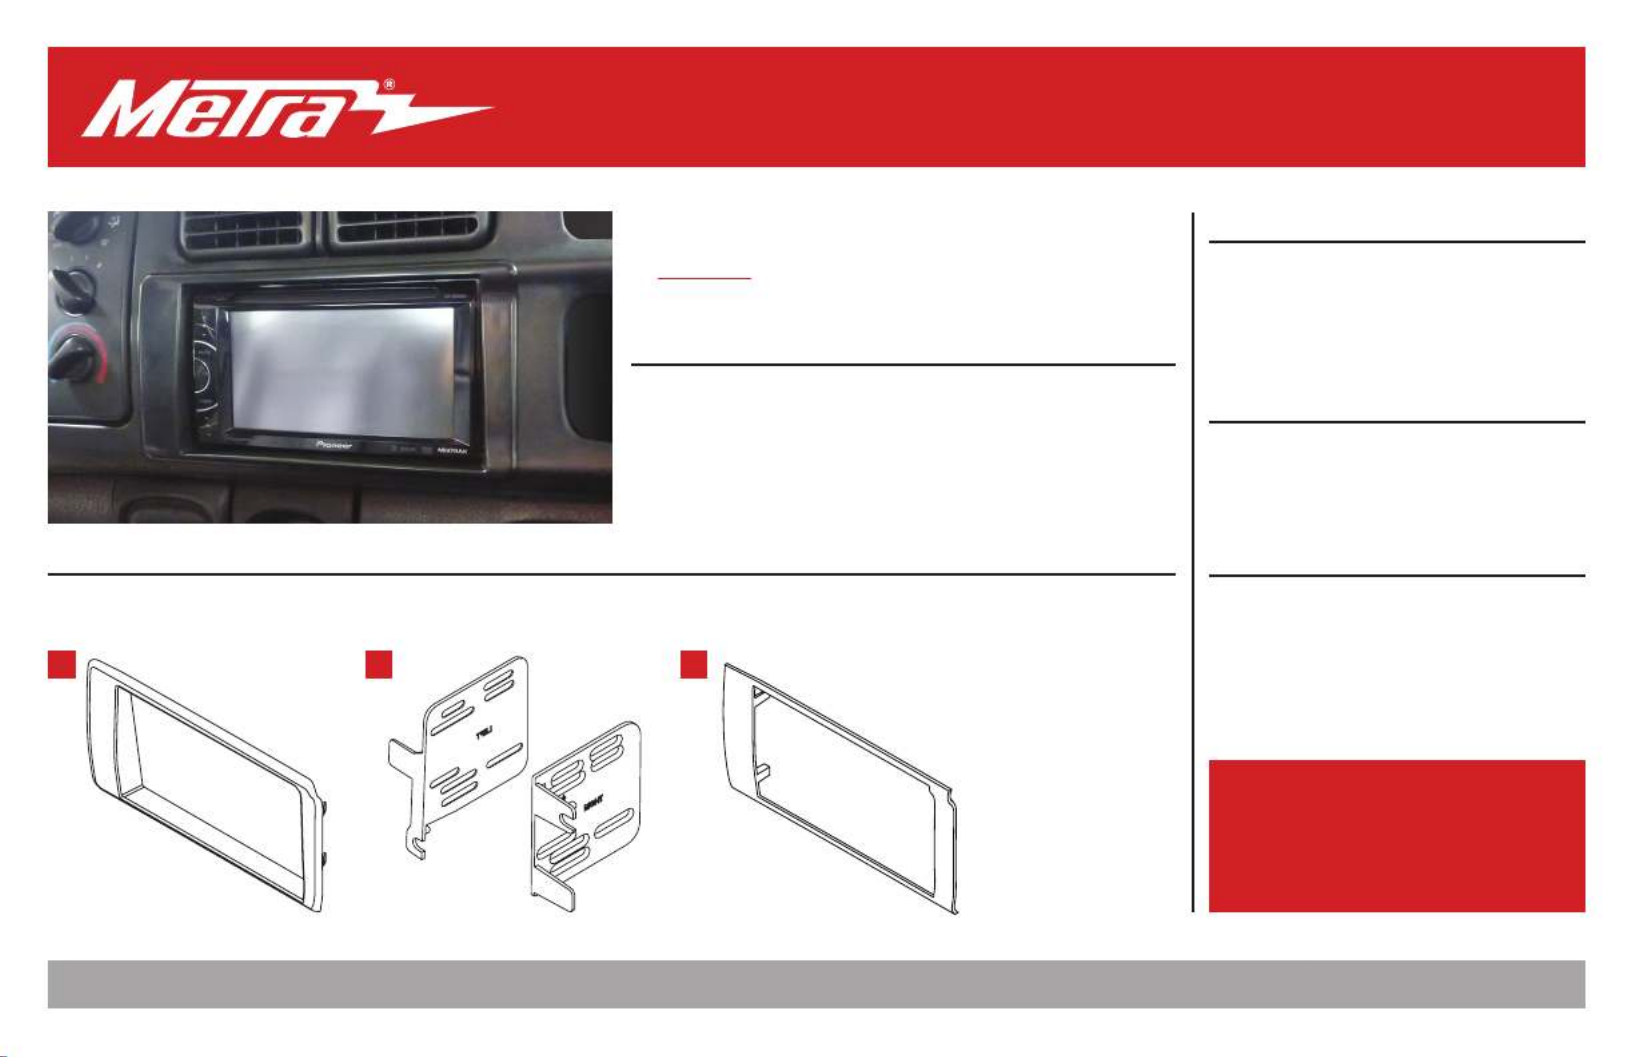
INSTALLATION INSTRUCTIONS
95-6551
Attention!Let the vehicle sit with the key
out of the ignition for a few minutes before
removing the factory radio. When testing the
aftermarket equipment, ensure that all factory
equipment is connected before cycling the
key to ignition.
KIT FEATURES
• ISO DDIN radio provision
KIT COMPONENTS
• A) Radio trim panel • B) Radio brackets • C) Cut template
TOOLS REQUIRED
• Panel removal tool • Phillips screwdriver
• 3/8” Socket wrench • Cutting tool • Scribe tool
TABLE OF CONTENTS
Dash Disassembly ..................................................2
Kit Preparation ....................................................2-3
Kit Assembly ..........................................................3
WIRING & ANTENNA CONNECTIONS
(sold separately)
Wiring Harness: 70-1817
Antenna Adapter: Not required
AB C
Dodge Ram 1998-2001
Visit for more detailed information about the product and up-to-date vehicle MetraOnline.com
specific applications
Specyfikacje produktu
| Marka: | Metra |
| Kategoria: | zestaw samochodowy |
| Model: | 95-6551 |
Potrzebujesz pomocy?
Jeśli potrzebujesz pomocy z Metra 95-6551, zadaj pytanie poniżej, a inni użytkownicy Ci odpowiedzą
Instrukcje zestaw samochodowy Metra

3 Kwietnia 2025
3 Kwietnia 2025
3 Kwietnia 2025
3 Kwietnia 2025
31 Marca 2025
28 Grudnia 2024
28 Grudnia 2024
28 Grudnia 2024
28 Grudnia 2024
28 Grudnia 2024
Instrukcje zestaw samochodowy
Najnowsze instrukcje dla zestaw samochodowy
1 Kwietnia 2025
15 Stycznia 2025
30 Grudnia 2025
28 Grudnia 2024
15 Grudnia 2024
7 Października 2024
7 Października 2024
6 Października 2024
6 Października 2024
5 Października 2024