Instrukcja obsługi Metra 99-7346B
Metra zestaw samochodowy 99-7346B
Przeczytaj poniżej 📖 instrukcję obsługi w języku polskim dla Metra 99-7346B (8 stron) w kategorii zestaw samochodowy. Ta instrukcja była pomocna dla 36 osób i została oceniona przez 4 użytkowników na średnio 4.6 gwiazdek
Strona 1/8
INSTALLATION INSTRUCTIONS FOR PART 99-7346B
APPLICATIONS
METRA. The World’s best kits.
™
metraonline.com1-800-221-0932
© COPYRIGHT 2004-2011 METRA ELECTRONICS CORPORATION
REV. 9/21/2012 INST99-7346B
CAUTION: Metra recommends disconnecting the
negative battery terminal before beginning any
installation. All accessories, switches, and especially
air bag indicator lights must be plugged in
beforereconnecting the battery or cycling the ignition.
NOTE: Refer to the instructions included with the
aftermarket radio.
Table of Contents
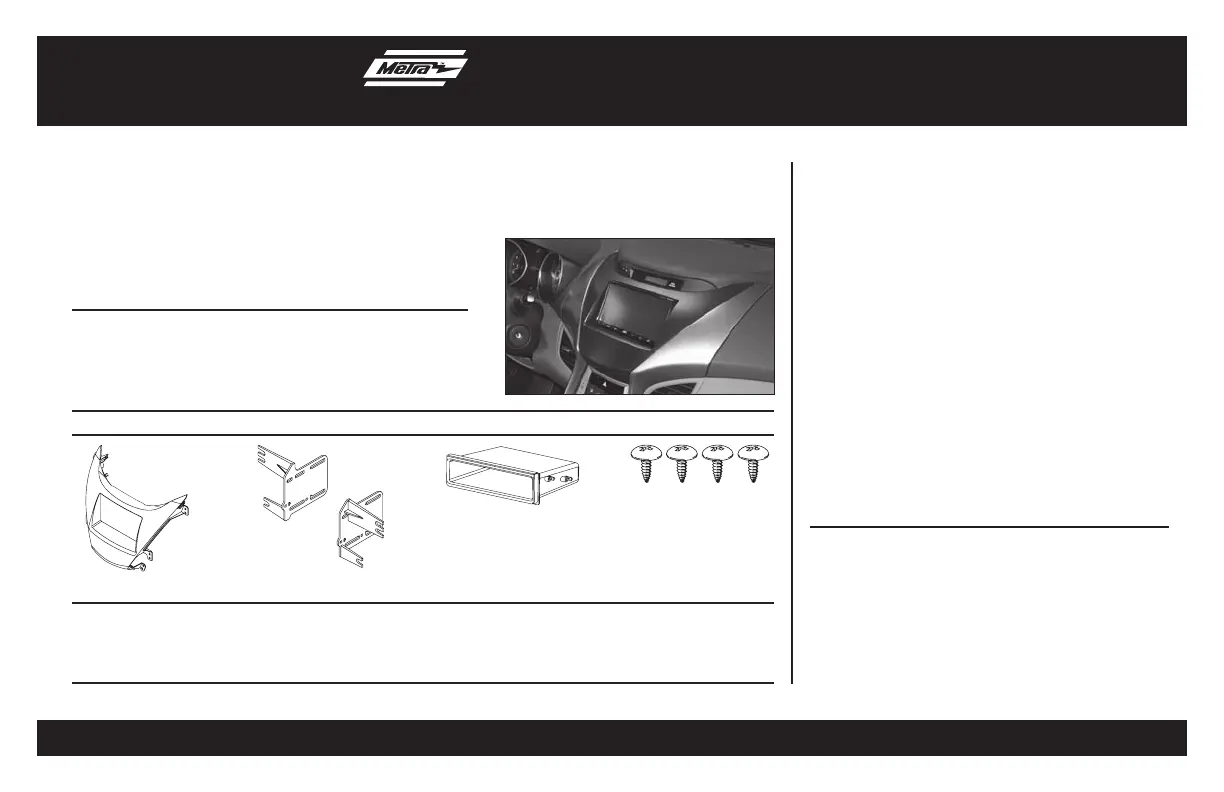
• ISO DIN head unit provision with pocket
• DDIN head unit provisions
• Painted black to match factory finish
• A) Radio Trim Panel • B) DDIN Brackets • C) Pocket • D) (4) #8 x 3/8” Truss-head Phillips screws
KIT FEATURES
KIT COMPONENTS
WIRING & ANTENNA CONNECTIONS (sold separately)
Wiring Harness: • 70-7304
Antenna Adapter: • Not Required
• Panel removal tool • Phillips screwdriver • Socket Wrench
TOOLS REQUIRED
Hyundai Elantra 2011-up
99-7346B
A
DBC
Dash Disassembly
–Hyundai Elantra 2011-up .....................................2
Kit Assembly
–ISO DIN head unit provision with pocket ...............3
–DDIN head unit provisions ....................................3
Specyfikacje produktu
| Marka: | Metra |
| Kategoria: | zestaw samochodowy |
| Model: | 99-7346B |
Potrzebujesz pomocy?
Jeśli potrzebujesz pomocy z Metra 99-7346B, zadaj pytanie poniżej, a inni użytkownicy Ci odpowiedzą
Instrukcje zestaw samochodowy Metra

3 Kwietnia 2025
3 Kwietnia 2025
3 Kwietnia 2025
3 Kwietnia 2025
31 Marca 2025
28 Grudnia 2024
28 Grudnia 2024
28 Grudnia 2024
28 Grudnia 2024
28 Grudnia 2024
Instrukcje zestaw samochodowy
Najnowsze instrukcje dla zestaw samochodowy
1 Kwietnia 2025
15 Stycznia 2025
30 Grudnia 2025
28 Grudnia 2024
15 Grudnia 2024
7 Października 2024
7 Października 2024
6 Października 2024
6 Października 2024
5 Października 2024