Instrukcja obsługi Optex FLX-S
Optex detektor ruchu FLX-S
Przeczytaj poniżej 📖 instrukcję obsługi w języku polskim dla Optex FLX-S (13 stron) w kategorii detektor ruchu. Ta instrukcja była pomocna dla 27 osób i została oceniona przez 4 użytkowników na średnio 4.8 gwiazdek
Strona 1/13
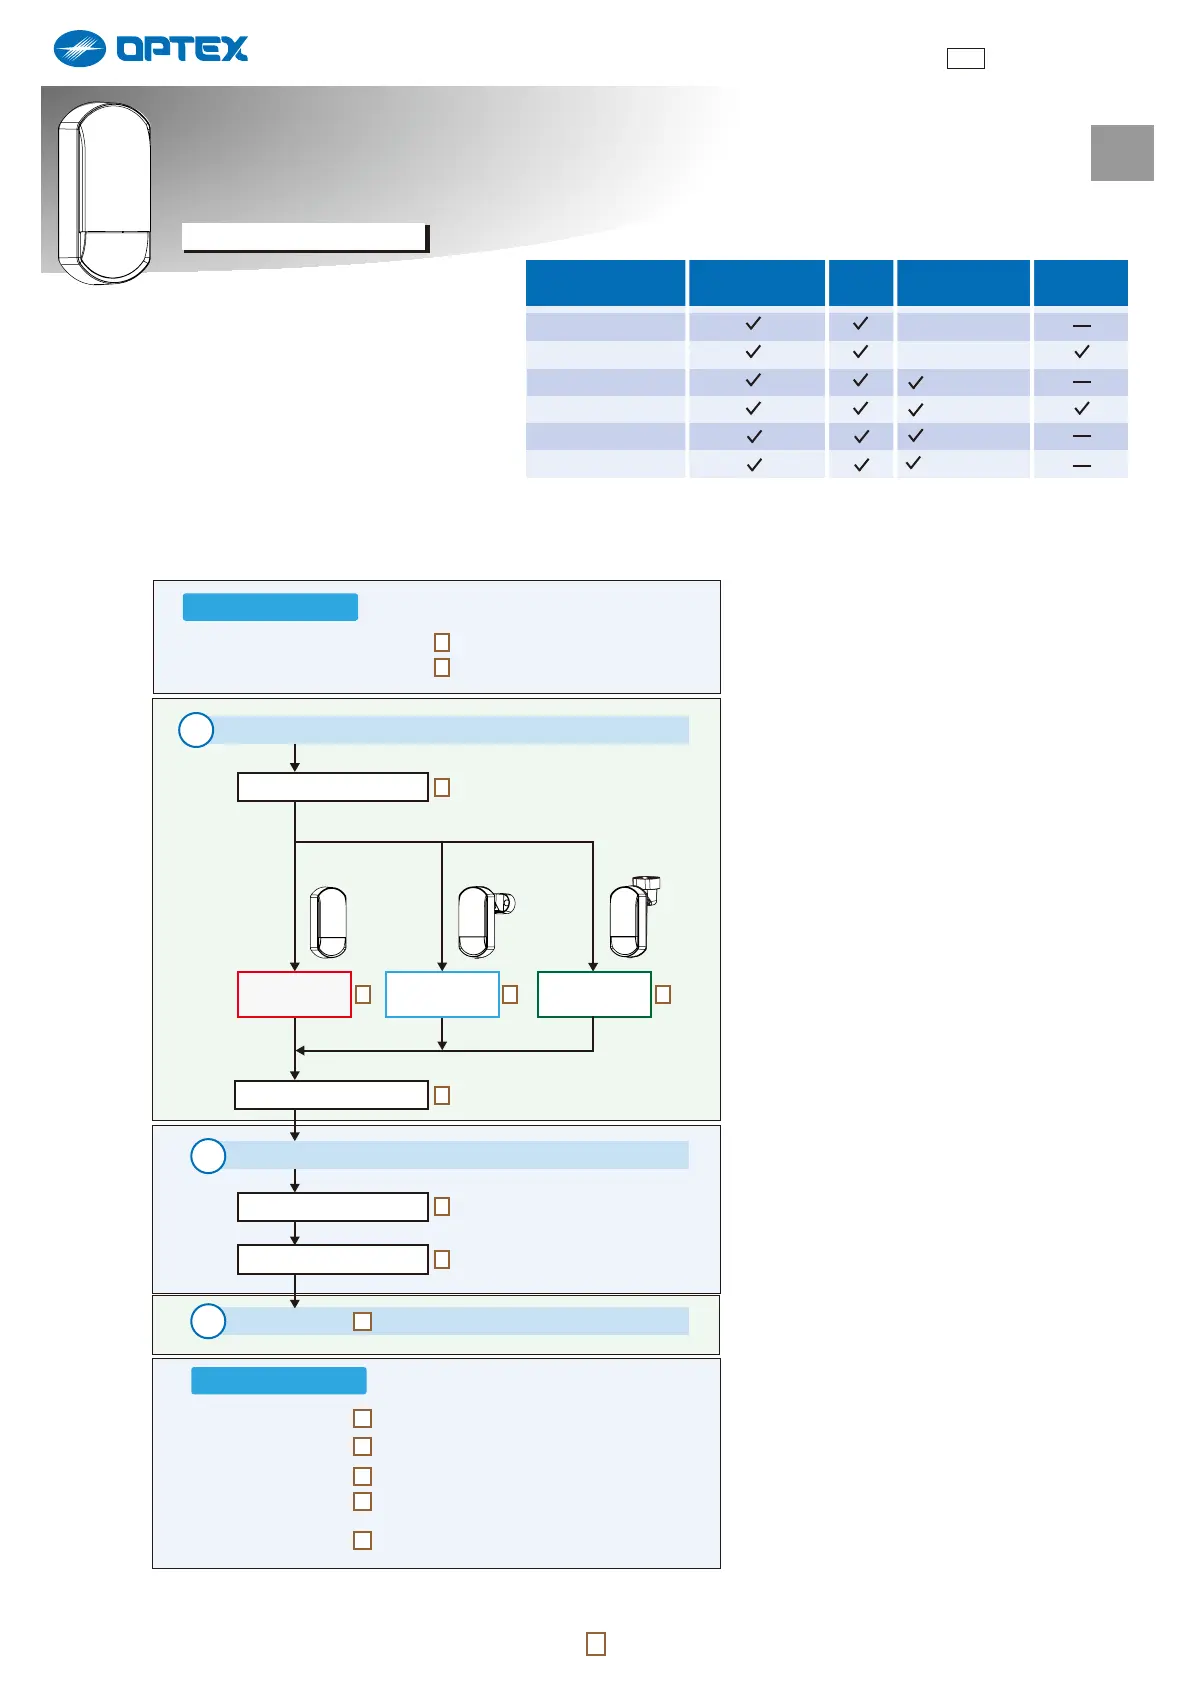
FlipX series
Flexible Range Indoor Detector
Flexible Range Indoor Detector
FlipX series
STANDARD MODELS
INSTALLATION INSTRUCTIONS
No.59-3043-1 2403-27
UL No.59-3043-0 2104-12
EN
1
- Manufacturer's statement
- Parts identification
- Specifications
- Dimensions
- Detection area
- Angle adjustment
with bracket CW-G2
- Compliance
Before installation
Others
<< Contents >>
Page
2
3
Installation
Wall mount
without bracket
Assemble and connect
Jumper pin settings
Wide/Narrow setting
1
Wall mount
with bracket
Ceiling mount
with bracket
Settings2
Disassemble
Checking3
3
456
7
8
11
12
13
13
8
12
10
*1 Not certified to SBSC and UL
*2 Not certified to EN 50131-2-2 (FLX-S-ST-BKT)/EN 50131-2-4 (FLX-S-DT-X5-BKT/-X9),
INCERT, SBSC and UL
Wide/Narrow area
Flip lens
PIR
Mounting
bracket
Microwave
FLX-S-ST
FLX-S-ST-BKT
*2
FLX-S-DT-X5
FLX-S-DT-X5-BKT
*2
FLX-S-DT-X8
*1
FLX-S-DT-X9
*2
(10,525 GHz)
(10,525 GHz)
(10,587 GHz)
(9,425 GHz)
Specyfikacje produktu
| Marka: | Optex |
| Kategoria: | detektor ruchu |
| Model: | FLX-S |
Potrzebujesz pomocy?
Jeśli potrzebujesz pomocy z Optex FLX-S, zadaj pytanie poniżej, a inni użytkownicy Ci odpowiedzą
Instrukcje detektor ruchu Optex

17 Grudnia 2024
17 Grudnia 2024
17 Grudnia 2024
17 Grudnia 2024
17 Grudnia 2024
17 Grudnia 2024
6 Grudnia 2024
6 Grudnia 2024
6 Grudnia 2024
13 Września 2024
Instrukcje detektor ruchu
Najnowsze instrukcje dla detektor ruchu
9 Stycznia 2025
29 Grudnia 2024
29 Grudnia 2024
26 Grudnia 2024
26 Grudnia 2024
25 Grudnia 2024
15 Grudnia 2024
15 Grudnia 2024
15 Grudnia 2024
15 Grudnia 2024