Instrukcja obsługi OSD Audio IWS-88
Przeczytaj poniżej 📖 instrukcję obsługi w języku polskim dla OSD Audio IWS-88 (2 stron) w kategorii subwoofer. Ta instrukcja była pomocna dla 17 osób i została oceniona przez 4 użytkowników na średnio 4.5 gwiazdek
Strona 1/2
18AWG minimum - for distances up to ………………………. . 10 ft
16AWG - from ……………………………………………. 10 to 50 ft
14AWG - from …………………………………………… 50 to 100ft
- Where is the best place to install the speakers
- Where do the speakers sound the best
- When placing the speakers in the wall, try to locate them so that the
sound is projected towards the general listening area.
- If you intend to paint the grilles, try to do so before installation.
Quick installation guide
- Pencil
- Drill
- Tape Measure
- Wire cutter
- Philips-head screwdriver
- Sandpaper
Tools needed for installation
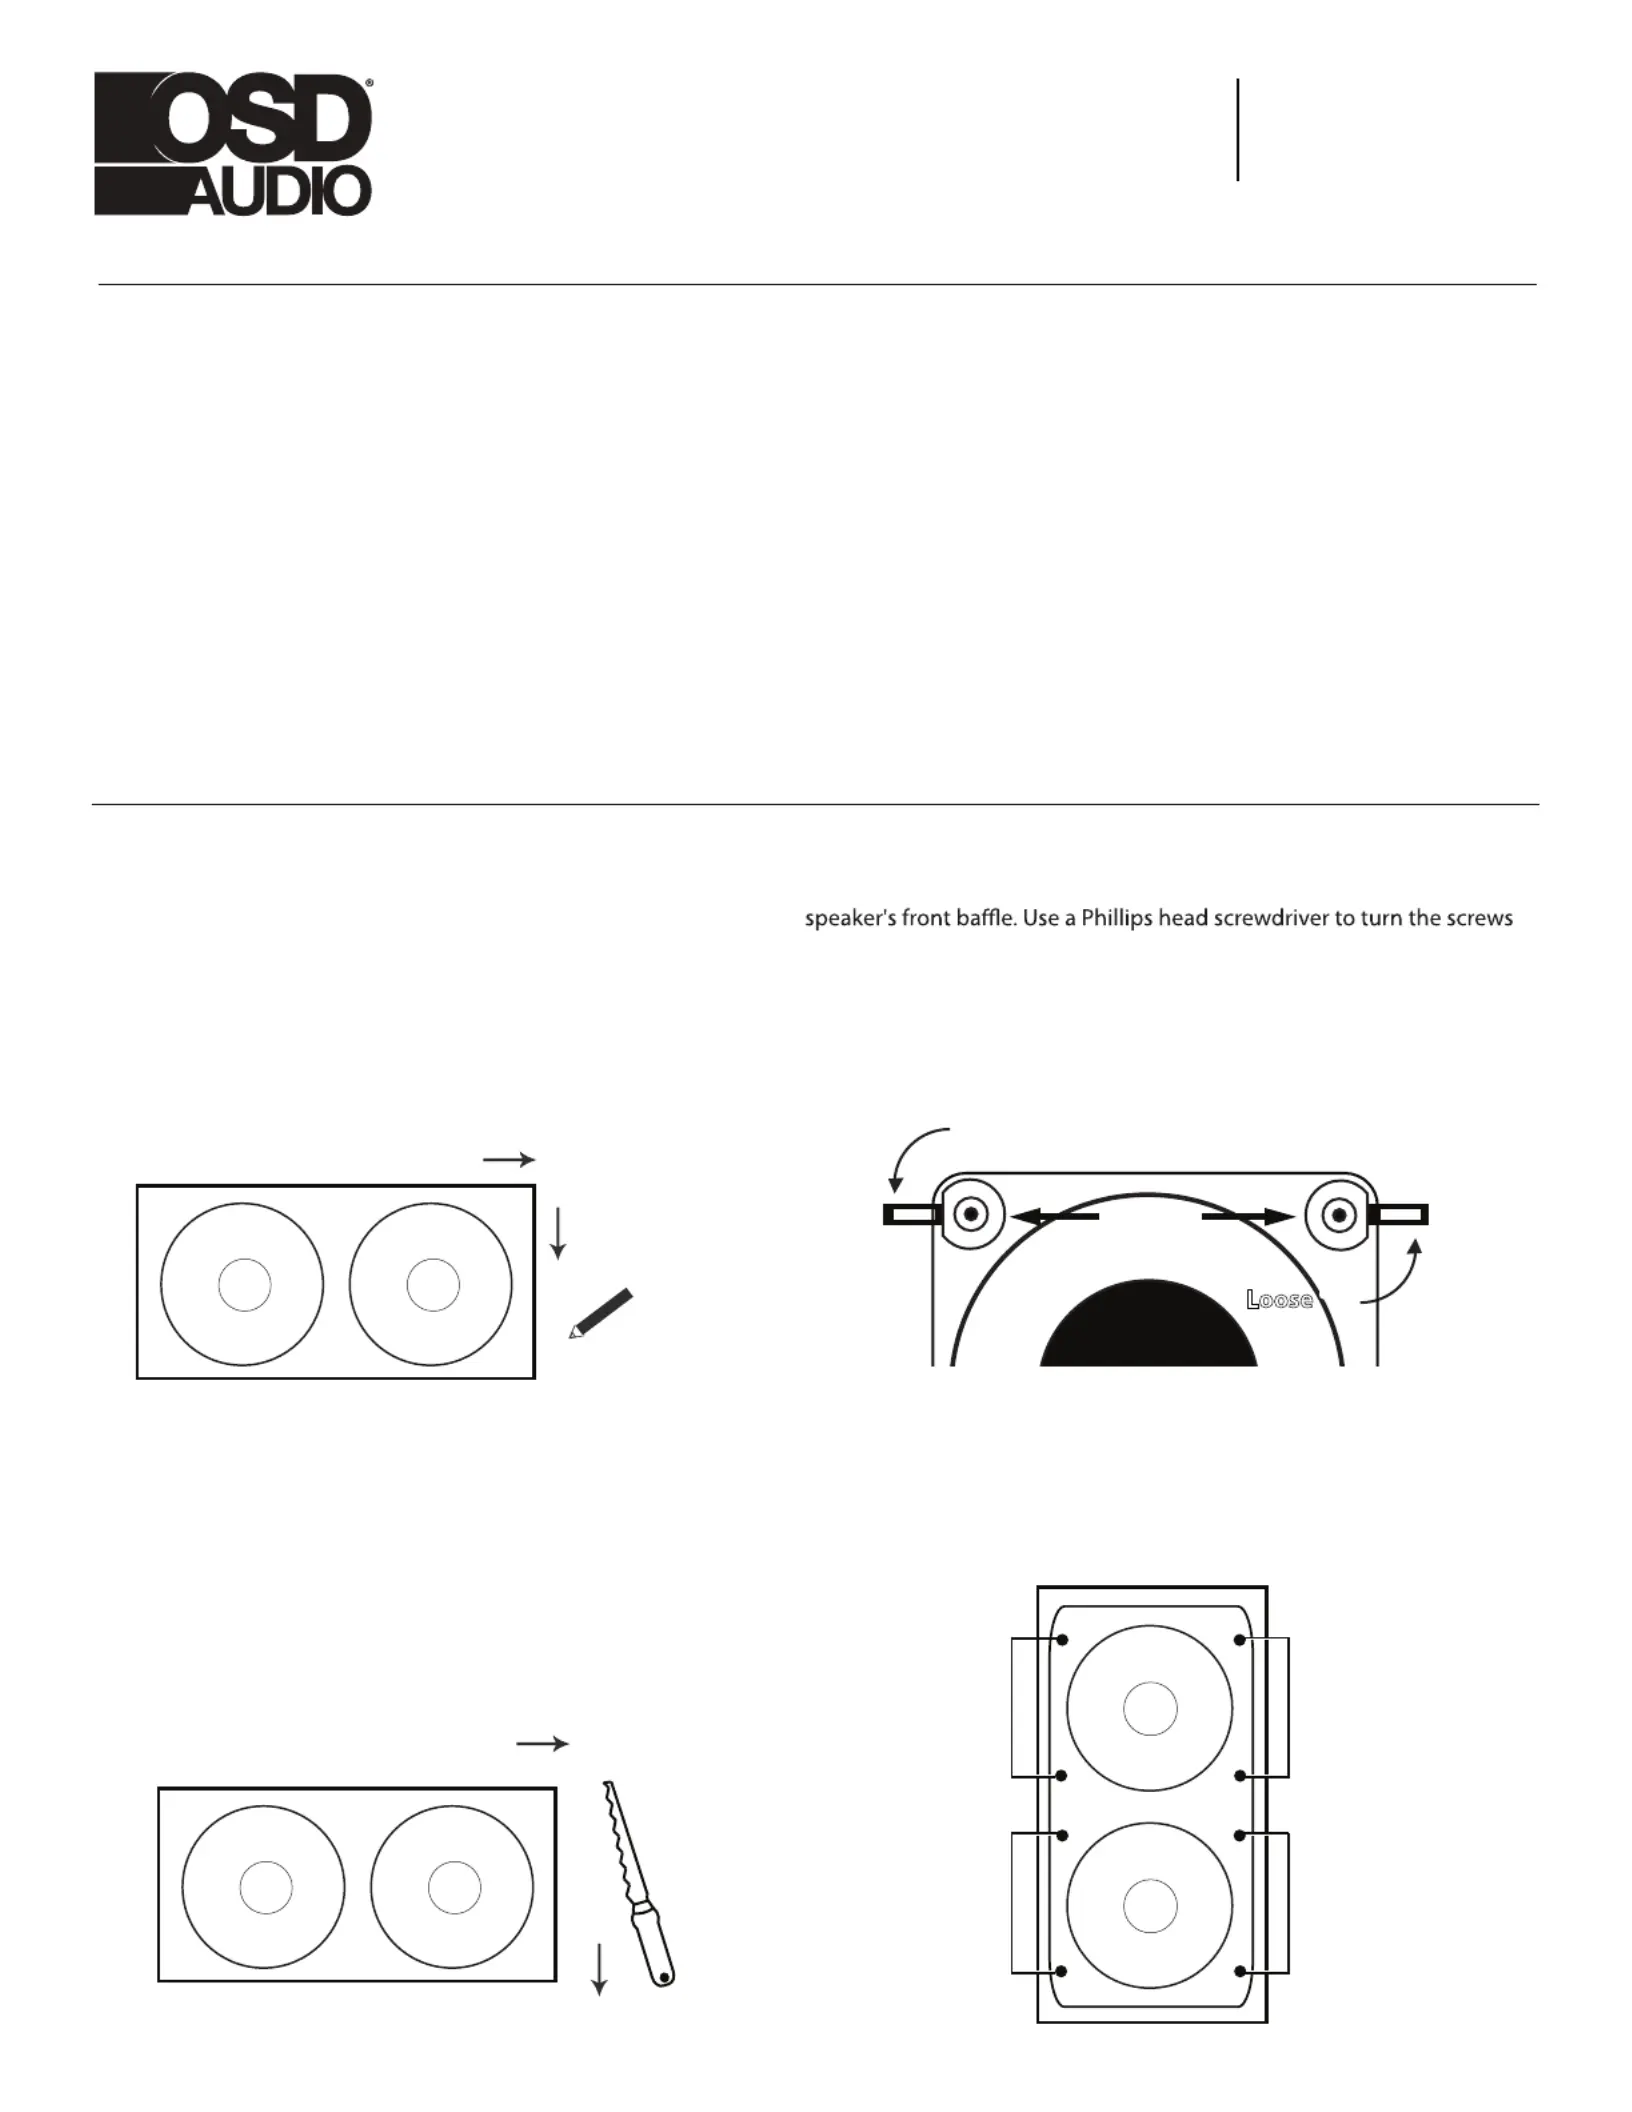
STEP 1
Trace along the inclusive template. Cut along the traced line using a
drywall saw or rotary drill. A simple, inexpensive drywall saw (about
$10 at your local hardware store) is the best choice for beginners.
Caution: This is the most important part of the entire installation.
If you are not certain whether any obstructions exist behind the
desired mounting area, you should start by cutting a small hole in
the center of your penciled mounting hole with a drywall saw. Use a
piece of sandpaper to sand down the cut out edge for a smoother
contour. (See Diagram 1 and Diagram 2)
Run the cable into the cut out location while leaving an extra two
feet to make the connection to the speaker easier. St
STEP 2
rip back
approximately ½” of the speaker cable insulation and twist
the copper wires tightly for easy insertion.
On the back of the speaker, press down on the gold-plated
compression terminal to reveal the "eye" and insert the speaker
cable through the eye for secure connection. Release the compres-
sion terminal to lock each cable securely.
Diagram 1:
Cutout tracing
Diagram 2:
Cut Out
To determine the length and the gauge of speaker wire, you will need to
measure the distance between your receiver/amplifier and the speakers.
- Always buy more than you think you would need.
- Equal wire lengths should always be used to maintain an equal
balance in sound volume.
- Sound quality is lost when using thin wire gauge over a long
distance.
- Utility knife
- Safety eyewear
- Gloves
Speaker wire
--
- Measure the distance from the receiver/amplifier to the speakers.
-----------------
----------------
-----------------
-----------------
----------------
-----------------
STEP 3
Tighten the dog-ear brackets by simply turning the screws on the
slowly clockwise. The quick-turn mounting system and frame will
"sandwich" or clamp around the wall to hold the speaker securely in
place. (See Diagram 3)
Diagram 3:
Mounting Dog Ear
Closed
Loose
Closed
L
oose
...........
..
.
.
.
.
.
......
.
dog ear
STEP 4
Screw
Screw
Screw
Screw
Tighten the four mounting screws with the same amount of force until
the speaker is aligned and held securely to the wall surface. Caution:
do not over tighten! (See Diagram 4)
Diagram 4:
MANUAL
DUAL 8" IN-WALL
SUBWOOFER
IWS88
Specyfikacje produktu
| Marka: | OSD Audio |
| Kategoria: | subwoofer |
| Model: | IWS-88 |
Potrzebujesz pomocy?
Jeśli potrzebujesz pomocy z OSD Audio IWS-88, zadaj pytanie poniżej, a inni użytkownicy Ci odpowiedzą
Instrukcje subwoofer OSD Audio

28 Stycznia 2025
28 Stycznia 2025
5 Stycznia 2025
4 Stycznia 2025
9 Października 2024
9 Października 2024
9 Października 2024
22 Września 2024
22 Września 2024
22 Września 2024
Instrukcje subwoofer
Najnowsze instrukcje dla subwoofer
4 Kwietnia 2025
2 Kwietnia 2025
2 Kwietnia 2025
1 Kwietnia 2025
30 Marca 2025
19 Marca 2025
19 Marca 2025
19 Marca 2025
19 Marca 2025
19 Marca 2025