Instrukcja obsługi Pioneer CA-HR-FD-EVO.001
Pioneer Nie skategoryzowane CA-HR-FD-EVO.001
Przeczytaj poniżej 📖 instrukcję obsługi w języku polskim dla Pioneer CA-HR-FD-EVO.001 (4 stron) w kategorii Nie skategoryzowane. Ta instrukcja była pomocna dla 43 osób i została oceniona przez 6 użytkowników na średnio 4.2 gwiazdek
Strona 1/4
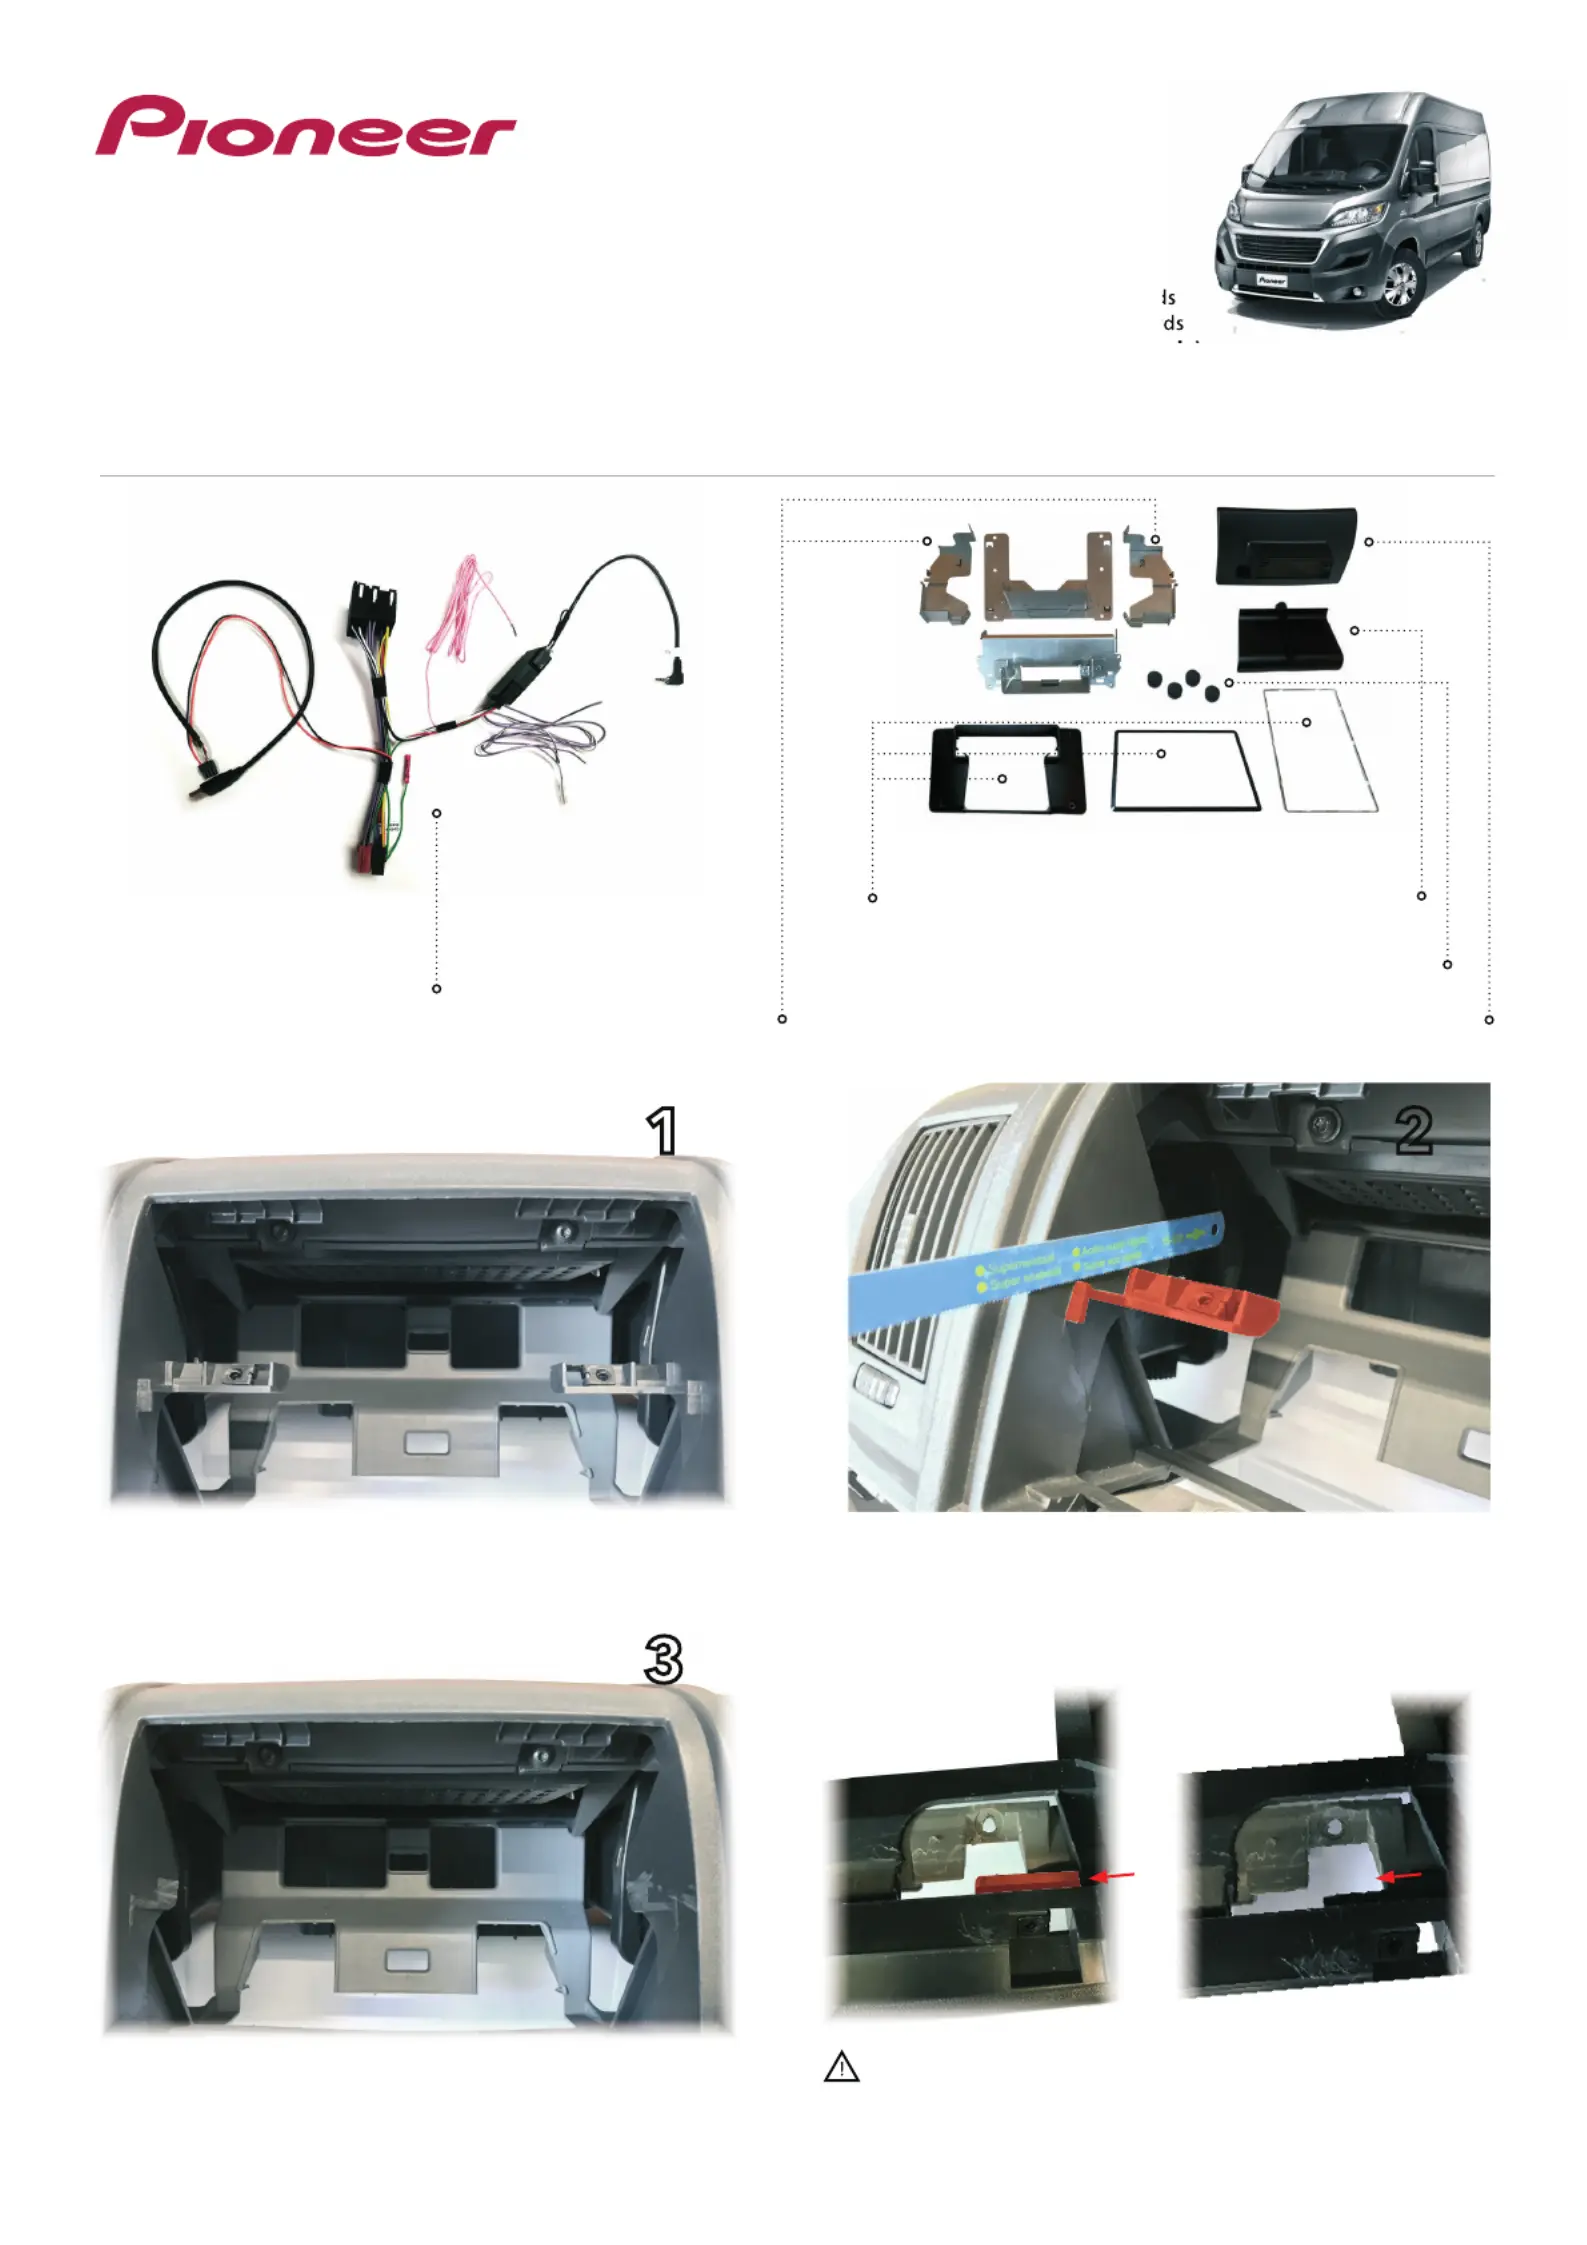
Installation manual SPH-EVO82DAB-DUC | Version 1.0
EN - Installation Manual
Original dashboard
Screen brackets
Interface
Dashboard cover
Screw covers
Cable cover
Screen cover
Result after the modification
Cut out the center supports / support bar
12
3
CA-HR-FD-EVO.001
INSTALLATION KIT FOR SPH-EVO82DAB-DUC
Compatibility:
• Fiat Ducato from 2007 onwards
• Peugeot Boxer from 2007 onward
• Citroen Jumper from 2007 onwar
(open dash platform with ISO only)
Result after the cut
If the van comes with these ridges, please remove by cutting
to make space for the metal brackets.
Specyfikacje produktu
| Marka: | Pioneer |
| Kategoria: | Nie skategoryzowane |
| Model: | CA-HR-FD-EVO.001 |
Potrzebujesz pomocy?
Jeśli potrzebujesz pomocy z Pioneer CA-HR-FD-EVO.001, zadaj pytanie poniżej, a inni użytkownicy Ci odpowiedzą
Instrukcje Nie skategoryzowane Pioneer

31 Stycznia 2025
Instrukcje Nie skategoryzowane
Najnowsze instrukcje dla Nie skategoryzowane
9 Kwietnia 2025
9 Kwietnia 2025
9 Kwietnia 2025
9 Kwietnia 2025
9 Kwietnia 2025
9 Kwietnia 2025
9 Kwietnia 2025
9 Kwietnia 2025
9 Kwietnia 2025
9 Kwietnia 2025