Instrukcja obsługi Russound KPSC
Russound system hi-fi KPSC
Przeczytaj poniżej 📖 instrukcję obsługi w języku polskim dla Russound KPSC (11 stron) w kategorii system hi-fi. Ta instrukcja była pomocna dla 30 osób i została oceniona przez 3 użytkowników na średnio 4.7 gwiazdek
Strona 1/11
KPSC
Keypad
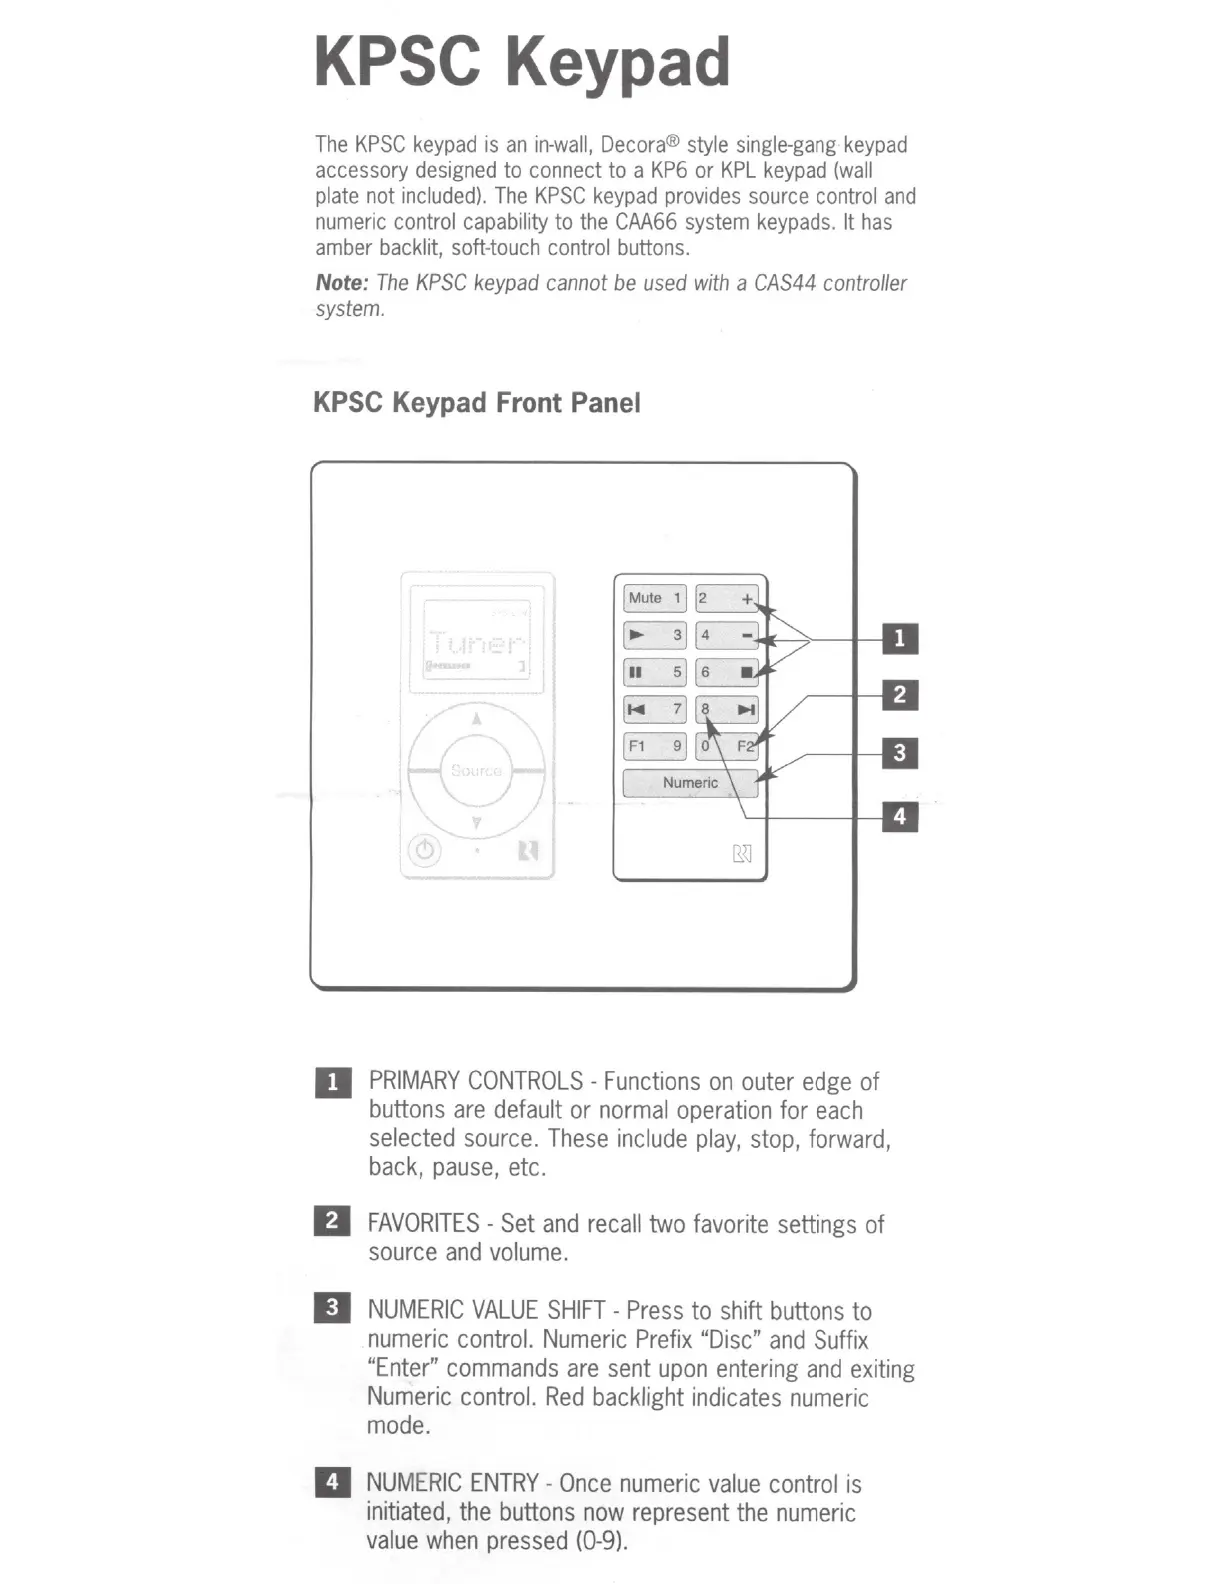
The
KPSC
keypad
is
an
in-wall,
Decora
®
style
single-gang
keypad
accessory
designed
to
connect
to
a
KP6
or
KPL
keypad
(wall
plate
not
included}.
The
KPSC
keypad
provides
source
control
and
numeric
control
capability
to
the
CAA66
system
keypads.
It
has
amber
backlit,
soft-touch
control
buttons.
Note:
The
KPSC
keypad
cannot
be
used
with
a
CAS44
controller
system
.
KPSC
Keypad
Front
Panel
J,
[
11
,r
A
I
~
K
nl
1...:)
uj
mJ
D
PRIMARY
CONTROLS
-
Functions
on
outer
edge
of
buttons
are
default
or
normal
operation
for
each
selected
source.
These
include
play,
stop,
forward,
back,
pause,
etc.
fl
FAVORITES-
Set
and
recall
two
favorite
settings
of
source
and
volume.
II
NUMERIC
VALUE
SHIFT-
Press
to
shift
buttons
to
numeric
control.
Numeric
Prefix
"Disc"
and
Suffix
"Enter"
commands
are
sent
upon
entering
and
exiting
Numeric
control.
Red
backlight
indicates
numeric
mode.
II
NUMERIC
ENTRY
-
Once
numeric
value
control
is
initiated,
the
buttons
now
represent
the
numeric
value
when
pressed
{0-9).
Specyfikacje produktu
| Marka: | Russound |
| Kategoria: | system hi-fi |
| Model: | KPSC |
Potrzebujesz pomocy?
Jeśli potrzebujesz pomocy z Russound KPSC, zadaj pytanie poniżej, a inni użytkownicy Ci odpowiedzą
Instrukcje system hi-fi Russound

4 Października 2024
4 Października 2024
4 Października 2024
4 Października 2024
4 Października 2024
4 Października 2024
4 Października 2024
4 Października 2024
4 Października 2024
4 Października 2024
Instrukcje system hi-fi
Najnowsze instrukcje dla system hi-fi
9 Kwietnia 2025
5 Kwietnia 2025
3 Kwietnia 2025
2 Kwietnia 2025
2 Kwietnia 2025
1 Kwietnia 2025
1 Kwietnia 2025
29 Marca 2025
28 Marca 2025
28 Marca 2025