Instrukcja obsługi Silverstone XE04-4189
Silverstone Sprzęt komputerowy XE04-4189
Przeczytaj poniżej 📖 instrukcję obsługi w języku polskim dla Silverstone XE04-4189 (2 stron) w kategorii Sprzęt komputerowy. Ta instrukcja była pomocna dla 19 osób i została oceniona przez 4 użytkowników na średnio 4.1 gwiazdek
Strona 1/2
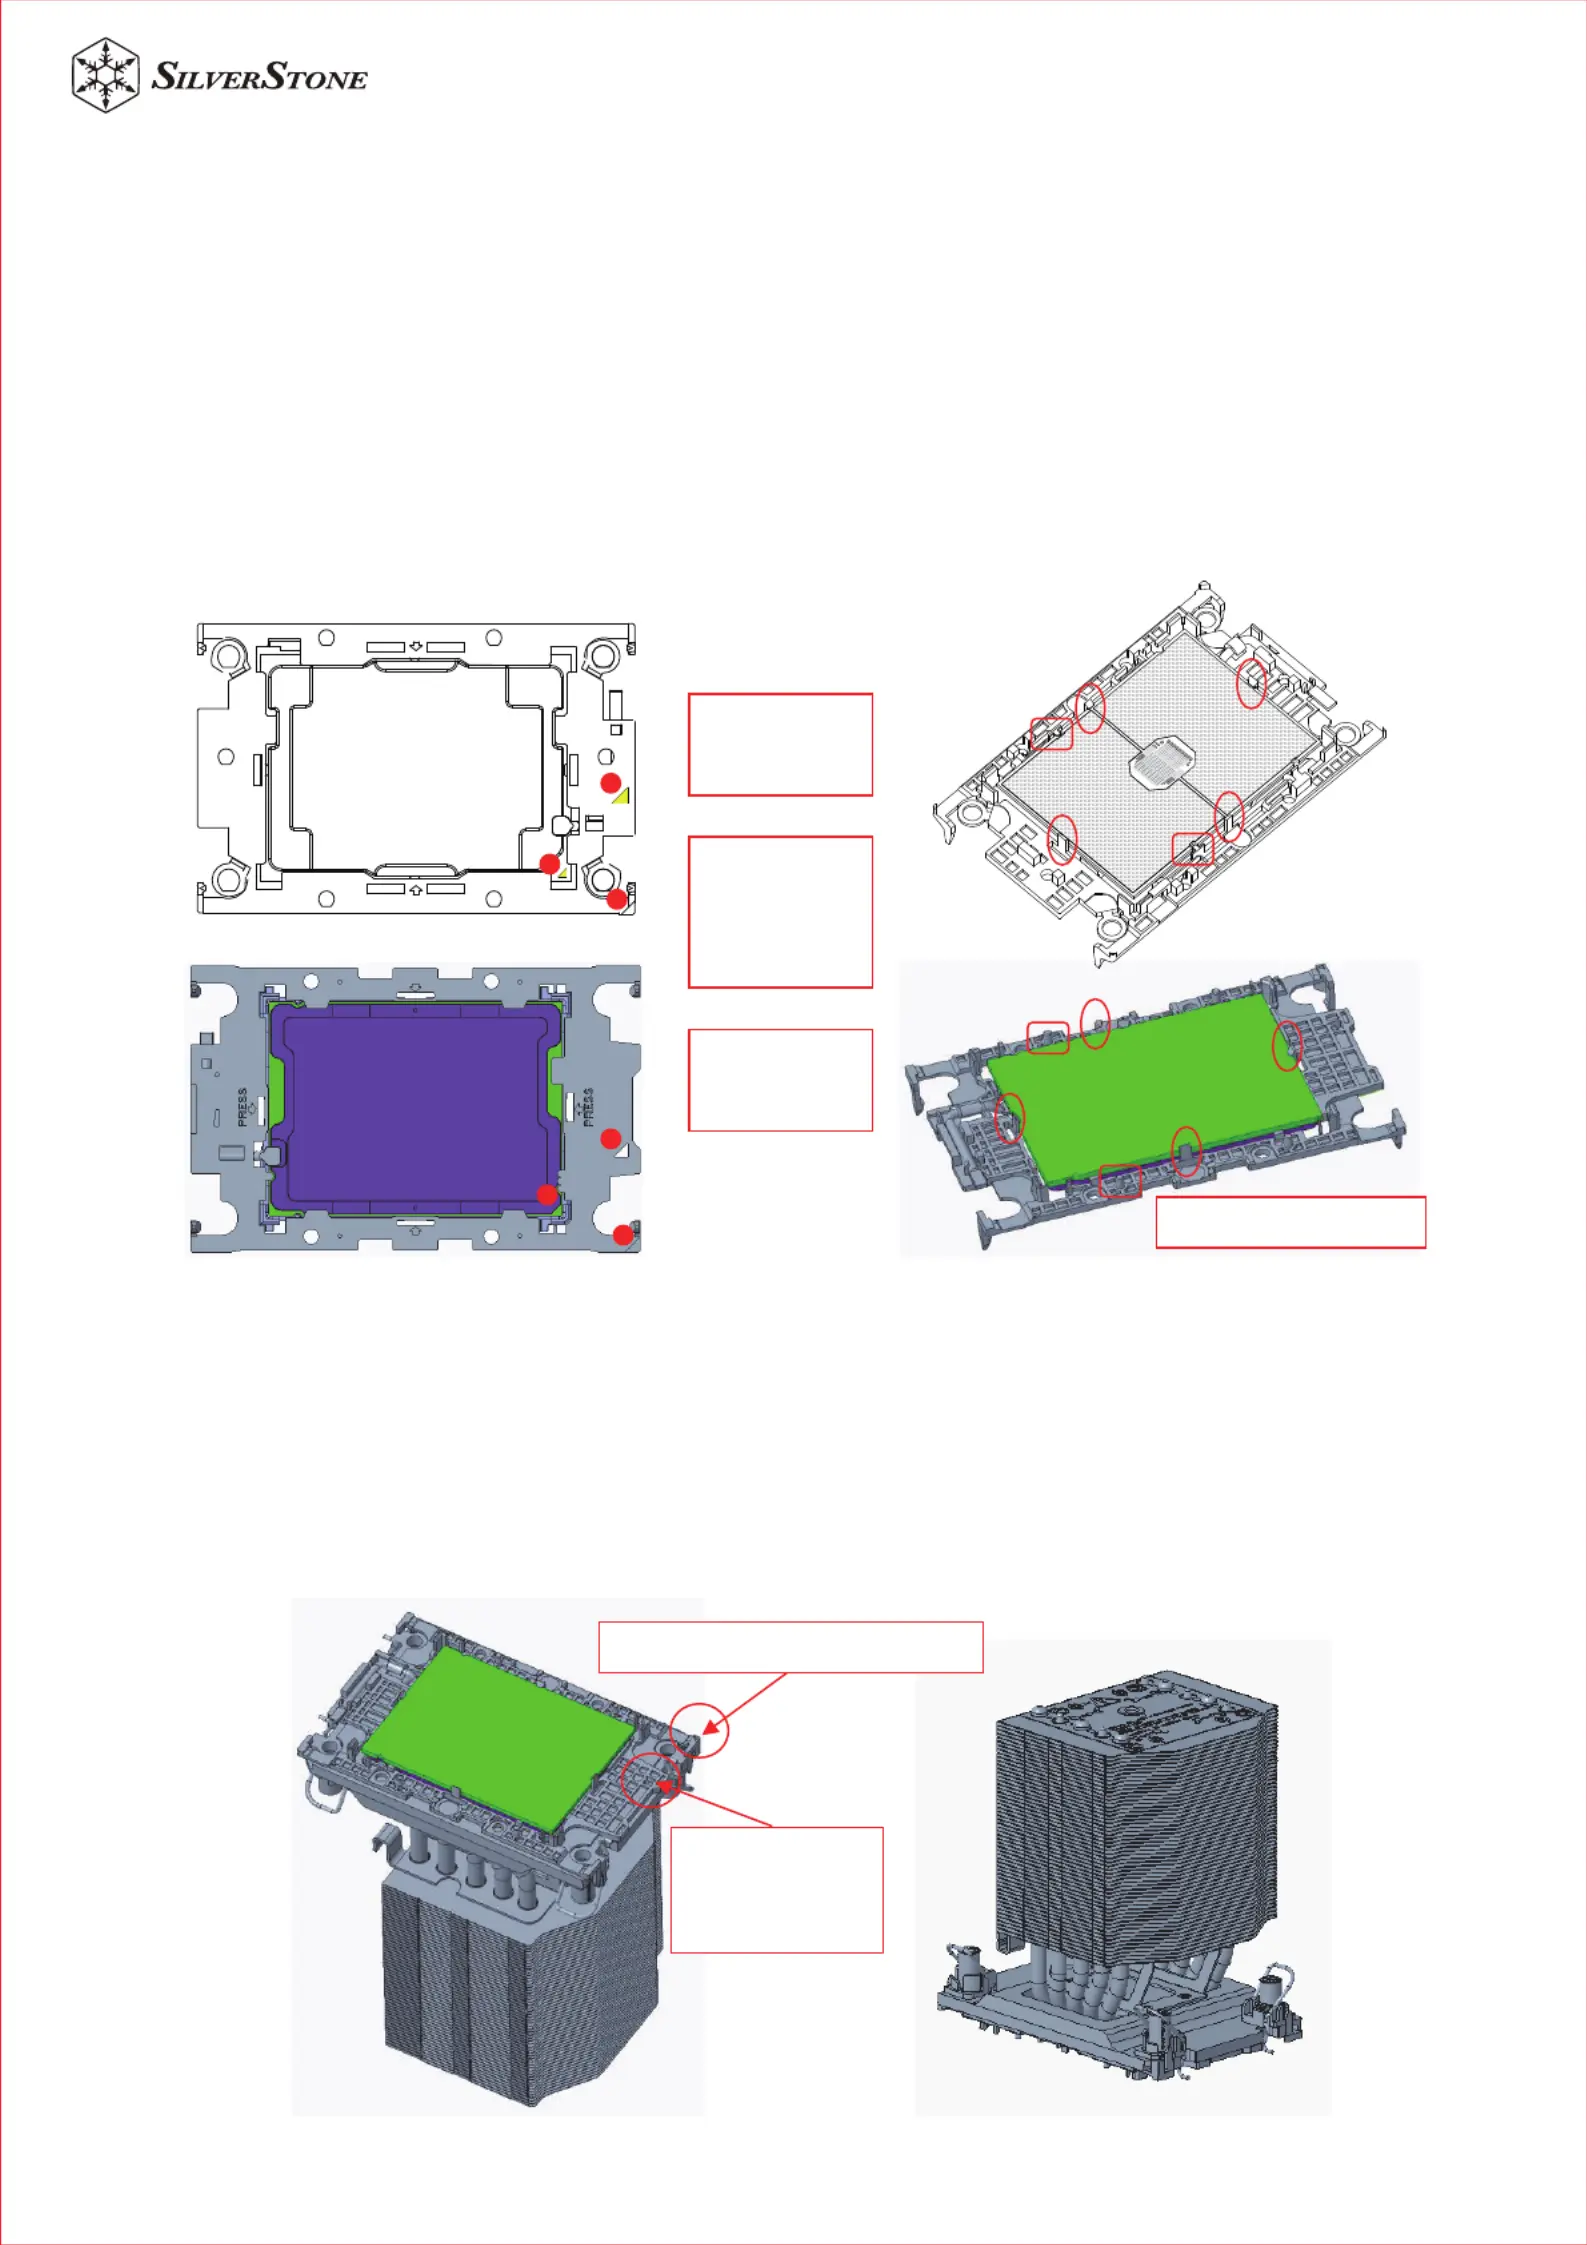
Figure 1Figure 2
Figure 3 Figure 4
Carer Latches and keying ri
Pin 1 d triangle ma on carrier top solirk
Pin 1 how llo
tangle ma on rirk
carer boom de ri�si
Please wear ESD gloves to protect the processor and CPU socket before installation process
Install the processor first with the plastic carrier. Align the golden color triangle mark with the hollow triangle mark on the
carrier, then align the key on the processor IHS cover and side, push the processor and confirm the 4 clips securely
locked (Figure 1 &2)
Note: the carrier latches must be fully engaged with the keying slots on the edges of the processor and the processor
must be securely seated on the carrier after insertion.
1.
2.
Remove the heatsink from its packaging and remove the protection cover of Thermal Interface Material (TIM). The
required amount of TIM has been pre-applied on the bottom of the heatsink. Inspect the pre-applied TIM for any damage
before use.
Identify processor Pin 1 and onboard socket Pin 1 to decide the heatsink installation direction; for certain motherboards,
the Pin 1 location will be different with CPU1 and CPU2. (Figure 3 & 4)
Note: The complete assembly of processor, carrier, and heat sink is called Processor Heat Sink Loading Module (PHLM)
or Processor Heat Sink Module (PHM).
3.
4.
Hw Tangle ollori
Maer on the rk
Carerri
1.
Pin-1 den Gol
Tangle Maerirkr
bothn CPU o
Top and Boo�m
Substrate
2.
Sd Tangle oliri
Maer on the rk
Carerri
3.
1
1
2
2
3
3
XENON (XE) SERIES – Assembly Guide for
LGA4677, LGA4189 Socket Coolers
Specyfikacje produktu
| Marka: | Silverstone |
| Kategoria: | Sprzęt komputerowy |
| Model: | XE04-4189 |
Potrzebujesz pomocy?
Jeśli potrzebujesz pomocy z Silverstone XE04-4189, zadaj pytanie poniżej, a inni użytkownicy Ci odpowiedzą
Instrukcje Sprzęt komputerowy Silverstone

8 Października 2024
8 Października 2024
8 Października 2024
8 Października 2024
8 Października 2024
8 Października 2024
8 Października 2024
8 Października 2024
8 Października 2024
2 Października 2024
Instrukcje Sprzęt komputerowy
Najnowsze instrukcje dla Sprzęt komputerowy
9 Kwietnia 2025
9 Kwietnia 2025
9 Kwietnia 2025
8 Kwietnia 2025
8 Kwietnia 2025
8 Kwietnia 2025
8 Kwietnia 2025
8 Kwietnia 2025
8 Kwietnia 2025
8 Kwietnia 2025