Instrukcja obsługi AV:link SF601
AV:link Wandsteuna SF601
Przeczytaj poniżej 📖 instrukcję obsługi w języku polskim dla AV:link SF601 (2 stron) w kategorii Wandsteuna. Ta instrukcja była pomocna dla 16 osób i została oceniona przez 8 użytkowników na średnio 4.8 gwiazdek
Strona 1/2
SF201, SF401, SF601
Fixed TV Wall Brackets
Item ref: 129.540UK, 129.541UK & 129.542UK
User Manual
These brackets are constructed from reinforced steel allow a screen to be mounted on wall safely. Designed to be easily installed and supplied with to a
all required installation hardware.
Model
SF201
SF401
SF601
Screen size
17” –” 45
26” –” 65
32” –” 75
Max. weight load
20kg
30kg
35kg
Caution:
Please read this manual thoroughly to avoid damage to property or personnel. If unsure of any part of this manual please refer to professional installer
for help:
•This product contains small components that could pose a choking hazard if swallowed, please keep out of reach of children.
•This product is designed for mounting on wall studs or concrete wall. Always ensure the mounting surface will be capable of withstanding the
combined weight of the TV bracket and TV, reinforcement may be required for aged or weak walls.
•Safety gear such as gloves and safety goggles must be worn during the installation. A minimum of two people are required throughout the
installation, failure to do so may result in injury or damage.
•This product is design for indoor use only. The bracket must be inspected at least every two months for loose joints or aged parts.
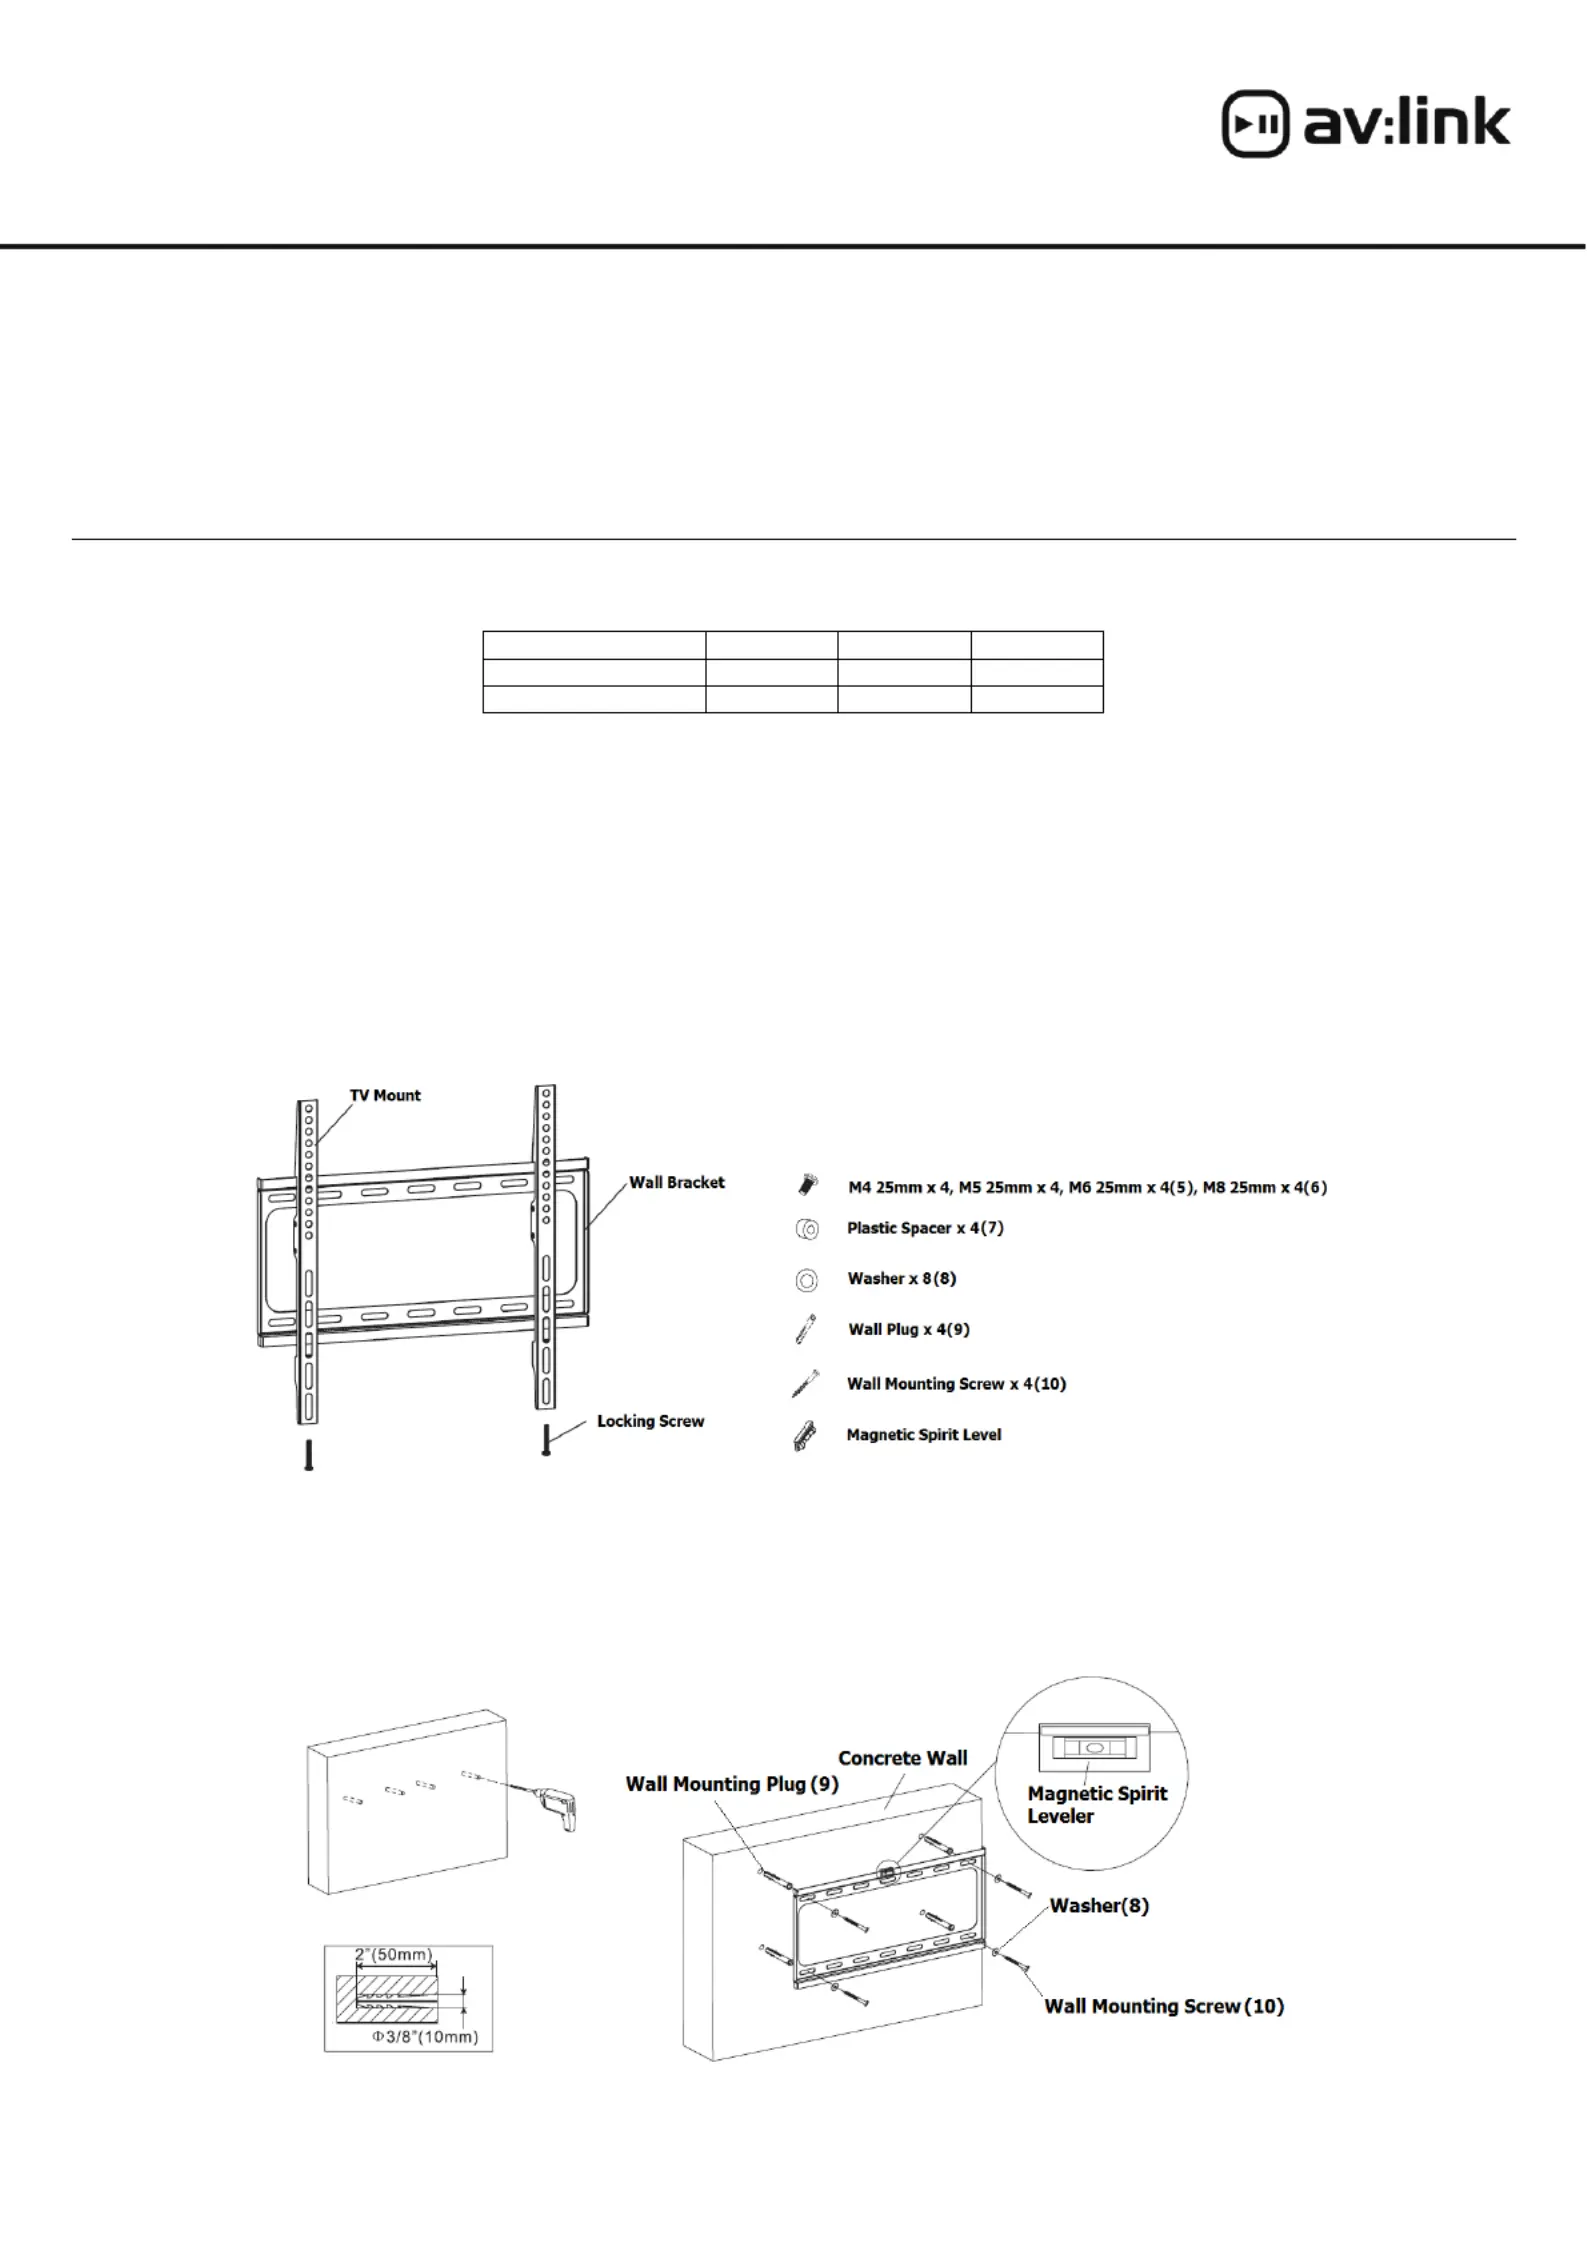
Contents:
Please check all contents list below are included inside the box. If anything is missing please return to the retailer or dealer. ed
For this installation you will also require pencil, tape measurer, electric drill, stud finder and Philip (cross) screwdriver.
Step 1 Fixing wall bracket –
For concrete wall installation first of all work out the height of the installation and ensure it is level using the spirit level. Use a pencil to mark where the
mounting holes will be and use an electric drill to drill a hole that is around 10mm in diameter and 50mm deep. Insert the wall plugs into the holes and
install the wall bracket as follows.
Specyfikacje produktu
| Marka: | AV:link |
| Kategoria: | Wandsteuna |
| Model: | SF601 |
Potrzebujesz pomocy?
Jeśli potrzebujesz pomocy z AV:link SF601, zadaj pytanie poniżej, a inni użytkownicy Ci odpowiedzą
Instrukcje Wandsteuna AV:link

4 Grudnia 2024
Instrukcje Wandsteuna
Najnowsze instrukcje dla Wandsteuna
29 Stycznia 2025
28 Stycznia 2025
14 Stycznia 2025
8 Stycznia 2025
7 Stycznia 2025
5 Stycznia 2025
5 Stycznia 2025
4 Stycznia 2025
4 Stycznia 2025
3 Stycznia 2025