Instrukcja obsługi Coleman Vela
Przeczytaj poniżej 📖 instrukcję obsługi w języku polskim dla Coleman Vela (2 stron) w kategorii namiot. Ta instrukcja była pomocna dla 23 osób i została oceniona przez 4 użytkowników na średnio 4.8 gwiazdek
Strona 1/2
Connect Frame to Tent
– Insert one end of main tent pole
onto pin of pin & ring system at tent
corner. (illus. 3)
– Go to opposite end of pole and
gradually apply pressure to the pole
forming an arch until you are able to
insert the pin into the pole.
– Repeat for second pole. (illus. 4)
1
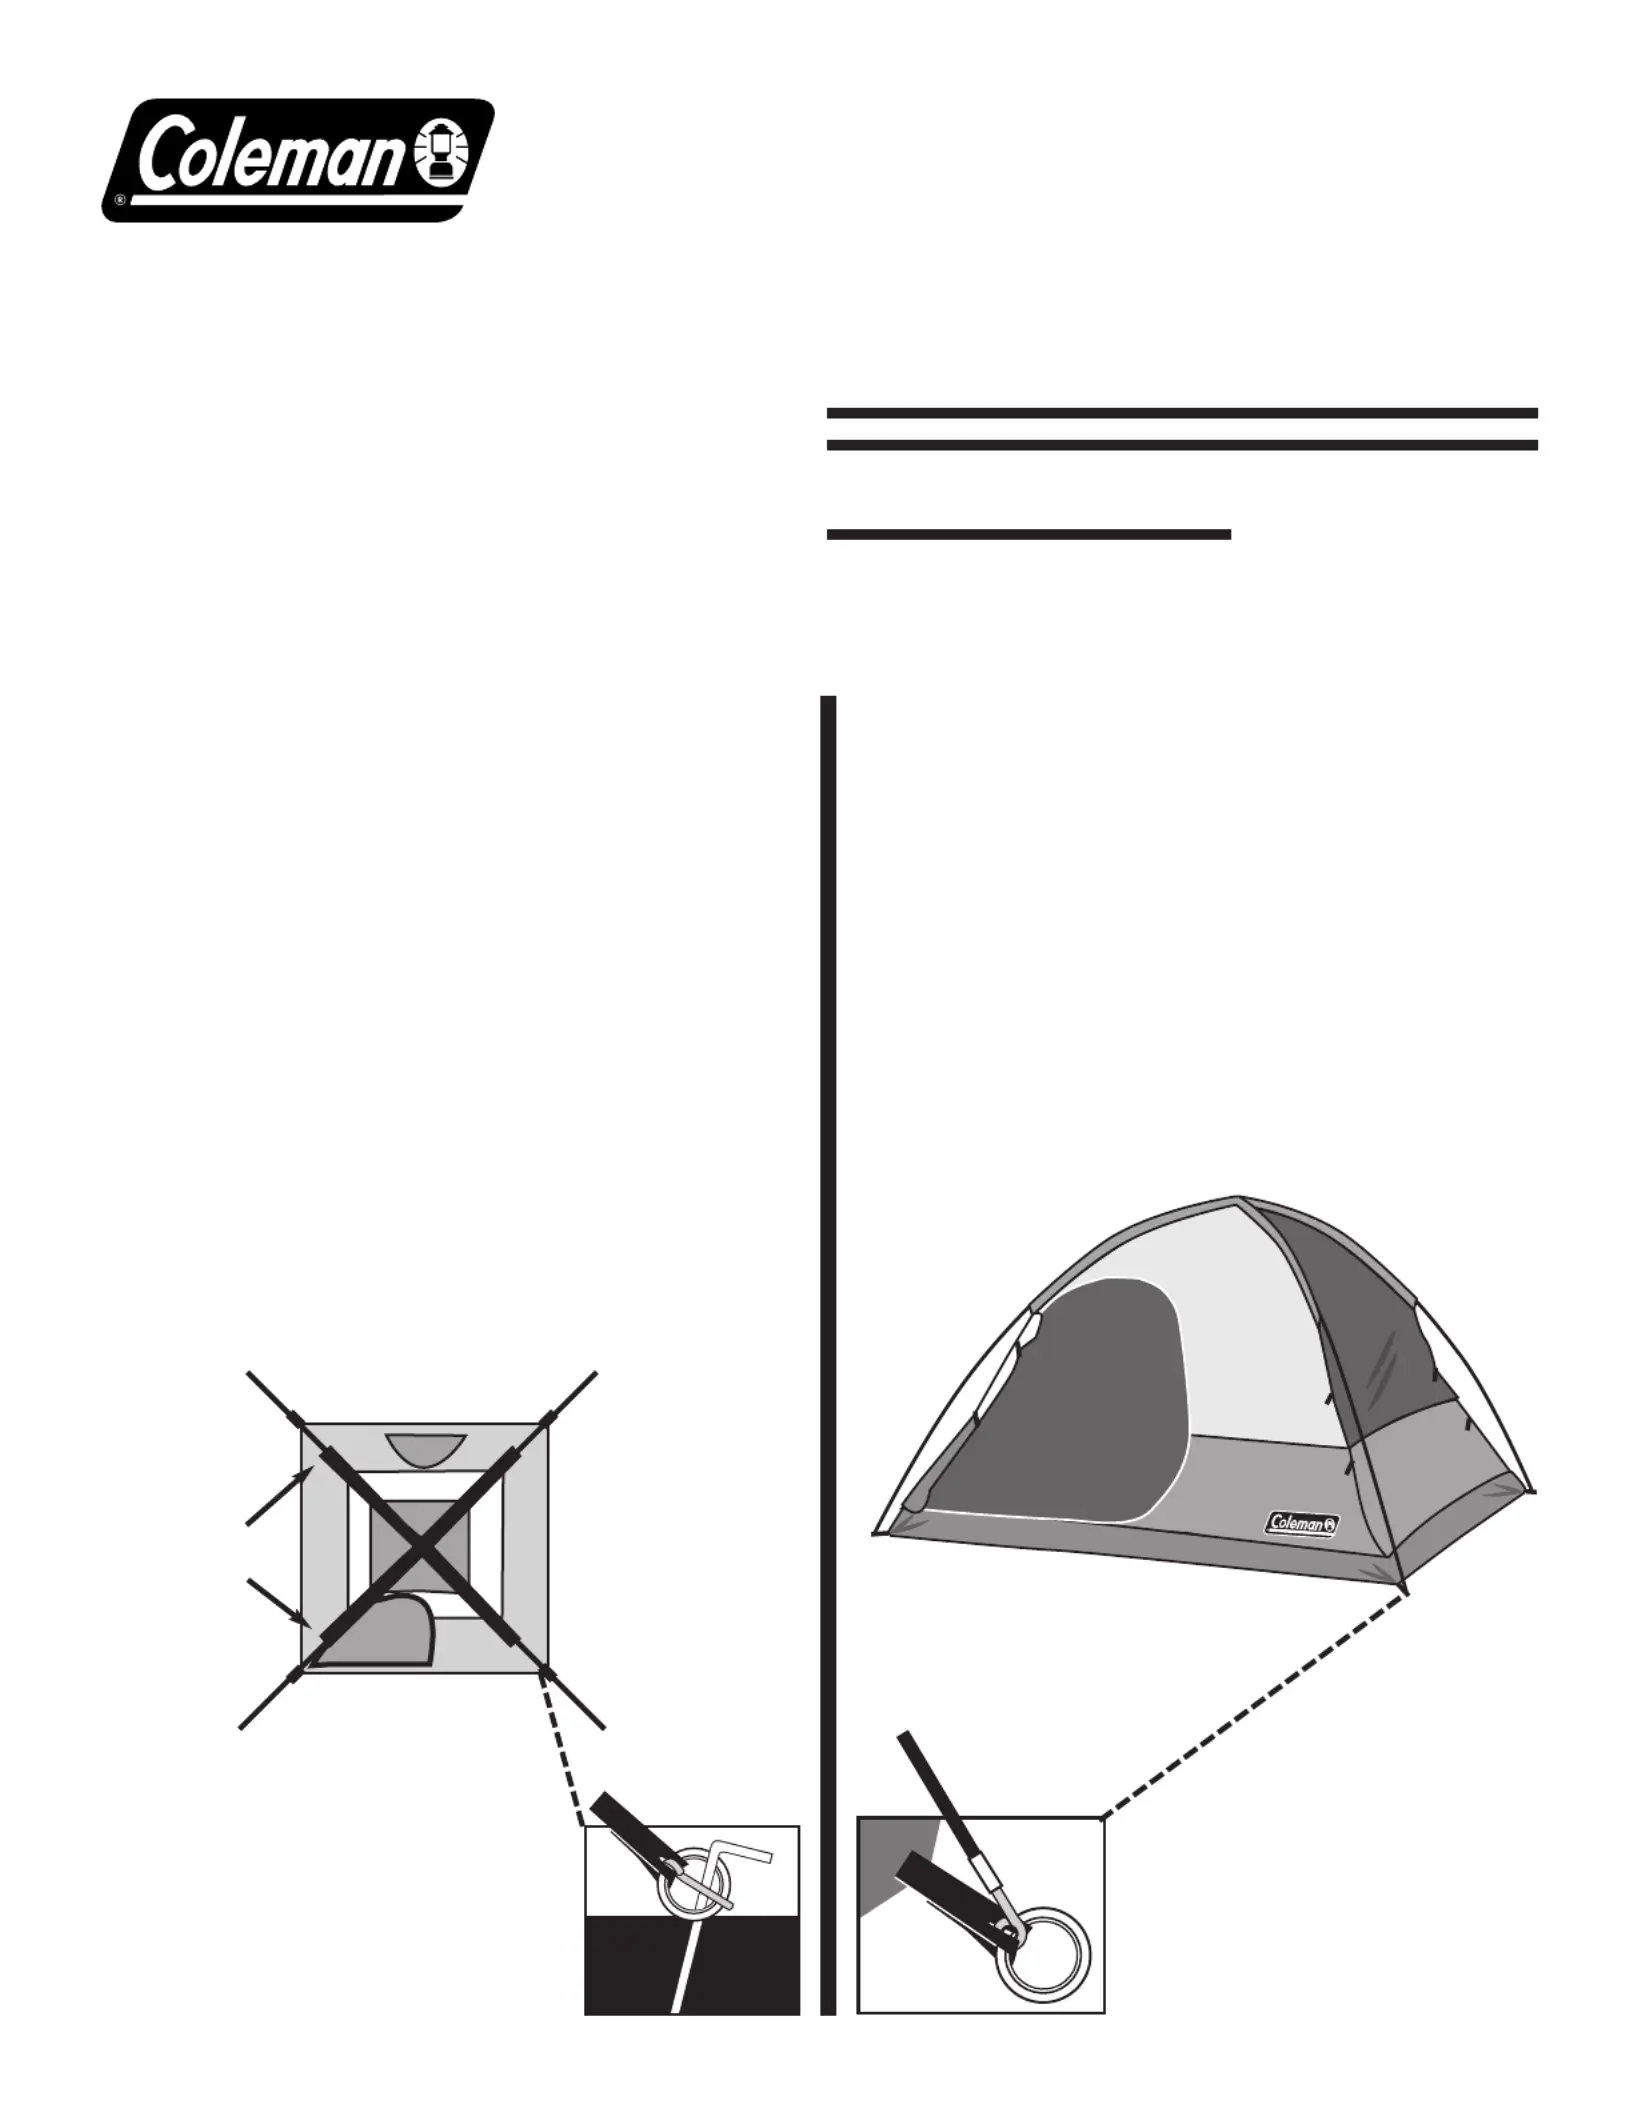
Layout & Positioning
of Tent, Pole Assembly
– Layout and position tent with door
facing desired direction. (illus. 1)
– Unzip door.
– Stake down tent using the rings of the
pin & ring system at the corners of the
tent. Keep the floor taut. (illus. 2)
– Assemble frame poles by
interlocking shock-corded poles.
This will make two long poles.
– Insert the poles diagonally into pole
sleeves.The center of the poles should
cross forming an “X” in the middle of
tent. (illus. 1)
2
Assembled
poles
inserted
through
pole
sleeves
illus. 1
illus. 4
Tent frame set-up
illus. 2
Tent stake through ring
illus. 3
Insert pole end onto
pin & ring
VELA
®
12’x11’
When You Are Ready To Set
Up Your Tent
– Select a level campsite clear of
rocks, branches and other hard
or sharp objects.
– Do not set up your tent under trees.
–For best results in windy conditions,
do not position the door of tent
into the wind.
(1) Rainfly
Pole
Rainfly Part No.
9161-1041
(2) Main Tent
Poles
POLE ASSEMBLYPARTS
Instructions apply to Part Number 9161-121
Part No. 9161-1021
Part No. 9161-1031
Specyfikacje produktu
| Marka: | Coleman |
| Kategoria: | namiot |
| Model: | Vela |
Potrzebujesz pomocy?
Jeśli potrzebujesz pomocy z Coleman Vela, zadaj pytanie poniżej, a inni użytkownicy Ci odpowiedzą
Instrukcje namiot Coleman

28 Grudnia 2024
28 Grudnia 2024
17 Września 2024
16 Września 2024
16 Września 2024
16 Września 2024
15 Września 2024
15 Września 2024
15 Września 2024
15 Września 2024
Instrukcje namiot
Najnowsze instrukcje dla namiot
31 Marca 2025
30 Marca 2025
29 Marca 2025
29 Marca 2025
29 Marca 2025
29 Marca 2025
29 Marca 2025
29 Marca 2025
29 Marca 2025
28 Marca 2025