Instrukcja obsługi Digi XBee-PRO PKG
Digi
Niesklasyfikowane
XBee-PRO PKG
Przeczytaj poniżej 📖 instrukcję obsługi w języku polskim dla Digi XBee-PRO PKG (2 stron) w kategorii Niesklasyfikowane. Ta instrukcja była pomocna dla 14 osób i została oceniona przez 7.5 użytkowników na średnio 4.1 gwiazdek
Strona 1/2

Getting Guide Started
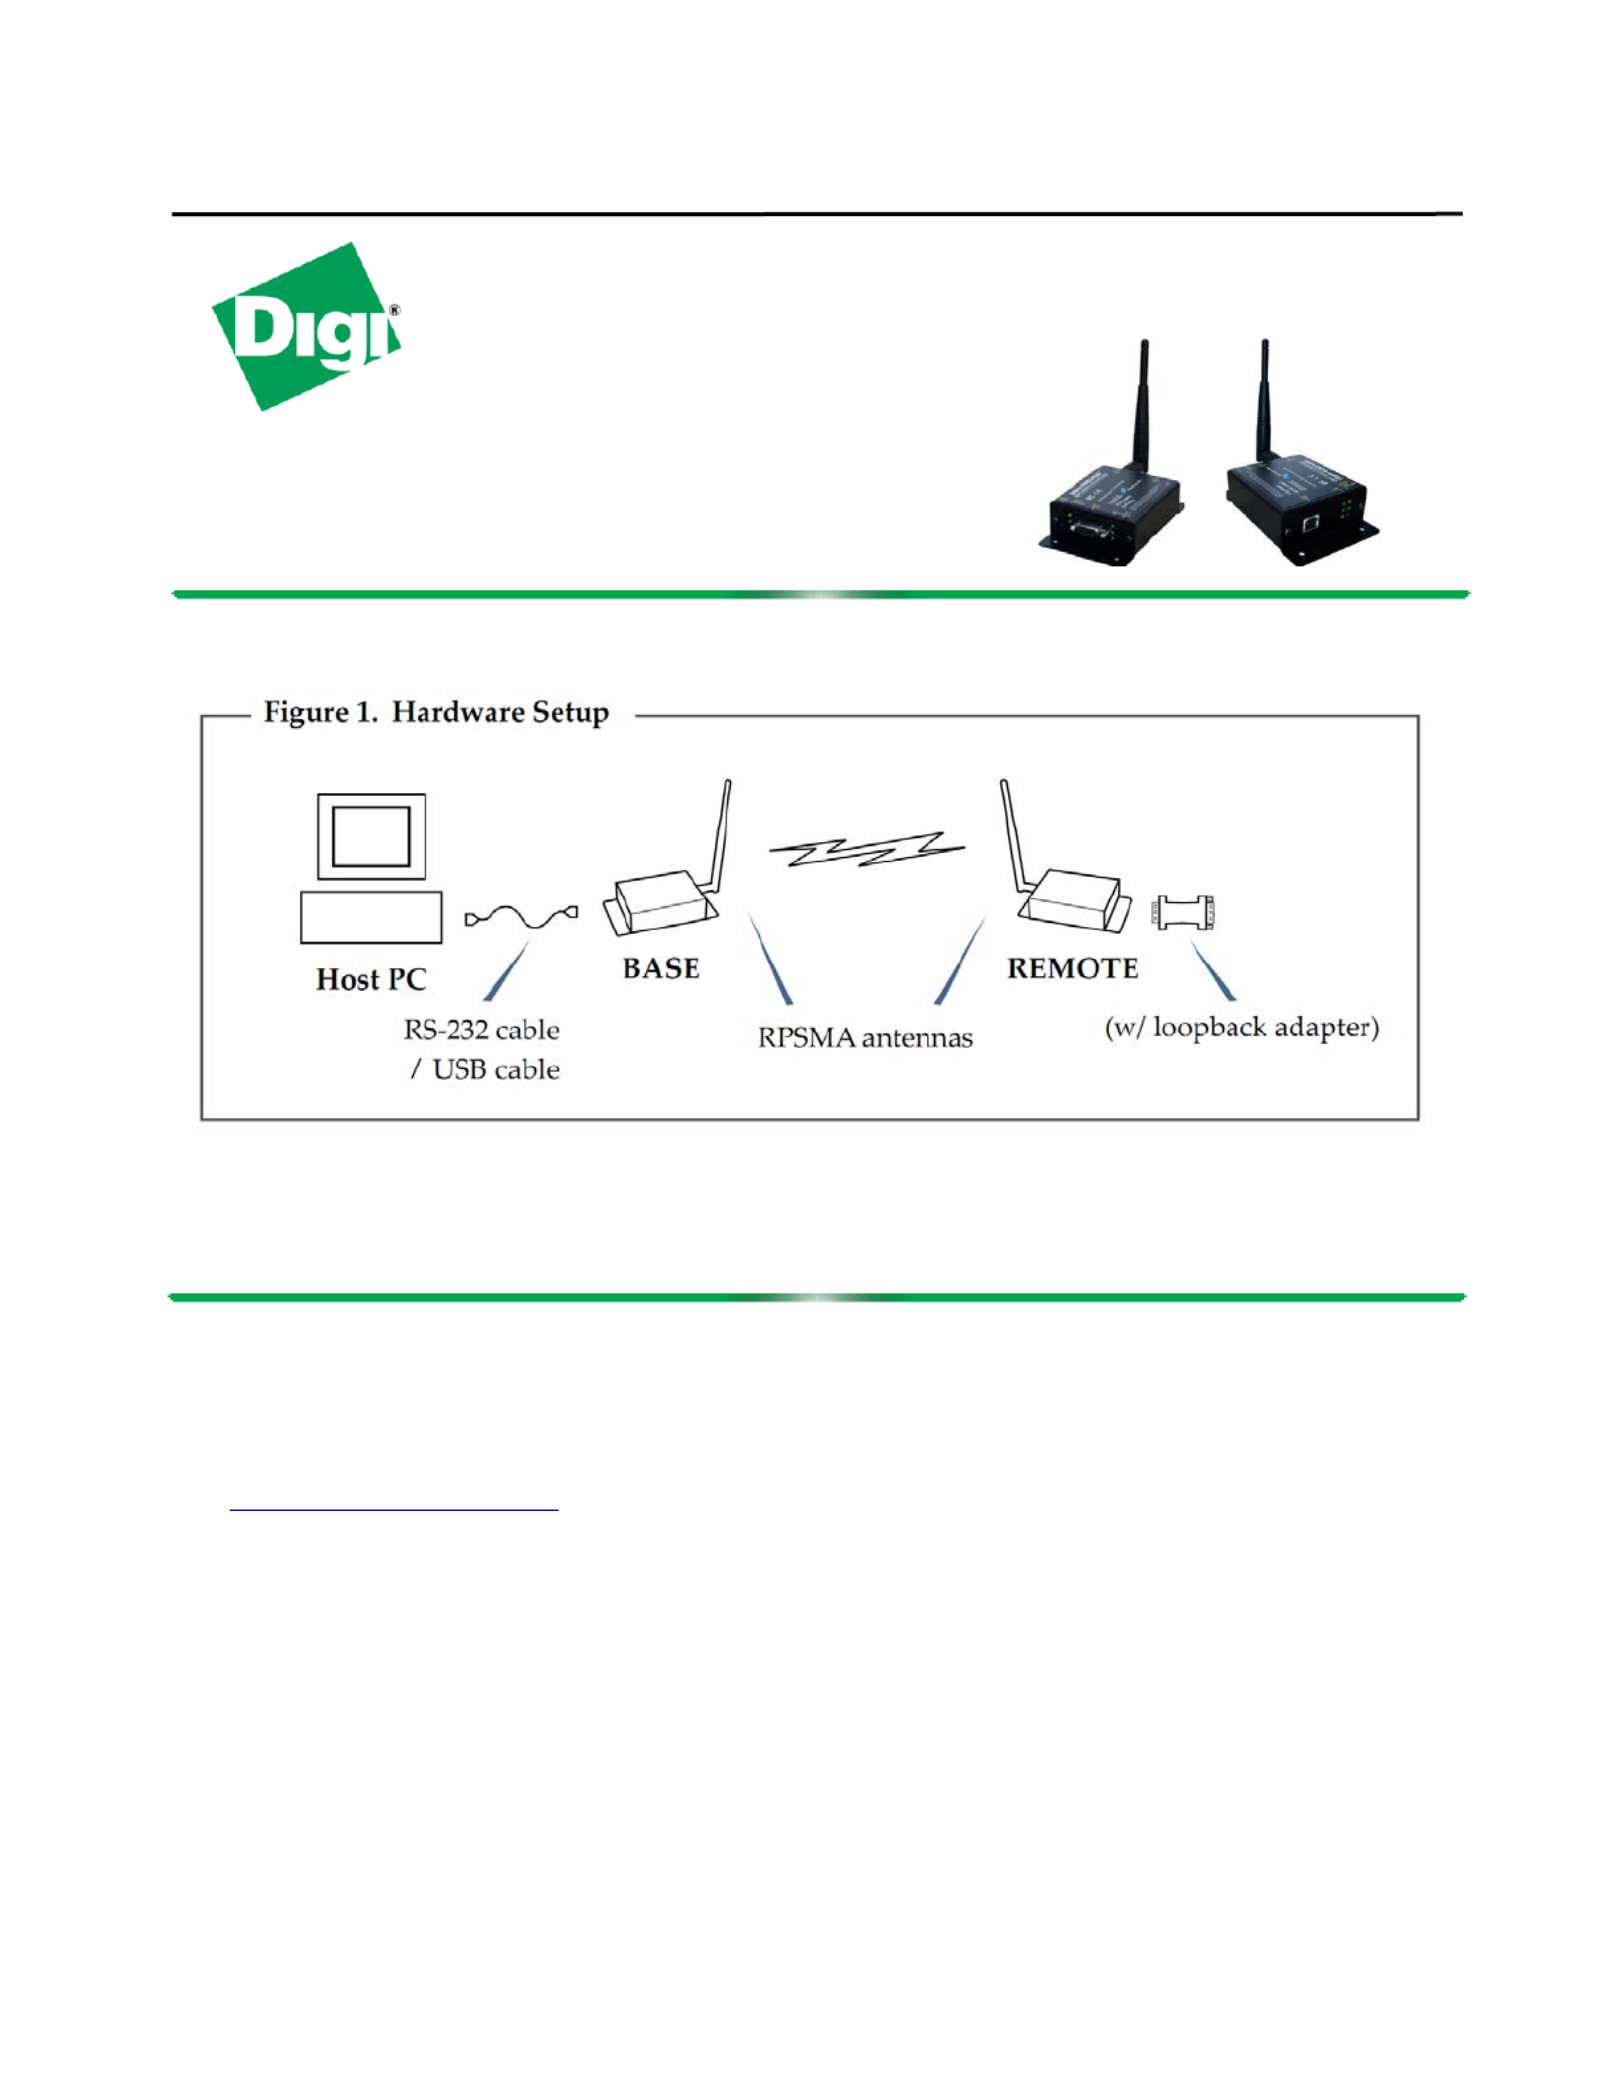
Connect the Hardware
Connect the hardware as shown in the following images:
Note: To run a successful range test, the remote end must be an RS-232 device.
Set Up Range Test
Install X-CTU Software
X-CTU is a stand-alone tool for configuring XBee devices. It is also used to run a range test and
is included on the Hardware and Software Setup CD. X-CTU can also be found on the website
at: http://www.digi.com/xctu
To install X-CTU:
1. Insert the Hardware and Software Setup CD in the PC’s CD/DVD drive.
2. . On the Home page, click Gateway, Host, Enterprise Documentation/Software
3. . Click X-CTU
4. Click Install X-CTU.
5. When installation completes, start X-CTU by double-clicking on the X-CTU icon placed on
your desktop or by selecting: Start > Programs > Digi > X-CTU
The X-CTU software is ready to be used.
XBee-PRO® 802.15.4 PKG-R &
PKG-U RF Modems

Install USB Drivers (For the XBee-PRO USB PKG version only)
The XBee-PRO USB PKG is a “plug-and-play” device that should be detected by the PC
automatically. To interface between the modem and a PC, two drivers must be installed: a USB
driver and a virtual COM port driver that makes the USB port look and perform like a physical
COM port. After the modem is detected, a wizard for installing the USB driver is launched. The
USB driver is included on the Hardware and Software Setup CD.
To install the two USB drivers:
1. Connect the XBee-PRO USB PKG to a PC using a USB cable. The New Hardware Wizard
dialog box will load.
2. Verify that the Hardware and Software Setup CD is inserted into the CD/DVD drive.
3. . Select Install from a specific list or location (Advanced); then click Next
4. Select Search for the best driver in these locations and search removable media (CD-
ROM). Click Next. A Hardware Installation Windows Logo Testing alert box is displayed.
5. . Click Continue Anyway
6. . Click Finish
You will be prompted to install another driver, the virtual COM port driver. Repeat steps 3
through 6 to install this driver.
Perform Range Test
1. Launch the X-CTU Software: Start > Programs > Digi > X-CTU
2. Under the PC Settings tab, select the PC serial COM port that will be used. The standard
COM port for the 9-pin serial port is COM 1. The USB ports will be labeled as Digi PKG-U
Serial Port Adapters and are assigned a number based on your PC's settings.
3. Verify that the baud rate and data settings match the internal settings of the radios. The
default settings for the radios are Baud Rate: 9600, Flow Control: HARDWARE, Data Bits:
8, Parity: NONE, and Stop Bits: 1.
4. Select the Range Test tab.
5. (Optional) Check the RSSI checkbox to enable the Received Signal Strength Indicator. The
RSSI value indicates the signal strength of the last packet that the radio received.
6. Click Start to begin the range test.
7. Monitor the link quality by reading the Percent section on the Range Test tab. This section
displays the running percentage of good packets sent to the receiving radio and looped back
to the base.
8. Click Stop to end the range test.
Toll-free phone U.S.A. & Canada: (866) 765-9885
Worldwide: (801) 765-9885
Online support: http://www.digi.com/support/eservice/login.jsp
Specyfikacje produktu
Marka: | Digi |
Kategoria: | Niesklasyfikowane |
Model: | XBee-PRO PKG |
Potrzebujesz pomocy?
Jeśli potrzebujesz pomocy z Digi XBee-PRO PKG, zadaj pytanie poniżej, a inni użytkownicy Ci odpowiedzą
Instrukcje Niesklasyfikowane Digi
3 Października 2024
3 Października 2024
3 Października 2024
3 Października 2024
3 Października 2024
3 Października 2024
3 Października 2024
23 Września 2024
22 Września 2024
22 Września 2024
Instrukcje Niesklasyfikowane
- Niesklasyfikowane Best Service
- Niesklasyfikowane Taylor
- Niesklasyfikowane Ambient Weather
- Niesklasyfikowane Lehle
- Niesklasyfikowane Kubo
- Niesklasyfikowane LawnMaster
- Niesklasyfikowane Fortinge
- Niesklasyfikowane Super Rod
- Niesklasyfikowane Grüniq
- Niesklasyfikowane CamRanger
- Niesklasyfikowane Televés
- Niesklasyfikowane 2hp
- Niesklasyfikowane Red Digital Cinema
- Niesklasyfikowane Nabo
- Niesklasyfikowane DigitSole
Najnowsze instrukcje dla Niesklasyfikowane
29 Stycznia 2025
29 Stycznia 2025
29 Stycznia 2025
29 Stycznia 2025
29 Stycznia 2025
29 Stycznia 2025
29 Stycznia 2025
29 Stycznia 2025
29 Stycznia 2025
29 Stycznia 2025