Instrukcja obsługi Ebro TTX 210
Ebro Niesklasyfikowane TTX 210
Przeczytaj poniżej 📖 instrukcję obsługi w języku polskim dla Ebro TTX 210 (3 stron) w kategorii Niesklasyfikowane. Ta instrukcja była pomocna dla 28 osób i została oceniona przez 6 użytkowników na średnio 4.1 gwiazdek
Strona 1/3
TTX 200 Type T Core Thermometer Operating Instructions
Congratulations on the purchase of the product. We hope that you can make use of this product for a long time
and it helps you with your work. Powered by a replaceable lithium battery, the thermometer is a handy,
temperature measurement device for a whole range of measurement and control applications.
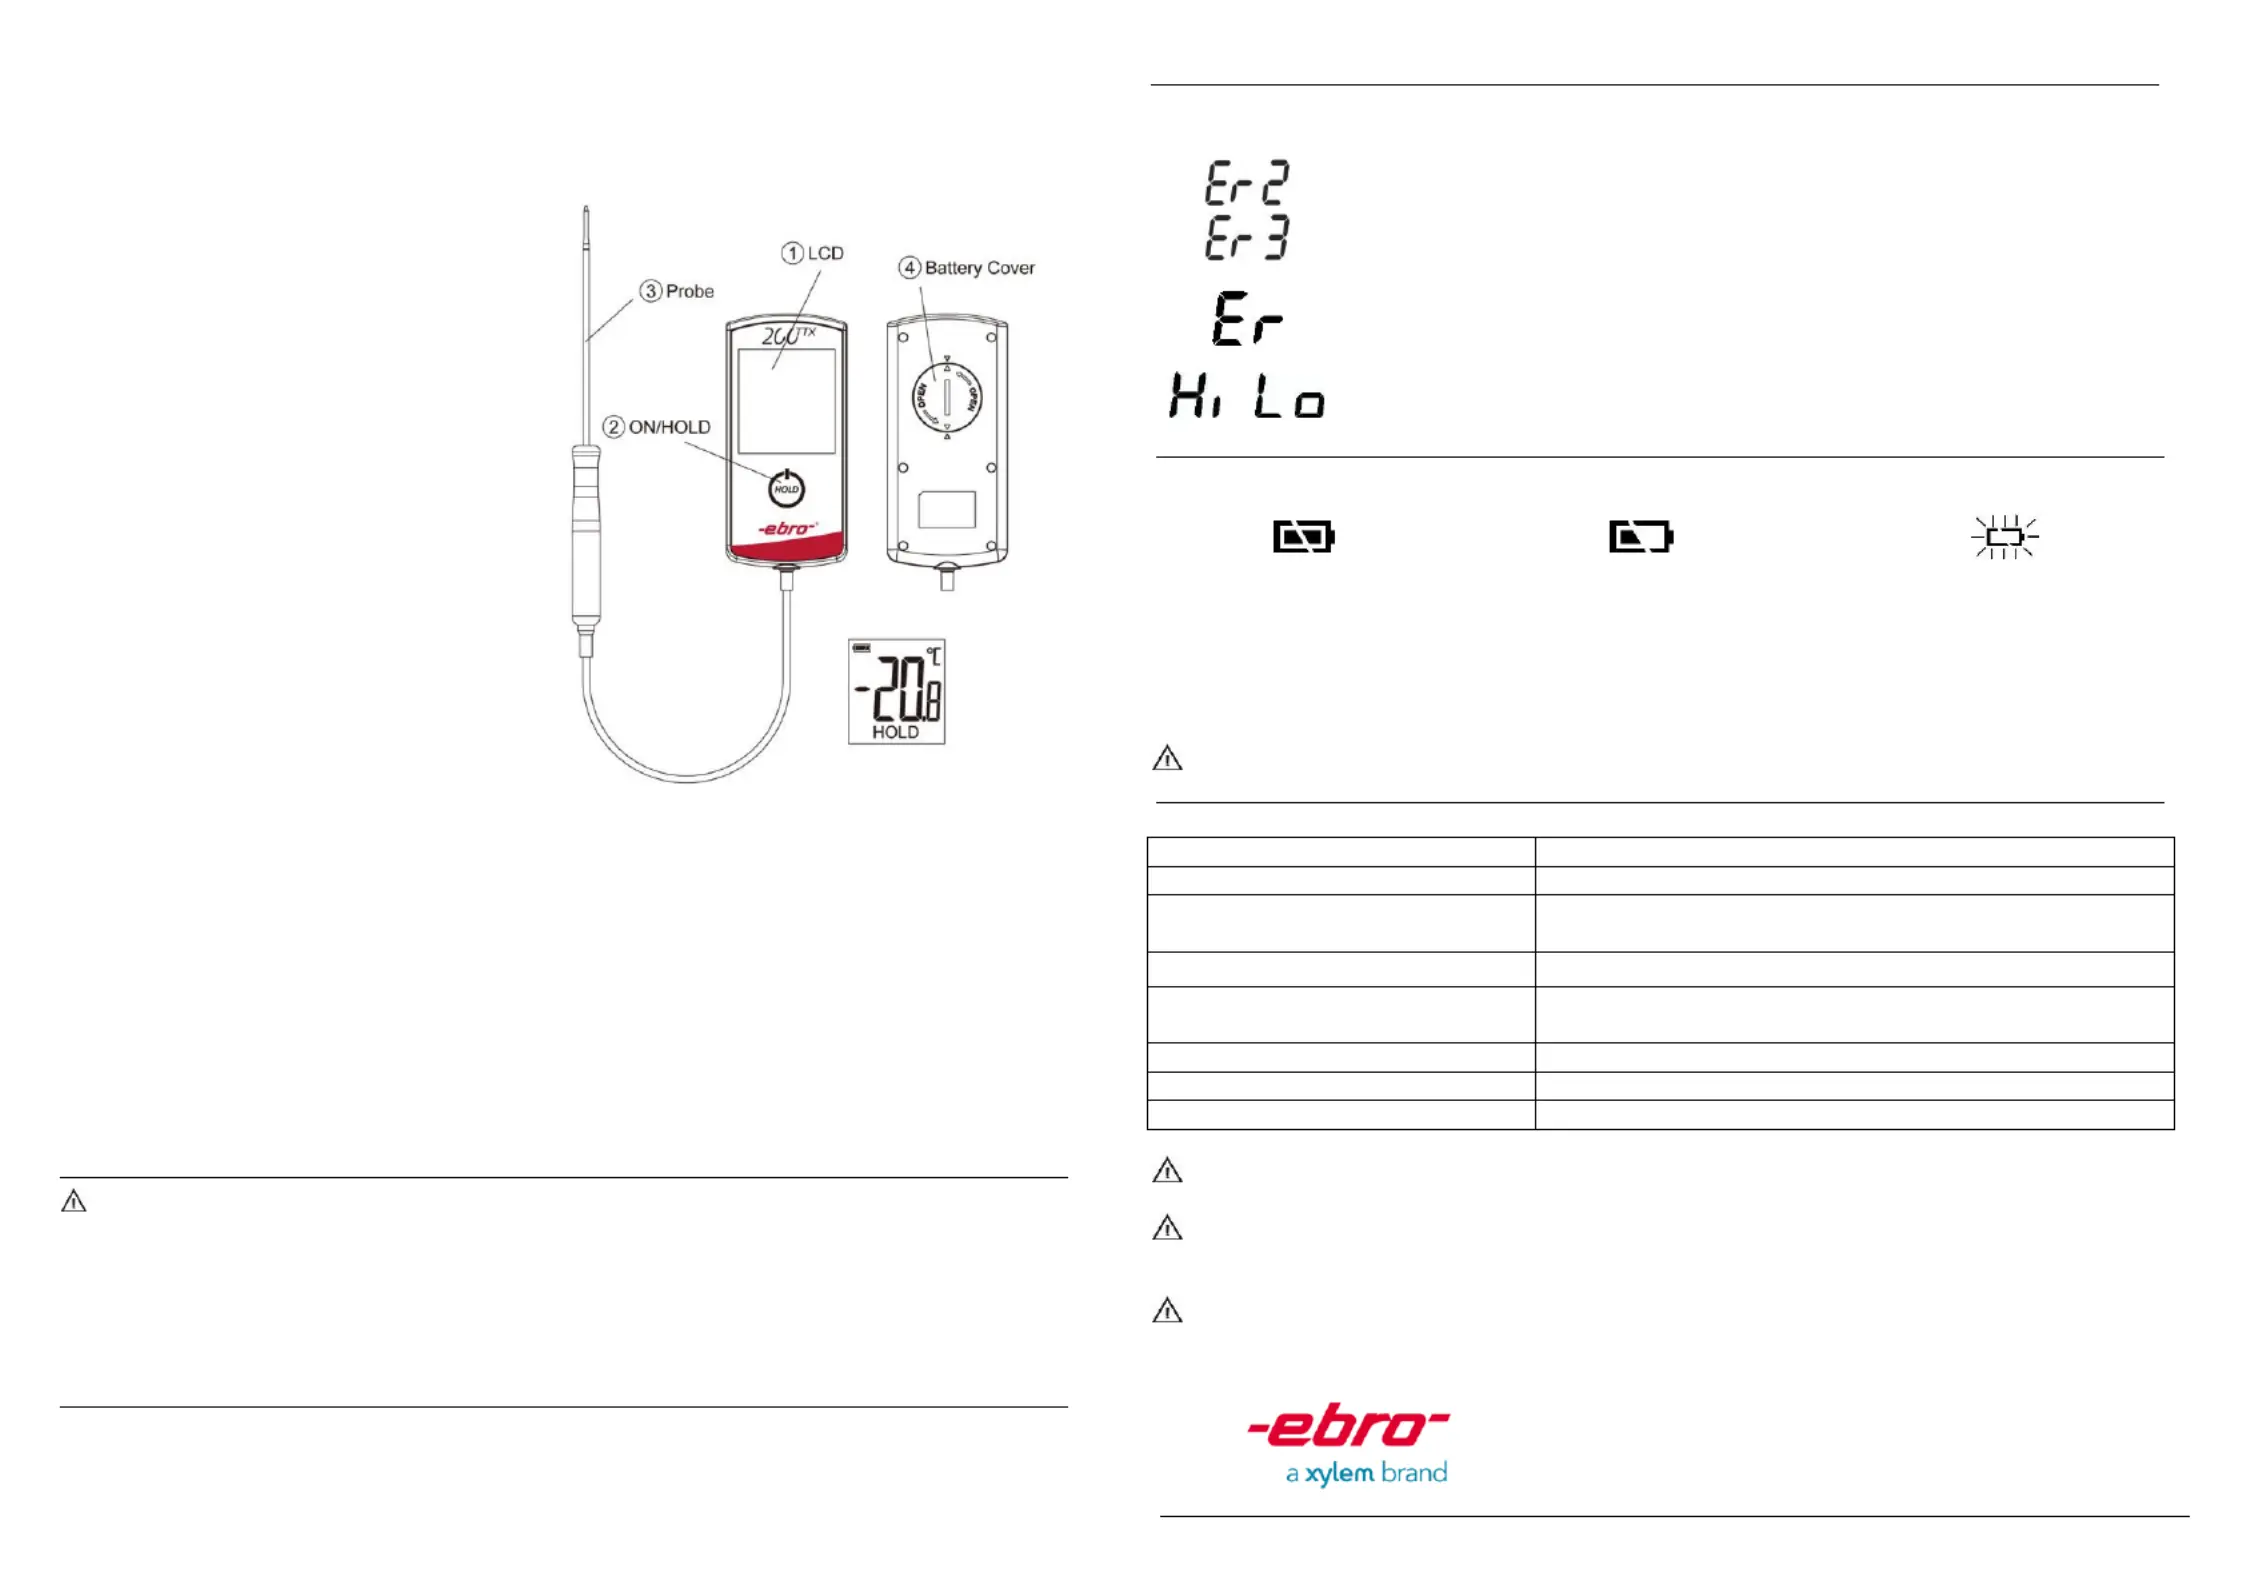
① LCD
② ON/HOLD
③ Thermocouple Probe
④ Battery Cover
OPERATION
1. Power on
To switch the thermometer on,
keep ON/HOLD () pressed ②
for approximately one second.
2. Display LCD
All necessary information is
displayed on the LCD. The individual symbols
have the following meanings:
2.1 Display for current
measured values
2.2 Minus sign
(negative measured values)
2.3 Battery status indicator
2.4 HOLD Auto shut down after 10 minutes “”--
2.5 Temperature unit
3. Select the required unit of measurement °C or °F:
Switch on the device by pressing ON/HOLD (). As soon "Ebro" is shown, press ON/HOLD () again for 3 ②②
seconds and release. The settings menu is active and the current unit is shown.
Press ON/HOLD () once, the display will switch to next unit. ②
Press ON/HOLD (for more than 2 sec, the current unit will be stored, and then the settings menu will be ②)
left.
4. Measuring temperature
4.1 As soon as switch on the device, start to take a temperature reading every second.
4.2 Press ON/HOLD () once, the device stops measuring and the last reading is shown on the LCD. ②
“HOLD” is shown on the LCD.
4.3 Press ON/HOLD () again, the device starts measuring again. ②
* The last measured value is frozen and the thermometer deactivates itself automatically after about 10
minutes to
save battery power.
CAUTION
The thermometer should be protected from the following:
1. Electro Static Discharge
2. ”Thermal shock” caused by large or abrupt ambient temperature changes.
- allow 30 minutes for unit to stabilize before use when exposed to “thermal shock”.
3. Do not leave the unit on or near objects of high temperatur e.
4Keep out of reach of all children..
STORAGE & CLEANING
Clean the device with a damp cloth. Do not use any solvents such as Acetone as they corrode the plastic.
Isopropyl alcohol may be used to disinfect. Do not submerge any part of the thermometer. The thermometer
should be stored at room temperature between 20 to + (-4~149°F). –65°C
LCD ERROR MESSAGES
The thermometer incorporates visual diagnostic messages as follows:
「」
「」
‘Er2’ is displayed when the thermometer is exposed to rapid changes in the ambient
temperature. The thermometershould be allowed plenty of time (minimum 30 minutes)
to stabilize to the working/room temperature.
‘Er3’ is displayed when the ambient temperature exceeds -20
o
C(-4°F) or +60
o
C°F). (140
「」
Error 5~9, for all other error messages it is necessary to reset the thermometer. To reset
it, turn the instrument o, remove the battery and wait for a minimum of one minute,
reinsert the battery and turn on. If the error message remains please contact the Service
Department for further assistance.
「」」「
‘Hi’ or ’Lo’ is displayed when the temperature being measured is outside of the
measurement range.
BATTERY
The thermometer incorporates visual low battery indication as follows:
‘Battery OK’:
measurements
are possible
‘Battery Low’: battery needs to be
replaced, measurements are still
possible
‘Battery Exhausted’:
measurements are not possible
BATTERY REPLACEMENT
When the ‘Low Battery’ icon indicates the battery is low, the battery should be replaced immediately with a
CR2450 lithium cell. The battery is located under the twist cover at the rear of the thermometer. Please note: It
is important to turn the instrument o before replacing the battery otherwise the thermometer may malfuncti on.
Dispose of used battery properly and keep away from children.
SPECIFICATION
Measurement Range
-30~199.9°C (-~391.8°F) 22
Operating Range
-260°C (-4~140°F) 0~
Accuracy
± 0.5°C(0.9°F) at -30~100°C (-22~212°F) ,
1% of reading at 100.1~199.9°C (212.1~391.8°F)
Resolution
0.1°C/0.1°F
Battery Life
>500h at room temp. and >250h at -20°C with
measurement active.
Dimensions
127 x60x16 mm (5×2.36×0.63 inch)
Needle
120mm length, 2mm diameter of tip, 3mm diameter of shaft
Weight
120.7 grams(4.26 oz) including a CR2450 lithium cell
Caution: Please make sure the target to be measured will not exceed the temperature range of the
probe to avoid permanent damage of the thermocouple probe.
Caution: To avoid electric shock and thermometer damage, do not measure live circuit where
voltage exceeding 24V
AC RMS or 60V DC with the thermocouple probe.
EMC/RFI: Readings may be aected if the unit is operated within radio frequency electromagnetic
eld strength of approximately 3 volts per meter, but the performance of the instrument
will not be permanently aected.
Xylem Analytics Germany GmbH
Am Achalaich 11
82362 Weilheim
Germany
Specyfikacje produktu
| Marka: | Ebro |
| Kategoria: | Niesklasyfikowane |
| Model: | TTX 210 |
Potrzebujesz pomocy?
Jeśli potrzebujesz pomocy z Ebro TTX 210, zadaj pytanie poniżej, a inni użytkownicy Ci odpowiedzą
Instrukcje Niesklasyfikowane Ebro

11 Grudnia 2024
11 Grudnia 2024
11 Grudnia 2024
11 Grudnia 2024
11 Grudnia 2024
11 Grudnia 2024
11 Grudnia 2024
11 Grudnia 2024
11 Grudnia 2024
11 Grudnia 2024
Instrukcje Niesklasyfikowane
Najnowsze instrukcje dla Niesklasyfikowane
29 Stycznia 2025
29 Stycznia 2025
29 Stycznia 2025
29 Stycznia 2025
29 Stycznia 2025
29 Stycznia 2025
29 Stycznia 2025
29 Stycznia 2025
29 Stycznia 2025
29 Stycznia 2025