Instrukcja obsługi Festo EAPR-E17-S
Festo Niesklasyfikowane EAPR-E17-S
Przeczytaj poniżej 📖 instrukcję obsługi w języku polskim dla Festo EAPR-E17-S (1 stron) w kategorii Niesklasyfikowane. Ta instrukcja była pomocna dla 17 osób i została oceniona przez 4 użytkowników na średnio 4.9 gwiazdek
Strona 1/1
Assembly instructions (Original instructions)
8079064
2017-09a
[8079066]
†‡
Sensing kit
EAPR-E17-S
Festo SE & Co. KG
Ruiter Straße 82
73734 Esslingen
Germany
+49 711 347-0
www.festo.com
1.Further applicable documents
All available documents for the product www.f
esto.com/pk
Observe further applicable documents:
Description of the linear gantry aJ
Operating instructions for the proximity sensor 5
2.Safety
Switch off power supply and compressed air before mounting work.
Comply with tightening torques ( Table).
Secure mounting components 34, , 689 and with adhesive .
Observe the safety data sheet of the adhesive 9 from the original
manufacturer.
3.Use for intended purpose
Sensing kit EAPR-E17-S:
Mounting for the proximity sensor 5 as limit switch on the Y-axis of the
linear gantry aJ.
4.Scope of delivery
22055d_1
1Retainer
2Switch lug
3Screw
4Screw
5Proximity sensor
SIES-Q8B
6Threaded pin
7Adapter
8Screw
9Adhesive
LOCTITE 243
(1x)
(1x)
(1x)
(1x)
(1x)
(2x)
(1x)
(2x)
(1x)
5.Not in scope of delivery
22055d_2
aJLinear gantry
EXCT
(1x)
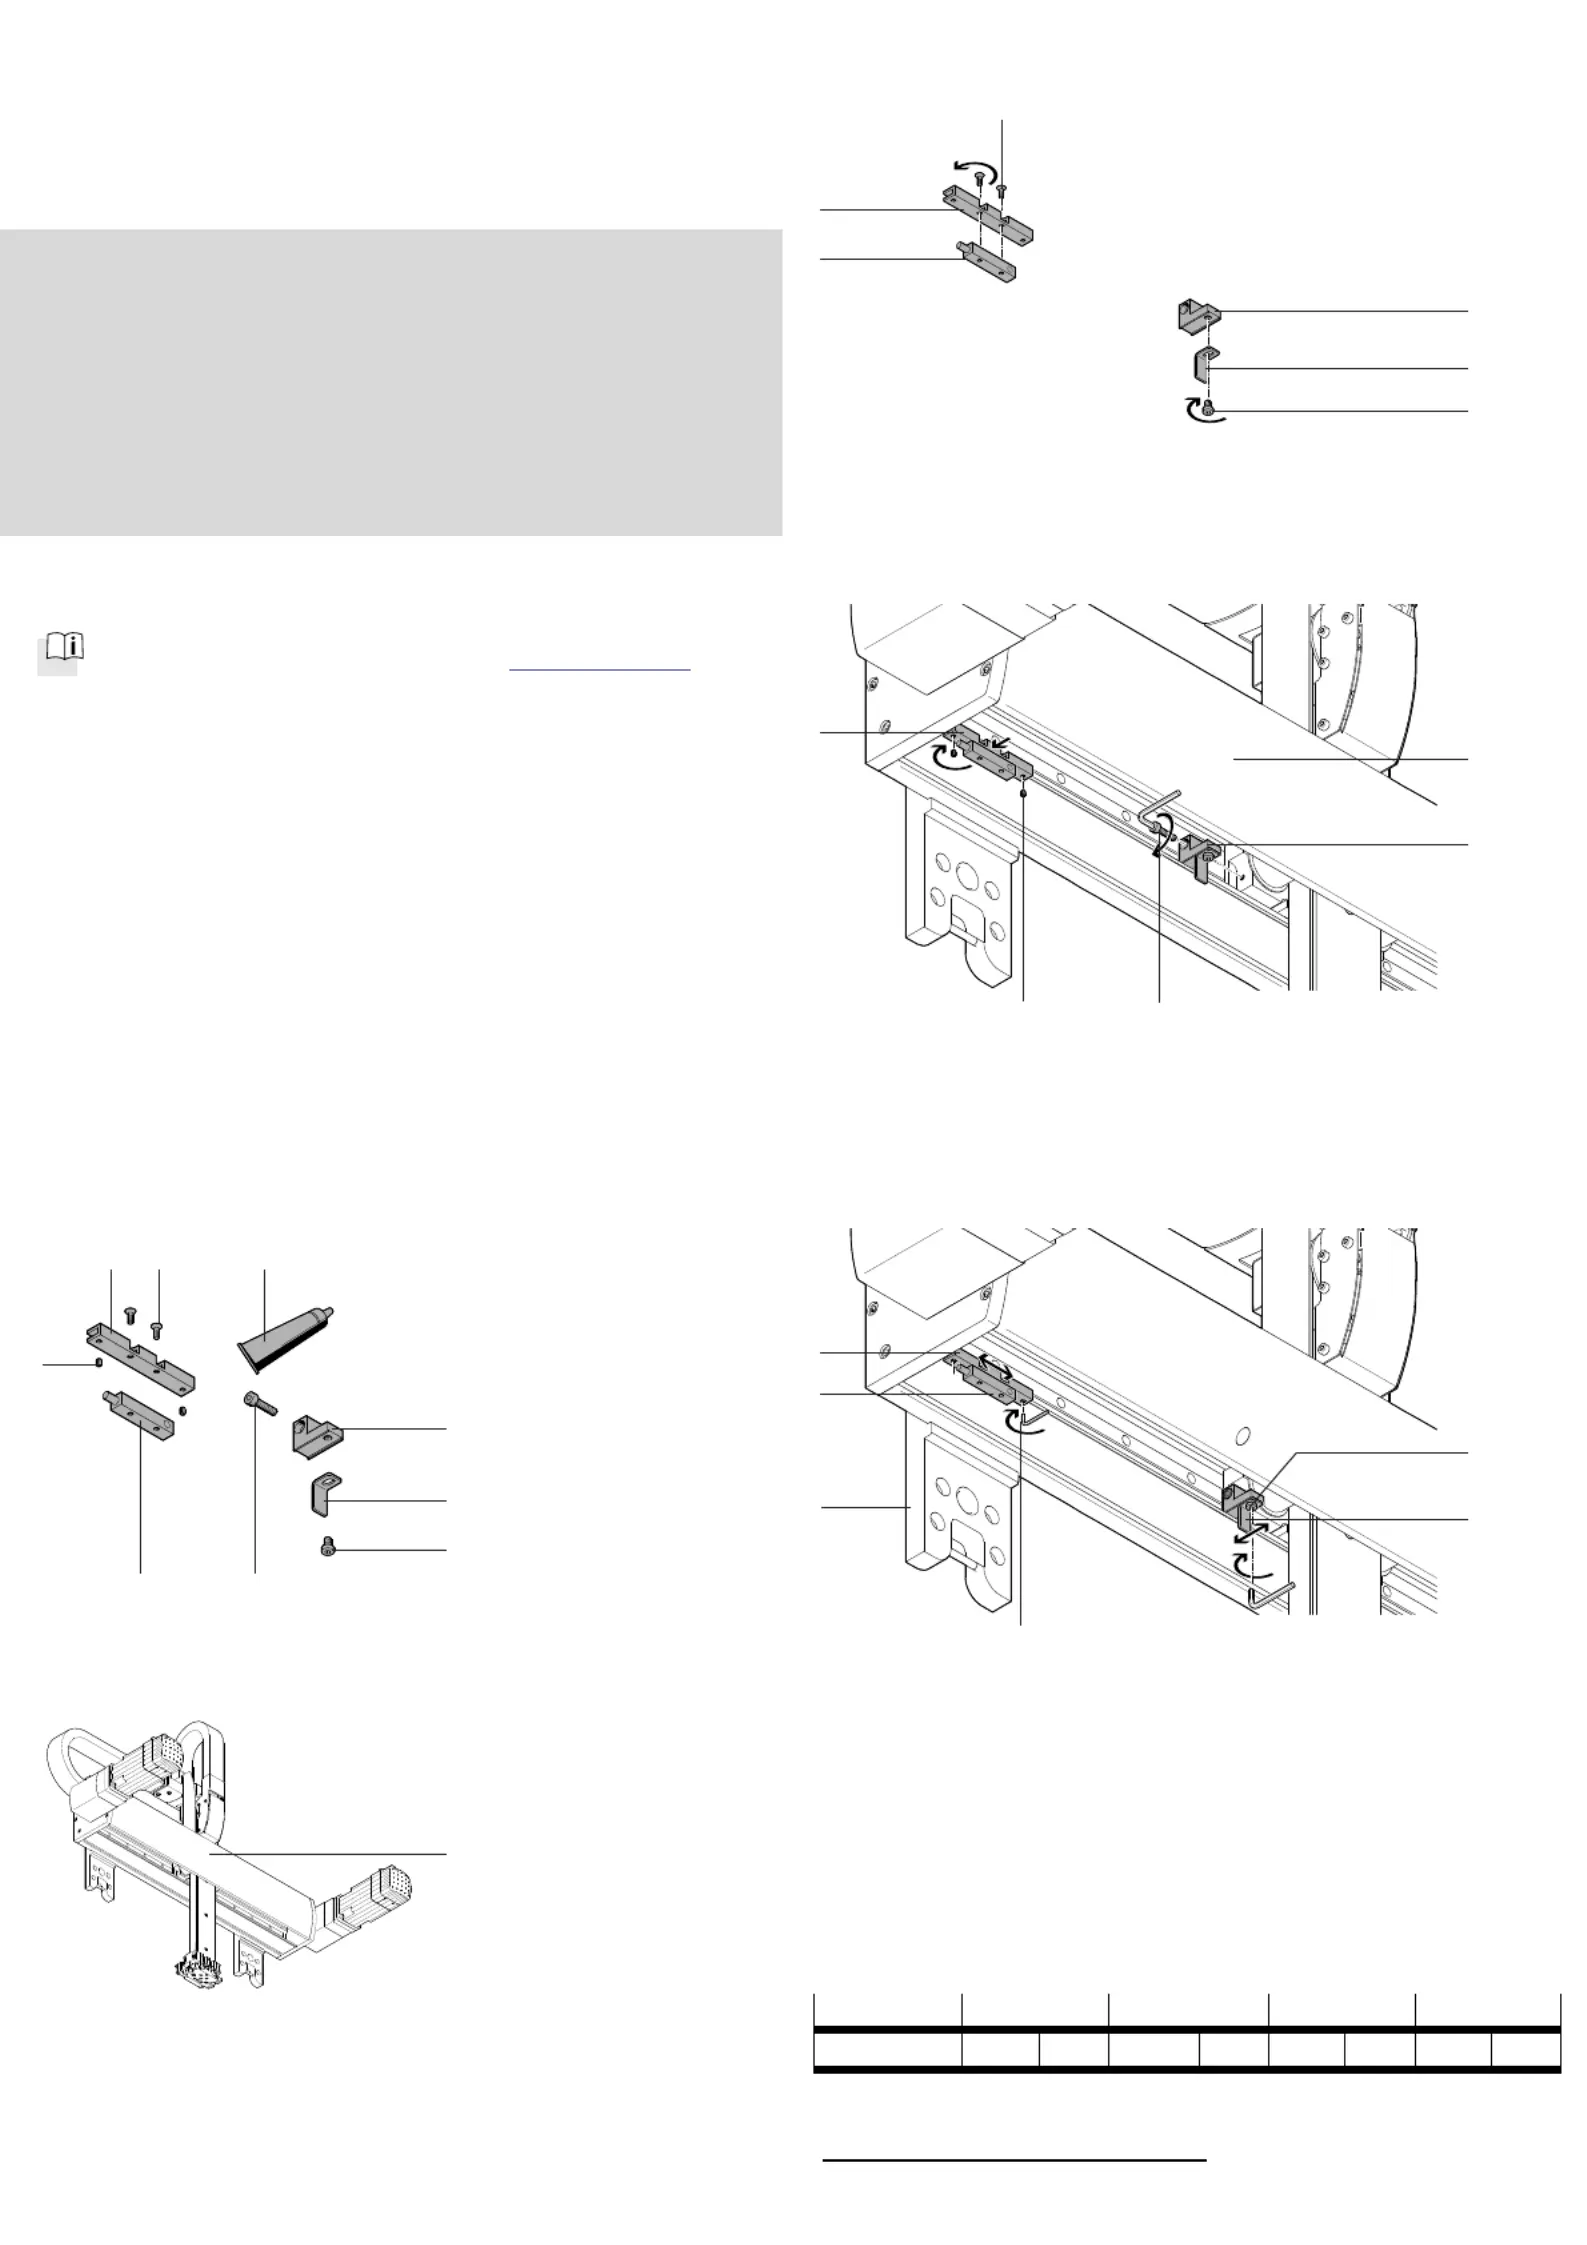
6.Mounting
22055d_3
Att
ach switch lug 2 with the screw 3 to the retainer 1.
Place the proximity sensor 57 on the adapter .
Cable of the proximity sensor 5 is not in the working space.
Mount the proximity sensor 58 with the screws .
22055d_4
Place the reta
iner 1 to the left or right on the slide of the Y-axis of
the lineargantry aJ.
Mount the retainer 14 with the screw .
Place the adapter 7 on the rail of the Y-axis on the linear gantry aJ.
Attach the adapter 76 with the threaded pins .
22055d_5
Push switc
h lug 2 against the proximity sensor 5.
Adjust switch lug 2.
Sensing distance ≤ 1 mm
Tighten screw 3.
Position the proximity sensor 5 at the required location.
Tighten threaded pins 6.
Adapter 7 is clamped.
Attach the cable of the proximity sensor 5, e. g. in the profile slot or to
the mounting plate (A).
7.Screw sizes and tightening torques M
A
1)
EAPR-E17-S 3
3
3
33 [Nm]4
4
4
44[Nm] 6
6
6
66[Nm]8
8
8
88[Nm]
M4x6 2.9 M4x16 2.9 M3x4 1 M3sx80.8
1)
Tolerance for tightening torqueM
A
without indication of tolerance± 20 %
3
2
1
4
5
6
7
8
aJ
9
5
1
2
3
7
8
7
6
4
1
aJ
2
3
5
7
6
A
Specyfikacje produktu
| Marka: | Festo |
| Kategoria: | Niesklasyfikowane |
| Model: | EAPR-E17-S |
Potrzebujesz pomocy?
Jeśli potrzebujesz pomocy z Festo EAPR-E17-S, zadaj pytanie poniżej, a inni użytkownicy Ci odpowiedzą
Instrukcje Niesklasyfikowane Festo

10 Stycznia 2025
10 Stycznia 2025
7 Stycznia 2025
7 Stycznia 2025
7 Stycznia 2025
7 Stycznia 2025
7 Stycznia 2025
7 Stycznia 2025
7 Stycznia 2025
7 Stycznia 2025
Instrukcje Niesklasyfikowane
Najnowsze instrukcje dla Niesklasyfikowane
29 Stycznia 2025
29 Stycznia 2025
29 Stycznia 2025
29 Stycznia 2025
29 Stycznia 2025
29 Stycznia 2025
29 Stycznia 2025
29 Stycznia 2025
29 Stycznia 2025
29 Stycznia 2025