Instrukcja obsługi Festo PEV-1/4-A-WD
Festo Niesklasyfikowane PEV-1/4-A-WD
Przeczytaj poniżej 📖 instrukcję obsługi w języku polskim dla Festo PEV-1/4-A-WD (2 stron) w kategorii Niesklasyfikowane. Ta instrukcja była pomocna dla 21 osób i została oceniona przez 8 użytkowników na średnio 4.8 gwiazdek
Strona 1/2
PEV-1/4-A-WD
Angled plug socket
Festo SE & Co. KG
Ruiter Straße 82
73734 Esslingen
Germany
+49 711 347-0
www.festo.com
Assembly instructions
8189918
2023-12a
[8189920]
8189918
Translation of the original instructions
© 2024 all rights reserved to Festo SE & Co. KG
1
Applicable Documents
All available documents for the product
è
www.festo.com/sp.
2Safety
2.1
Safety instructions
–Before working on the product: Switch off the power supply, ensure that it is off
and secure it against being switched on again.
2.2Intended use
The angled plug socket is a plug connector that can be assembled and connects
the pressure switch PEV-1/4-A-SW27 with a controller.
2.3
Training of qualified personnel
Work on the product may only be carried out by qualified personnel who can
evaluate the work and detect dangers. The qualified personnel are trained in
electrical engineering.
3Additional information
–Contact the regional Festo contact if you have technical problems
è
www.festo.com.
–
Accessories and spare parts
è
www.festo.com/catalogue.
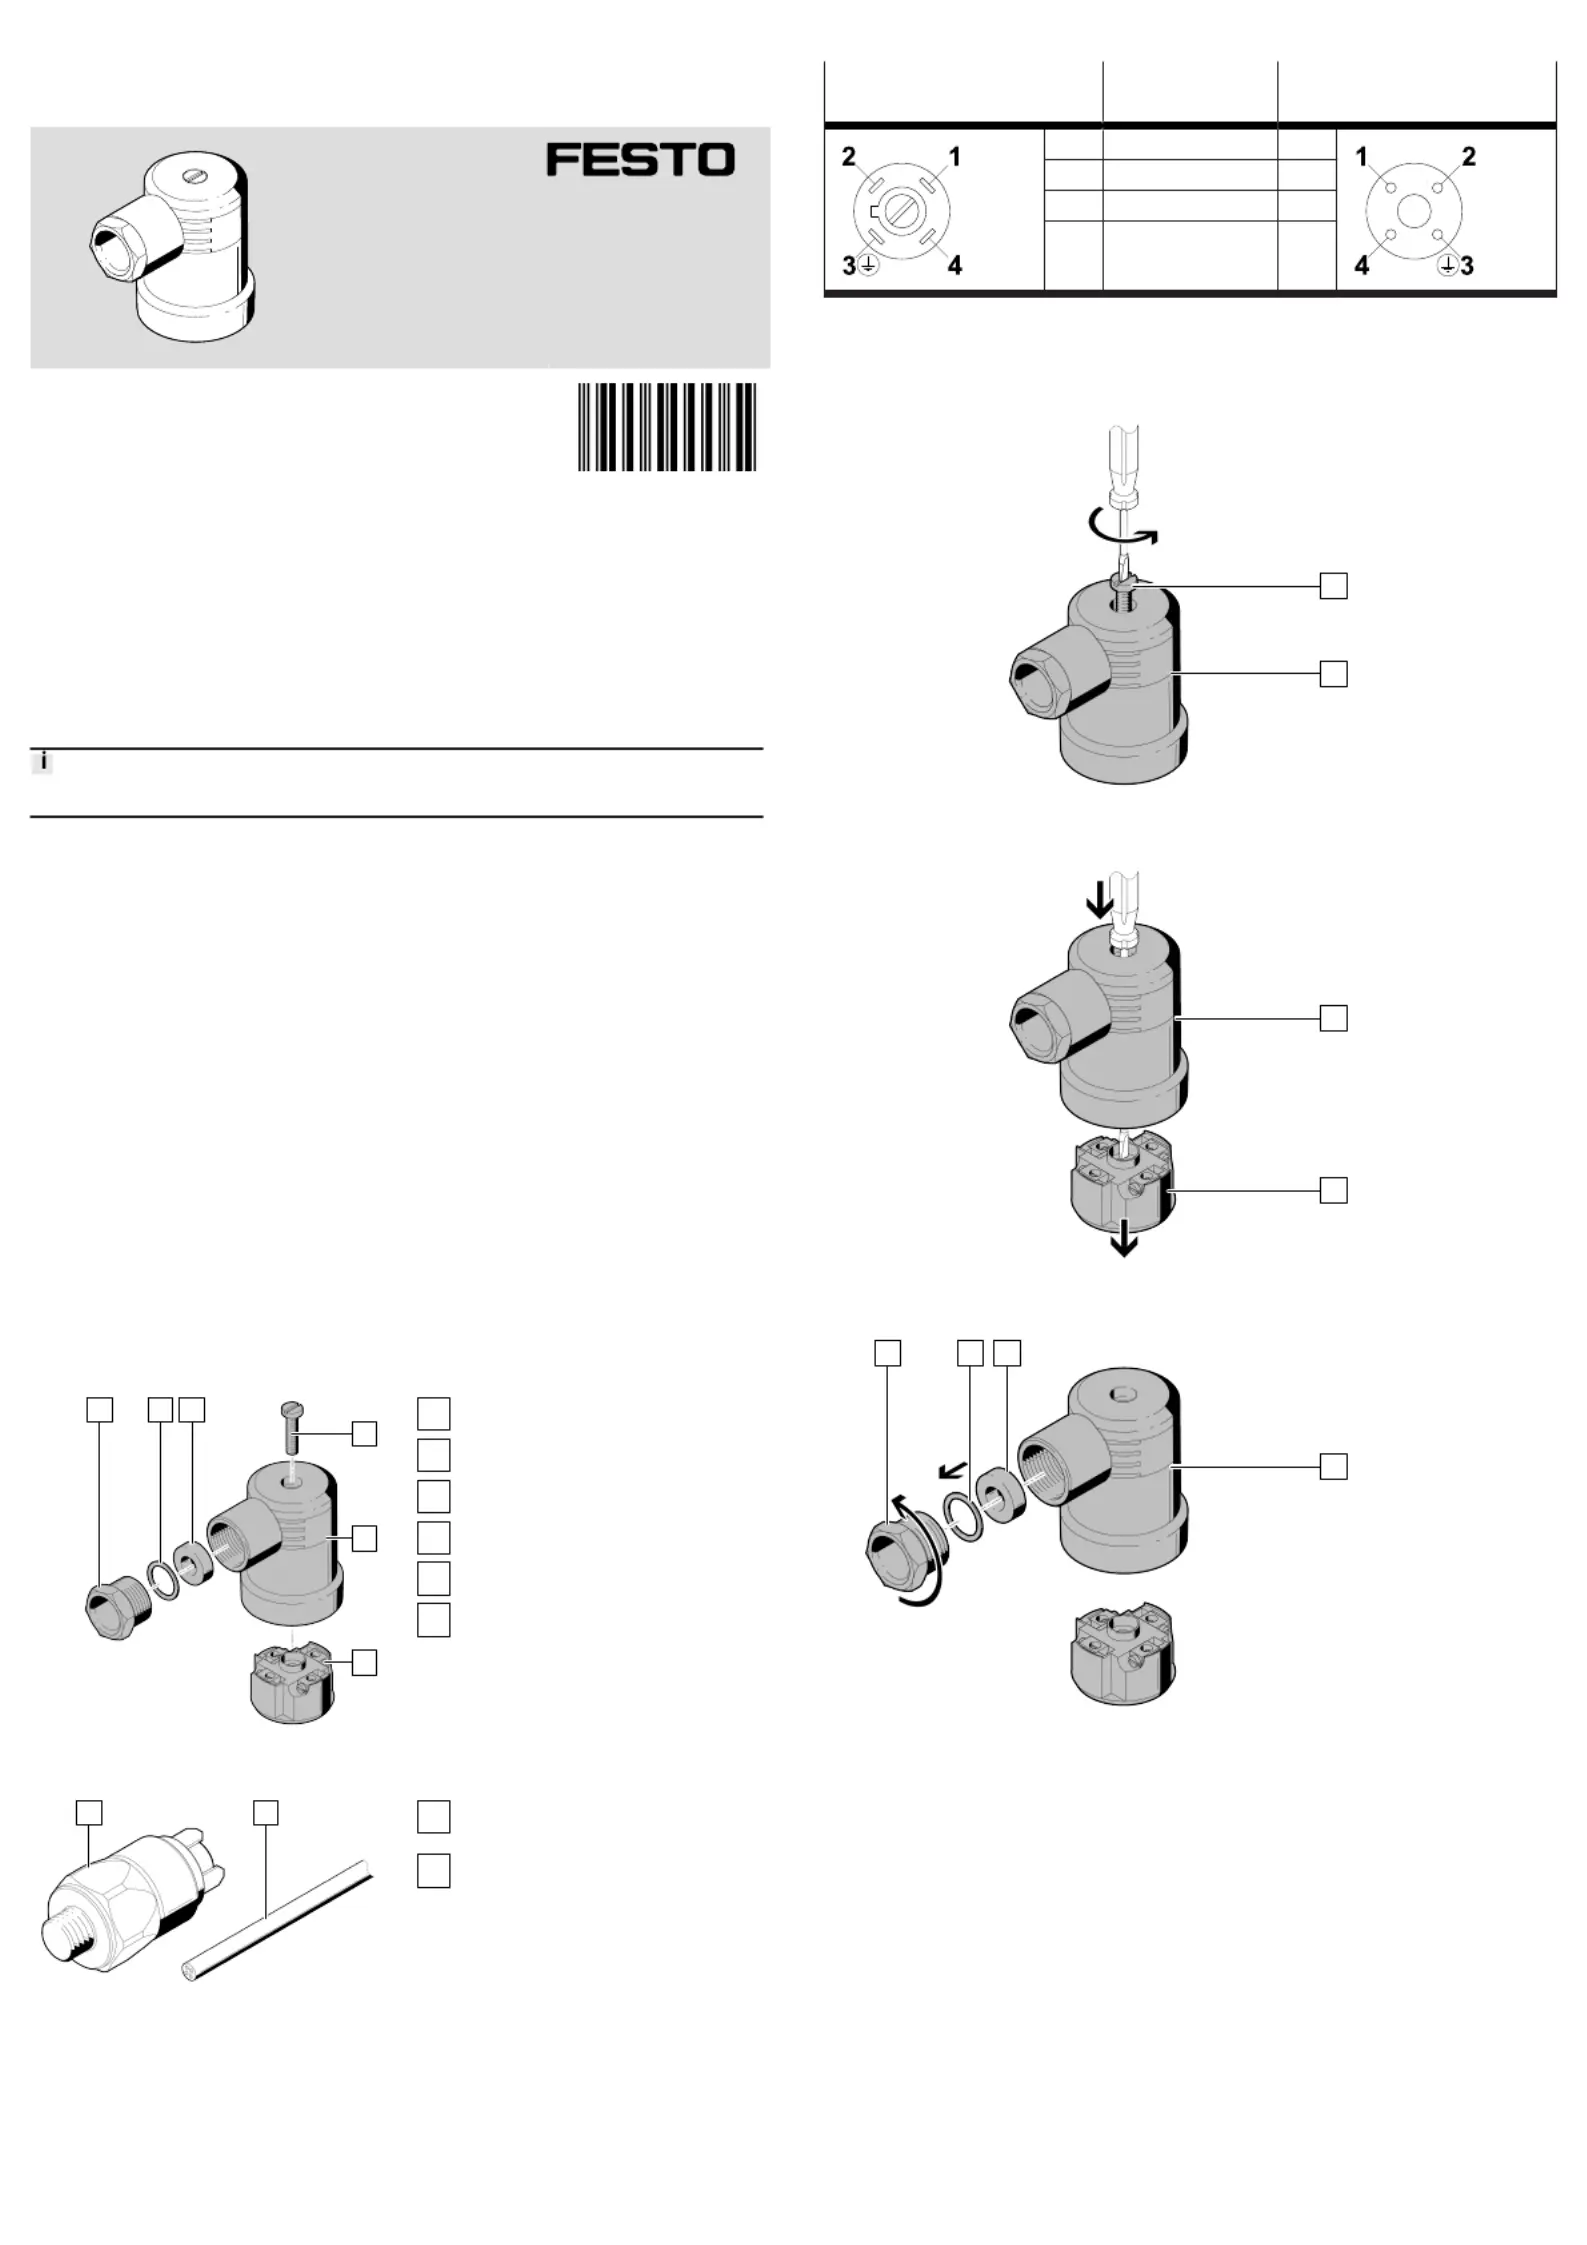
4Product Range Overview
4.1
Scope of delivery
123
4
5
6
Fig.1
1
Pressure screw (1x)
2
Washer (1x)
3
Seal (1x)
4
Central screw (1x)
5
Housing (1x)
6
Contact holder (1x)
with screw terminals
4.2Not in scope of delivery
78
Fig.2
7
Pressure switch (1x)
PEV-1/4-A-SW27
8
Cable (1x)
5Contact assignment
Electrical connection1
Field device side
ConnectionElectrical connection2
Controller side
1Operating voltage1
2N/C contact2
3Earthing3
4N/O contact4
Tab. 1:Contact assignment
6Assembly
6.1
Preparation
4
5
Fig.3
•
Screw the central screw out of the housing.45
5
6
Fig.4
•
Press the contact holder out of the housing.65
123
5
Fig.5
1.
Unscrew the pressure screw.1
2.Remove the washer and the seal from the housing.235
Specyfikacje produktu
| Marka: | Festo |
| Kategoria: | Niesklasyfikowane |
| Model: | PEV-1/4-A-WD |
Potrzebujesz pomocy?
Jeśli potrzebujesz pomocy z Festo PEV-1/4-A-WD, zadaj pytanie poniżej, a inni użytkownicy Ci odpowiedzą
Instrukcje Niesklasyfikowane Festo

10 Stycznia 2025
10 Stycznia 2025
7 Stycznia 2025
7 Stycznia 2025
7 Stycznia 2025
7 Stycznia 2025
7 Stycznia 2025
7 Stycznia 2025
7 Stycznia 2025
7 Stycznia 2025
Instrukcje Niesklasyfikowane
Najnowsze instrukcje dla Niesklasyfikowane
29 Stycznia 2025
29 Stycznia 2025
29 Stycznia 2025
29 Stycznia 2025
29 Stycznia 2025
29 Stycznia 2025
29 Stycznia 2025
29 Stycznia 2025
29 Stycznia 2025
29 Stycznia 2025