Instrukcja obsługi Festo VABA-C13-100-1-F90-G12
Festo Niesklasyfikowane VABA-C13-100-1-F90-G12
Przeczytaj poniżej 📖 instrukcję obsługi w języku polskim dla Festo VABA-C13-100-1-F90-G12 (2 stron) w kategorii Niesklasyfikowane. Ta instrukcja była pomocna dla 14 osób i została oceniona przez 5 użytkowników na średnio 4.2 gwiazdek
Strona 1/2
VABA-C13-100-...-F90-G12
Adapter plate
Festo SE & Co. KG
Ruiter Straße 82
73734 Esslingen
Germany
+49 711 347-0
www.festo.com
Assembly instructions
8202509
2023-11a
[8202511]
8202509
Translation of the original instructions
© 2023 all rights reserved to Festo SE & Co. KG
1
Applicable documents
All available documents for the product
è
www.festo.com/sp.
DocumentProductContent
Operating instructionSemi-rotary driveDFPD–
Tab. 1:
Applicable documents
2Safety
2.1Safety instructions
–
Only mount the product on components that are in a condition to be safely
operated.
2.2
Intended use
In accordance with VDI/VDE3847-2 the adapter plate acts as an inter-
face between a positioner, a valve terminalVTOP and a semi-rotary
driveDFPD-...-C-VDE2.
VABA-C13-100-...-F90-G12-1-2
DFPD-...-C-VDE2-240…-900-1200…-2300
Tab. 2:
Permissible semi-rotary drives
2.3
Training of qualified personnel
Work on the product may only be carried out by qualified personnel who can
evaluate the work and detect dangers. The qualified personnel have skills and
experience in dealing with electropneumatic (open-loop) control technology.
3Additional information
–
Contact the regional Festo contact if you have technical problems
è
www.festo.com.
–
Accessories and spare parts
è
www.festo.com/catalogue.
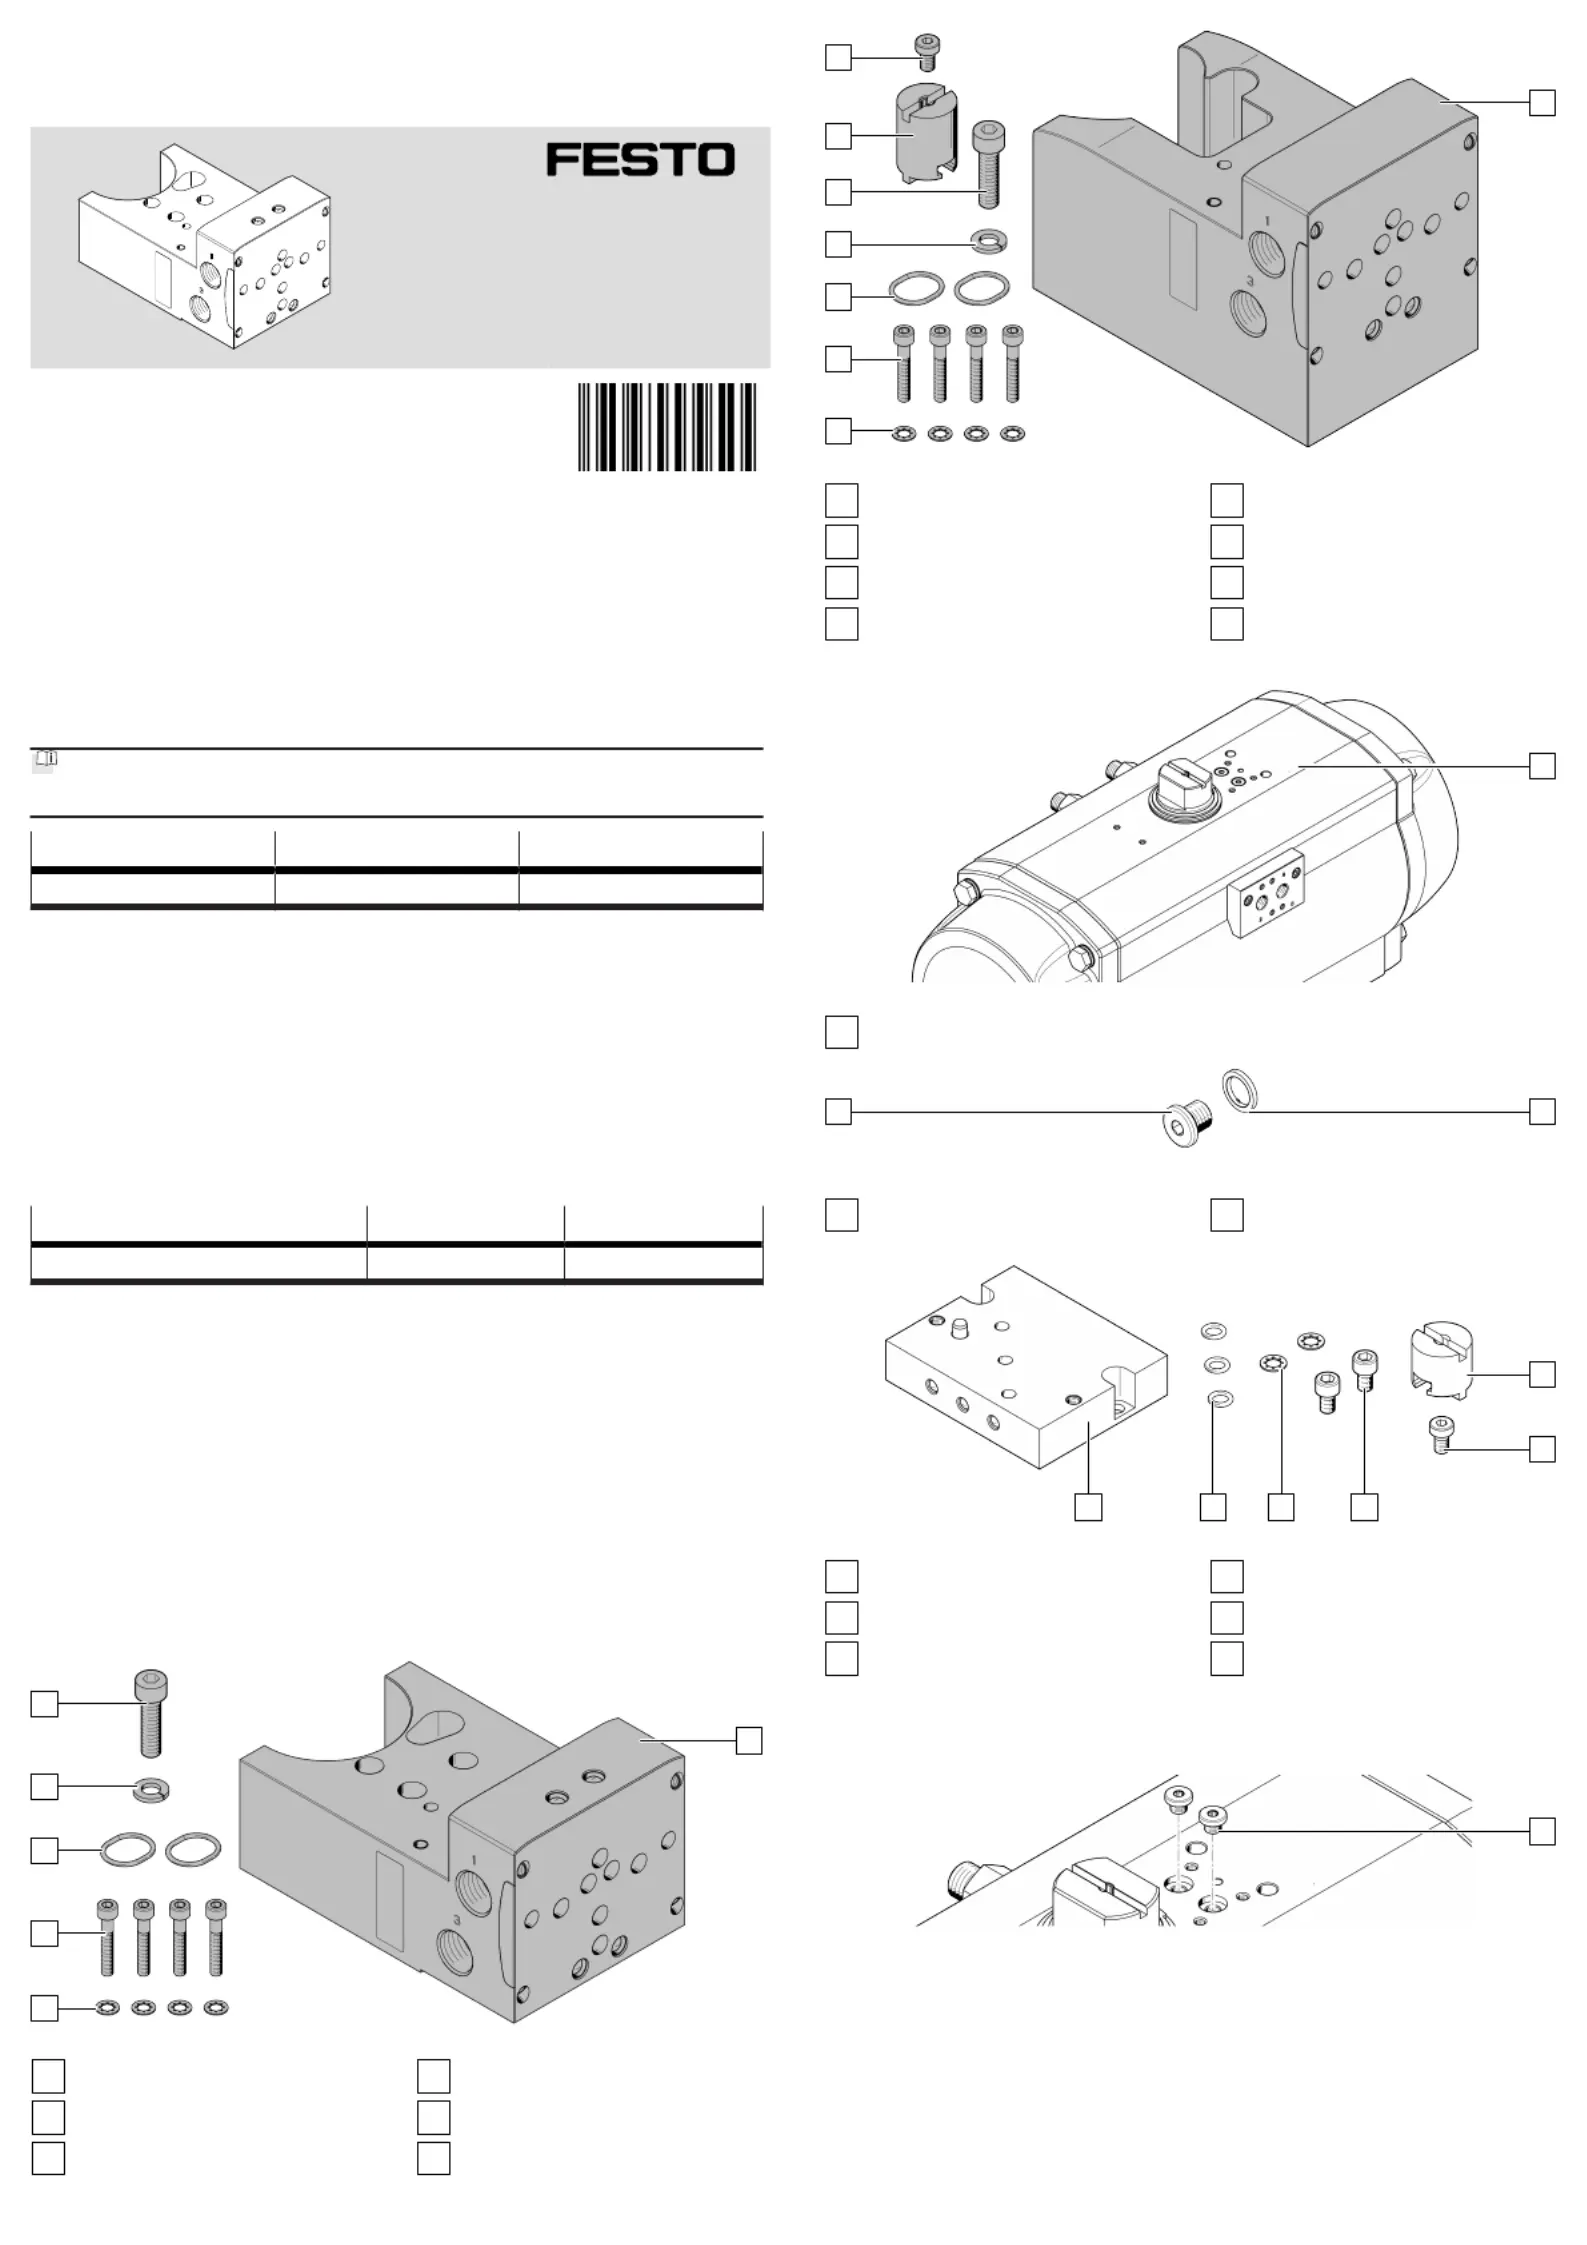
4
Product Range Overview
4.1Scope of delivery
1
2
3
4
5
6
Fig. 1:
Adapter plate VABA-C13-100-1-F90-G12
1
Bridge (1x)
2
Toothed disc (4x)
3
Screw (4x)
4
O-ring (2x)
5
Split washer (1x)
6
Screw (1x)
7
8
9
10
11
12
13
14
Fig. 2:
Adapter plate VABA-C13-100-2-F90-G12
7
Bridge (1x)
8
Toothed disc (4x)
9
Screw (4x)
10
O-ring (2x)
11
Split washer (1x)
12
Screw (1x)
13
Adapter (1x)
14
Screw (1x)
4.2
Not in scope of delivery
15
Fig. 3:Semi-rotary drive DFPD-...C-VDE2
15
Semi-rotary drive (1x)
1617
Fig.4
16
Sealing ring (2x)
17
Screw (2x)
G1/4
18
19
20212223
Fig. 5:Adapter kit DADG-AK-F9-2 for DFPD-2300-...-C-VDE2
18
Adapter (1x)
19
Screw (1x)
20
Screw (2x)
21
Toothed disc (2x)
22
O-ring (3x)
23
Adapter plate (1x)
5Assembly
5.1
Preparing assembly
24
Fig. 6:
Removing screws
•Remove the screws[24].
Specyfikacje produktu
| Marka: | Festo |
| Kategoria: | Niesklasyfikowane |
| Model: | VABA-C13-100-1-F90-G12 |
Potrzebujesz pomocy?
Jeśli potrzebujesz pomocy z Festo VABA-C13-100-1-F90-G12, zadaj pytanie poniżej, a inni użytkownicy Ci odpowiedzą
Instrukcje Niesklasyfikowane Festo

10 Stycznia 2025
10 Stycznia 2025
7 Stycznia 2025
7 Stycznia 2025
7 Stycznia 2025
7 Stycznia 2025
7 Stycznia 2025
7 Stycznia 2025
7 Stycznia 2025
7 Stycznia 2025
Instrukcje Niesklasyfikowane
Najnowsze instrukcje dla Niesklasyfikowane
29 Stycznia 2025
29 Stycznia 2025
29 Stycznia 2025
29 Stycznia 2025
29 Stycznia 2025
29 Stycznia 2025
29 Stycznia 2025
29 Stycznia 2025
29 Stycznia 2025
29 Stycznia 2025