Instrukcja obsługi Kramer RK-UT1
Kramer Niesklasyfikowane RK-UT1
Przeczytaj poniżej 📖 instrukcję obsługi w języku polskim dla Kramer RK-UT1 (2 stron) w kategorii Niesklasyfikowane. Ta instrukcja była pomocna dla 30 osób i została oceniona przez 7 użytkowników na średnio 4.1 gwiazdek
Strona 1/2
RK-UT1 Quick Start (P/N: 2900-896QS REV 1)300
P/N:
2900-300896QS
Rev:
1
Scan for full manual
RK-UT1 Quick Start Guide
This guide helps you install and use your RK-UT1for the first time.
Go to www.kramerav.com/downloads/-UT1RKto download the latest user manual and check if firmware
upgrades are available.
Step 1: Check what’s in the b ox
RK-UT1 Under the Table Enclosure
6 wood mounting screws
1 Quick start guide
20 M3x5 screws
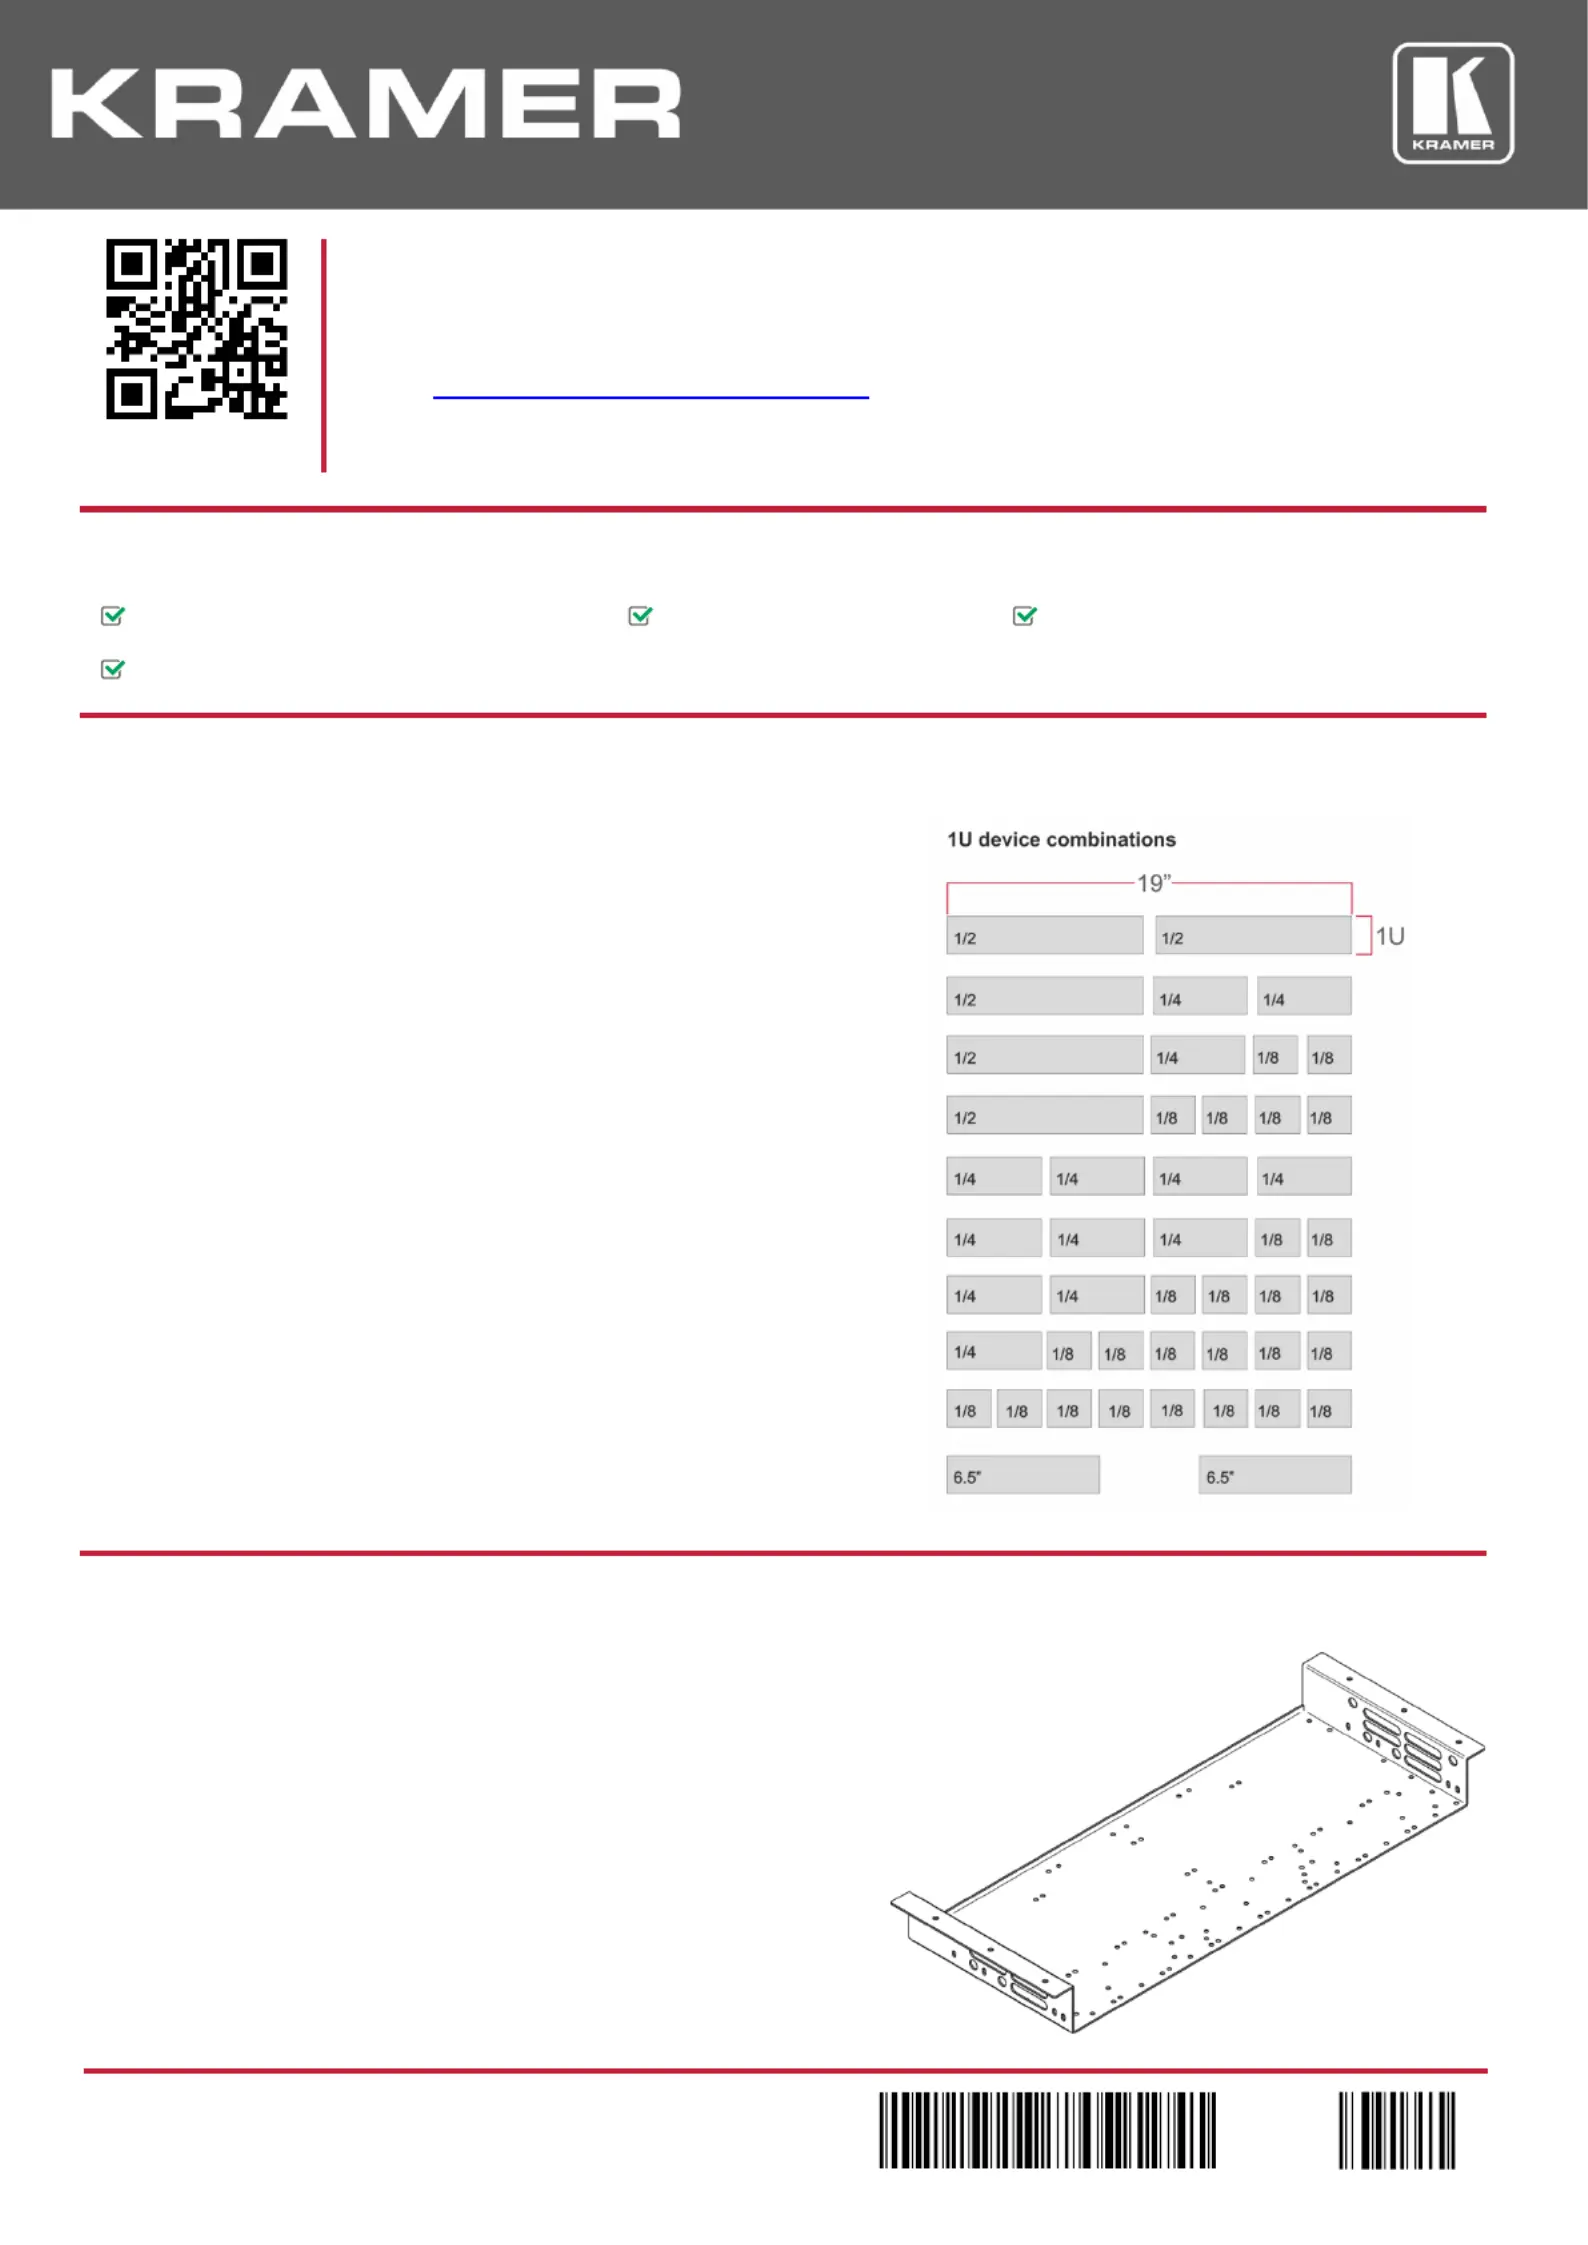
Step 2: Get to know your - RKUT1
Mount any of the following combinations of Kramer
1U products (1/2-19" 1U units, 1/4-19" 1U units, 1/8-
19" 1U units and separately, up to two 6.5"-1U units)
in the rack adapter. If empty spaces remainRK-UT1,
you can close them with blank panels (optional).
Step 3: Mount devices onto the - RKUT1
The underside TOOL mounting area RK-UT1
includes a set of screw holes that are suitable for
any combination of units.
Specyfikacje produktu
| Marka: | Kramer |
| Kategoria: | Niesklasyfikowane |
| Model: | RK-UT1 |
Potrzebujesz pomocy?
Jeśli potrzebujesz pomocy z Kramer RK-UT1, zadaj pytanie poniżej, a inni użytkownicy Ci odpowiedzą
Instrukcje Niesklasyfikowane Kramer

3 Stycznia 2025
20 Grudnia 2024
19 Grudnia 2024
19 Grudnia 2024
19 Grudnia 2024
19 Grudnia 2024
19 Grudnia 2024
19 Grudnia 2024
19 Grudnia 2024
19 Grudnia 2024
Instrukcje Niesklasyfikowane
Najnowsze instrukcje dla Niesklasyfikowane
29 Stycznia 2025
29 Stycznia 2025
29 Stycznia 2025
29 Stycznia 2025
29 Stycznia 2025
29 Stycznia 2025
29 Stycznia 2025
29 Stycznia 2025
29 Stycznia 2025
29 Stycznia 2025