Instrukcja obsługi Livex Lighting Omega 7303-07
Livex Lighting
Ulga
Omega 7303-07
Przeczytaj poniżej 📖 instrukcję obsługi w języku polskim dla Livex Lighting Omega 7303-07 (1 stron) w kategorii Ulga. Ta instrukcja była pomocna dla 16 osób i została oceniona przez 8.5 użytkowników na średnio 4.5 gwiazdek
Strona 1/1
$
%
-XQFWLRQ%R[
%R[
VFUHZ
6LQJOHEDU
3DQ$.H\KROH%RWWRP9LHZ
ASSEM
BLING &INSTALLATION INSTRUCTIONS PRODUCT#
7311 7312 7313 7314 and 7301 7302 7303 7304 For Ceiling Mount Fixtures
WARNING! SHUT POWER OFF AT FUSE OR CIRCUIT BREAKER .
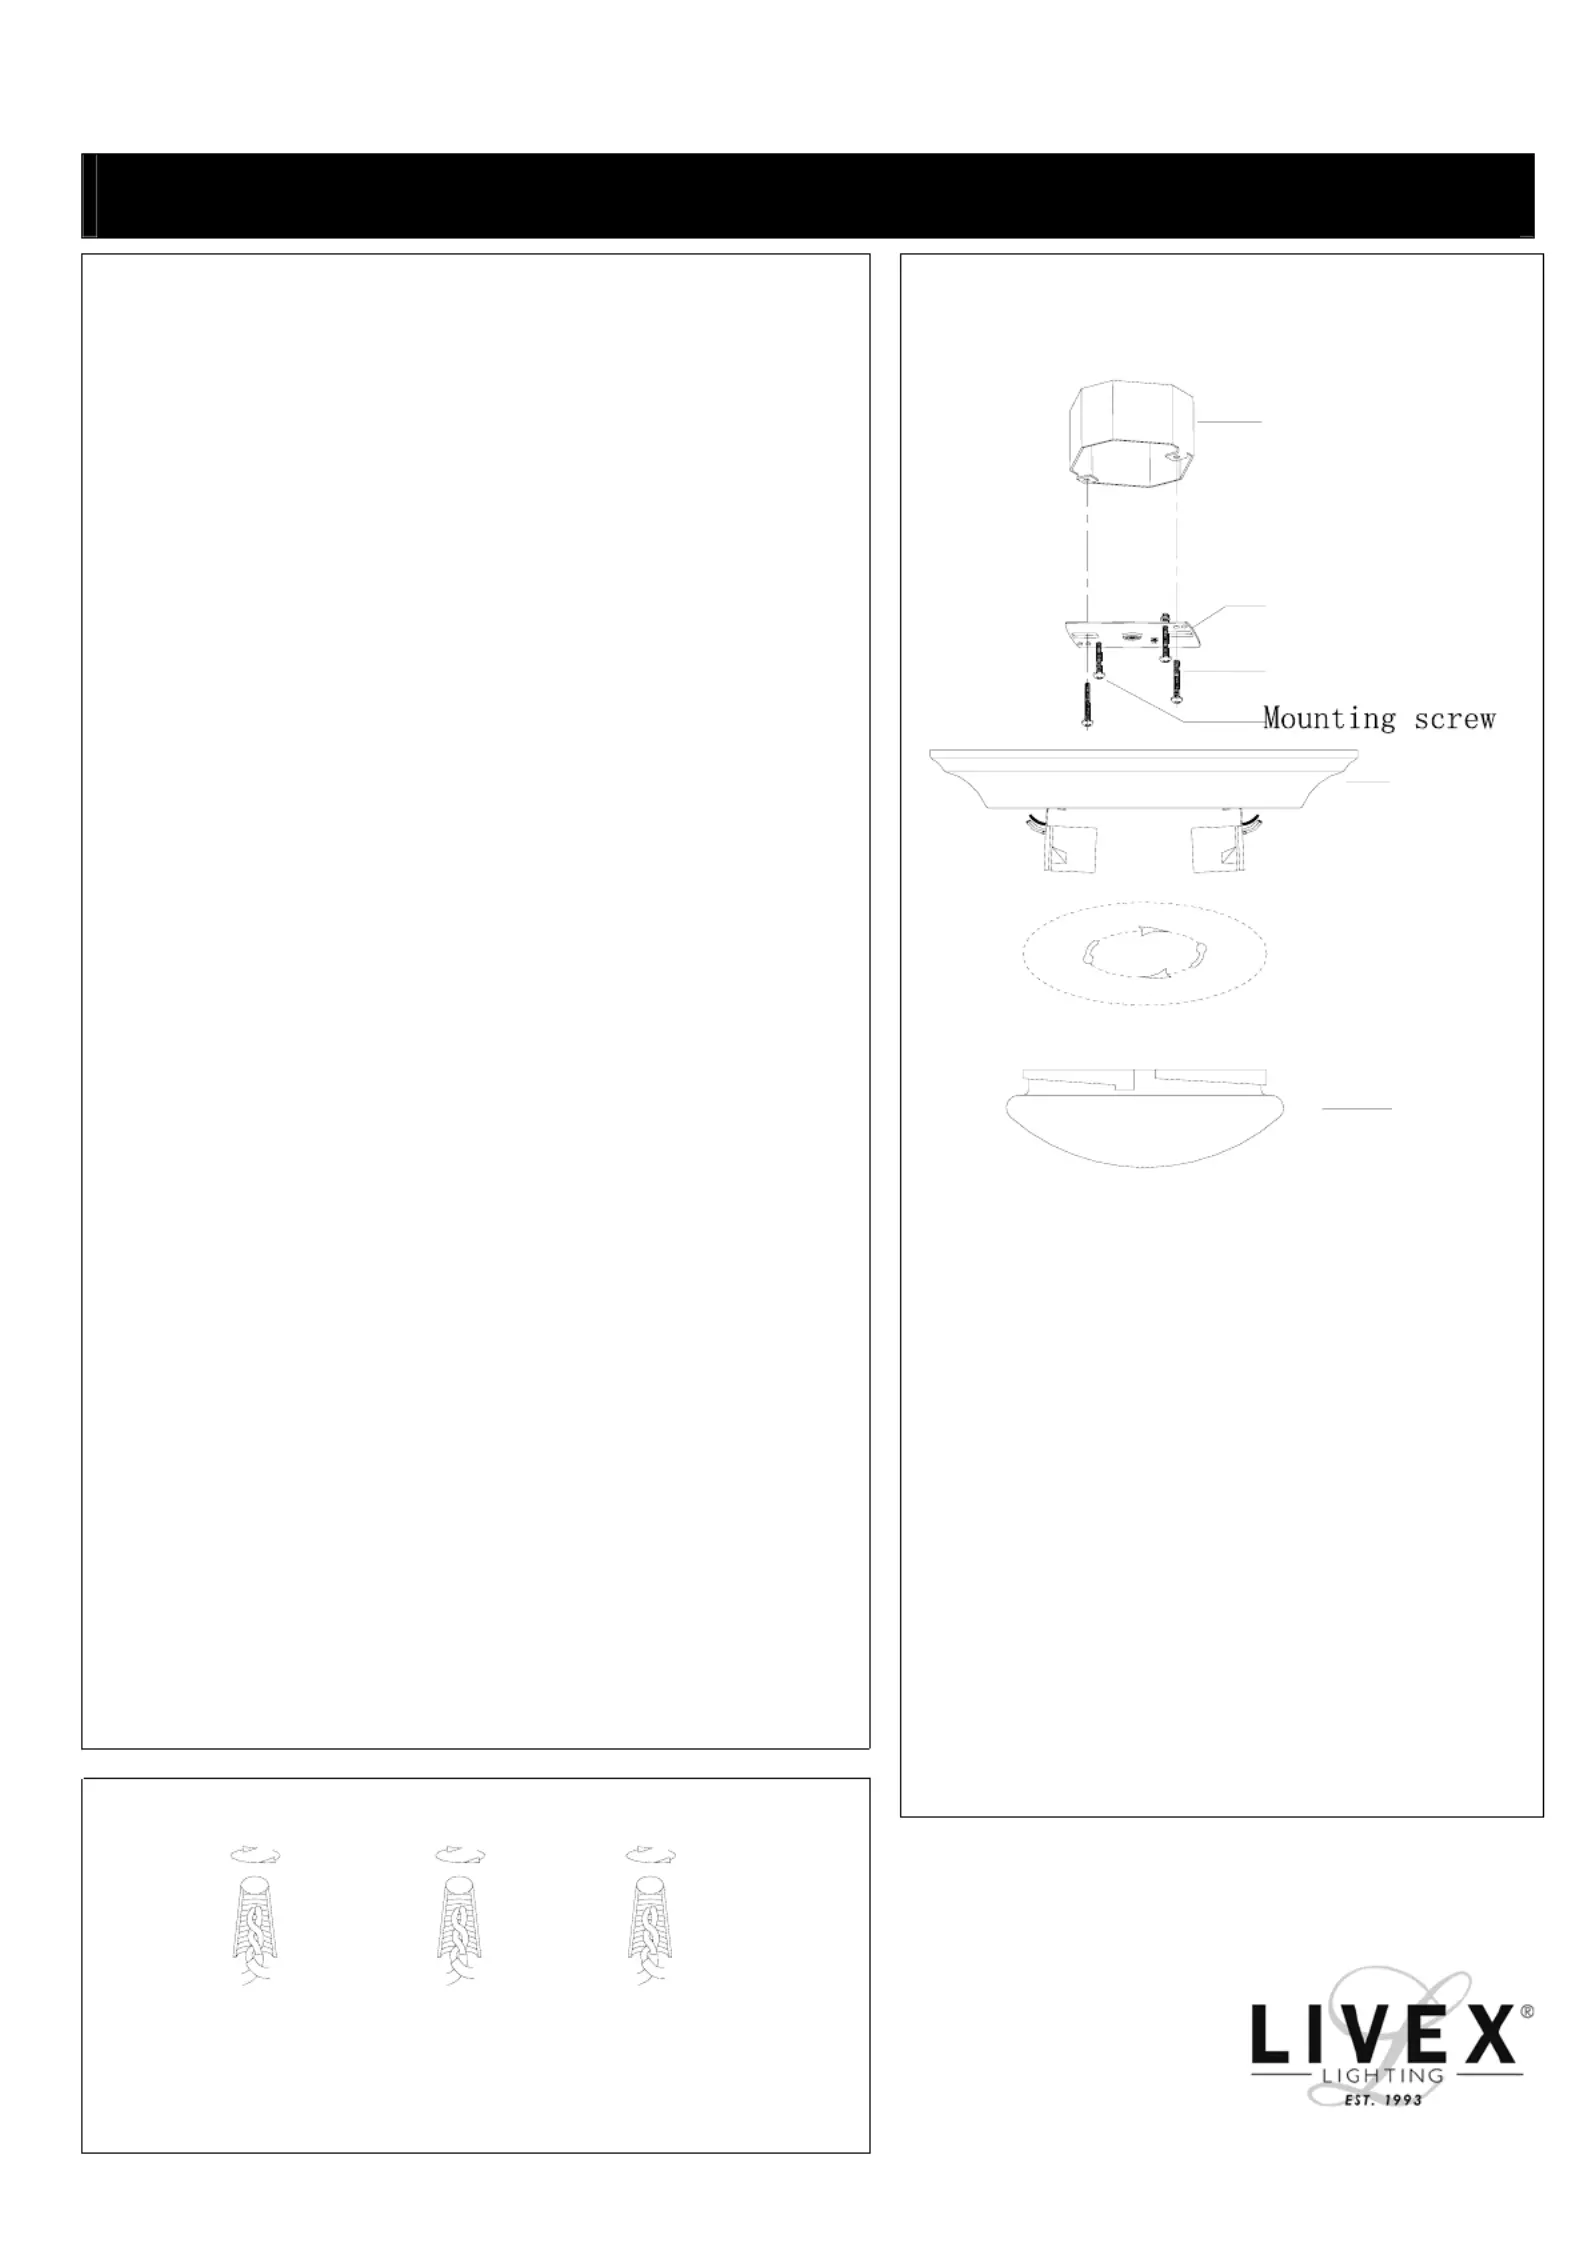
MOUNTING THE FIXTURE
1. Shut off the power at the fuse box or circuit breaker box.
Remove the old fixture from ceiling, including the single
bar.
2. Carefully unpack your new fixture and lay out all the parts
on a clear area. T
ake care not to lose any small parts
necessary for
installation.
3. Thread the two mounting screws about 1/4”into the
pre-drilled holes in the single bar spaced the same distance
apart as the holes in the pan (A).
4. Attach the single bar to the Junction Box using the two
screws from the Junction Box. The side of the single bar
marked "GND" must face out.
5. Hold the pan (A) towards the single bar and connect the
electrical wires as follows (See Fig.2). Connect the black
wire from the fixture to the black house (hot) wire; connect
the white wire from the fixture to the white house (neutral)
wire. Make sure all wire nuts are secured. You may wrap
the connections with electrical tape. If your Junction box
has a ground wire (green or bare copper) connects fixture’s
ground wire to it. Other wise attach the bare copper fixture
wire to the green ground screw on the single bar. Tuck the
wire connections neatly into the ceiling junction box as you
are holding the fixture assembly toward the ceiling.
6. Finish m
ounting the pan (A) by placing it over both
mounting screws so that the screws protrude from the
keyholes in the bottom of the pan (A). Rotate the pan (A)
until the screw are seat in the slots of the keyholes and
tighten it with a screwdriver.
7. Install the light bulbs in accordance with the fixture’s
specifications
.
DO NOT EXCEED THE MAXIMUM
WATTAGE RATING!
8. Raise the glass shade(B) to the pan(A), aligning the
salient of pan with glass shade's dint, rotate the glass
shade until tighten.
Your installation is now complete. Return power to the
junction box and test the fixture.
Fig.1
Fig.2
MIN 90
ć6833
ć6833
ć6833
ć6833ć6833/<&21
/<&21
/<&21
/<&21/<&21'8&725
'8&725
'8&725
'8&725'8&7256
6
6
66
:KLWHRU
+286(
%ODFN
:,5(6
+RW
6PRRWK
),;785(
:,5(6
%ODFNRU
5LEEHG
:,5(6
),;785(
%DUH&RSSHU*URXQG
),;785(
:,5(6
&RSSHU
*URXQG
+286(
1HXWUDO
:,5(6
:KLWH
%DUH
*UHHQRU
:,5(6
+286(
DOC20141207311
(Not included)
Specyfikacje produktu
| Marka: | Livex Lighting |
| Kategoria: | Ulga |
| Model: | Omega 7303-07 |
Potrzebujesz pomocy?
Jeśli potrzebujesz pomocy z Livex Lighting Omega 7303-07, zadaj pytanie poniżej, a inni użytkownicy Ci odpowiedzą
Instrukcje Ulga Livex Lighting

4 Stycznia 2025

4 Stycznia 2025

4 Stycznia 2025

4 Stycznia 2025

4 Stycznia 2025

4 Stycznia 2025

4 Stycznia 2025

4 Stycznia 2025

4 Stycznia 2025

4 Stycznia 2025
Instrukcje Ulga
- Peerless-AV
- Rayzr 7
- DreamLED
- Light4Me
- Doughty
- LumenRadio
- Delta Dore
- Astro
- Olight
- Peerless
- Mr Safe
- Denver
- Kern
- Dometic
- Litepanels
Najnowsze instrukcje dla Ulga

9 Kwietnia 2025

8 Kwietnia 2025

8 Kwietnia 2025

8 Kwietnia 2025

8 Kwietnia 2025

7 Kwietnia 2025

5 Kwietnia 2025

5 Kwietnia 2025

5 Kwietnia 2025

5 Kwietnia 2025