Instrukcja obsługi Middle Atlantic RK-GD8
Middle Atlantic Niesklasyfikowane RK-GD8
Przeczytaj poniżej 📖 instrukcję obsługi w języku polskim dla Middle Atlantic RK-GD8 (4 stron) w kategorii Niesklasyfikowane. Ta instrukcja była pomocna dla 23 osób i została oceniona przez 8 użytkowników na średnio 4.0 gwiazdek
Strona 1/4
I-00189 Rev D
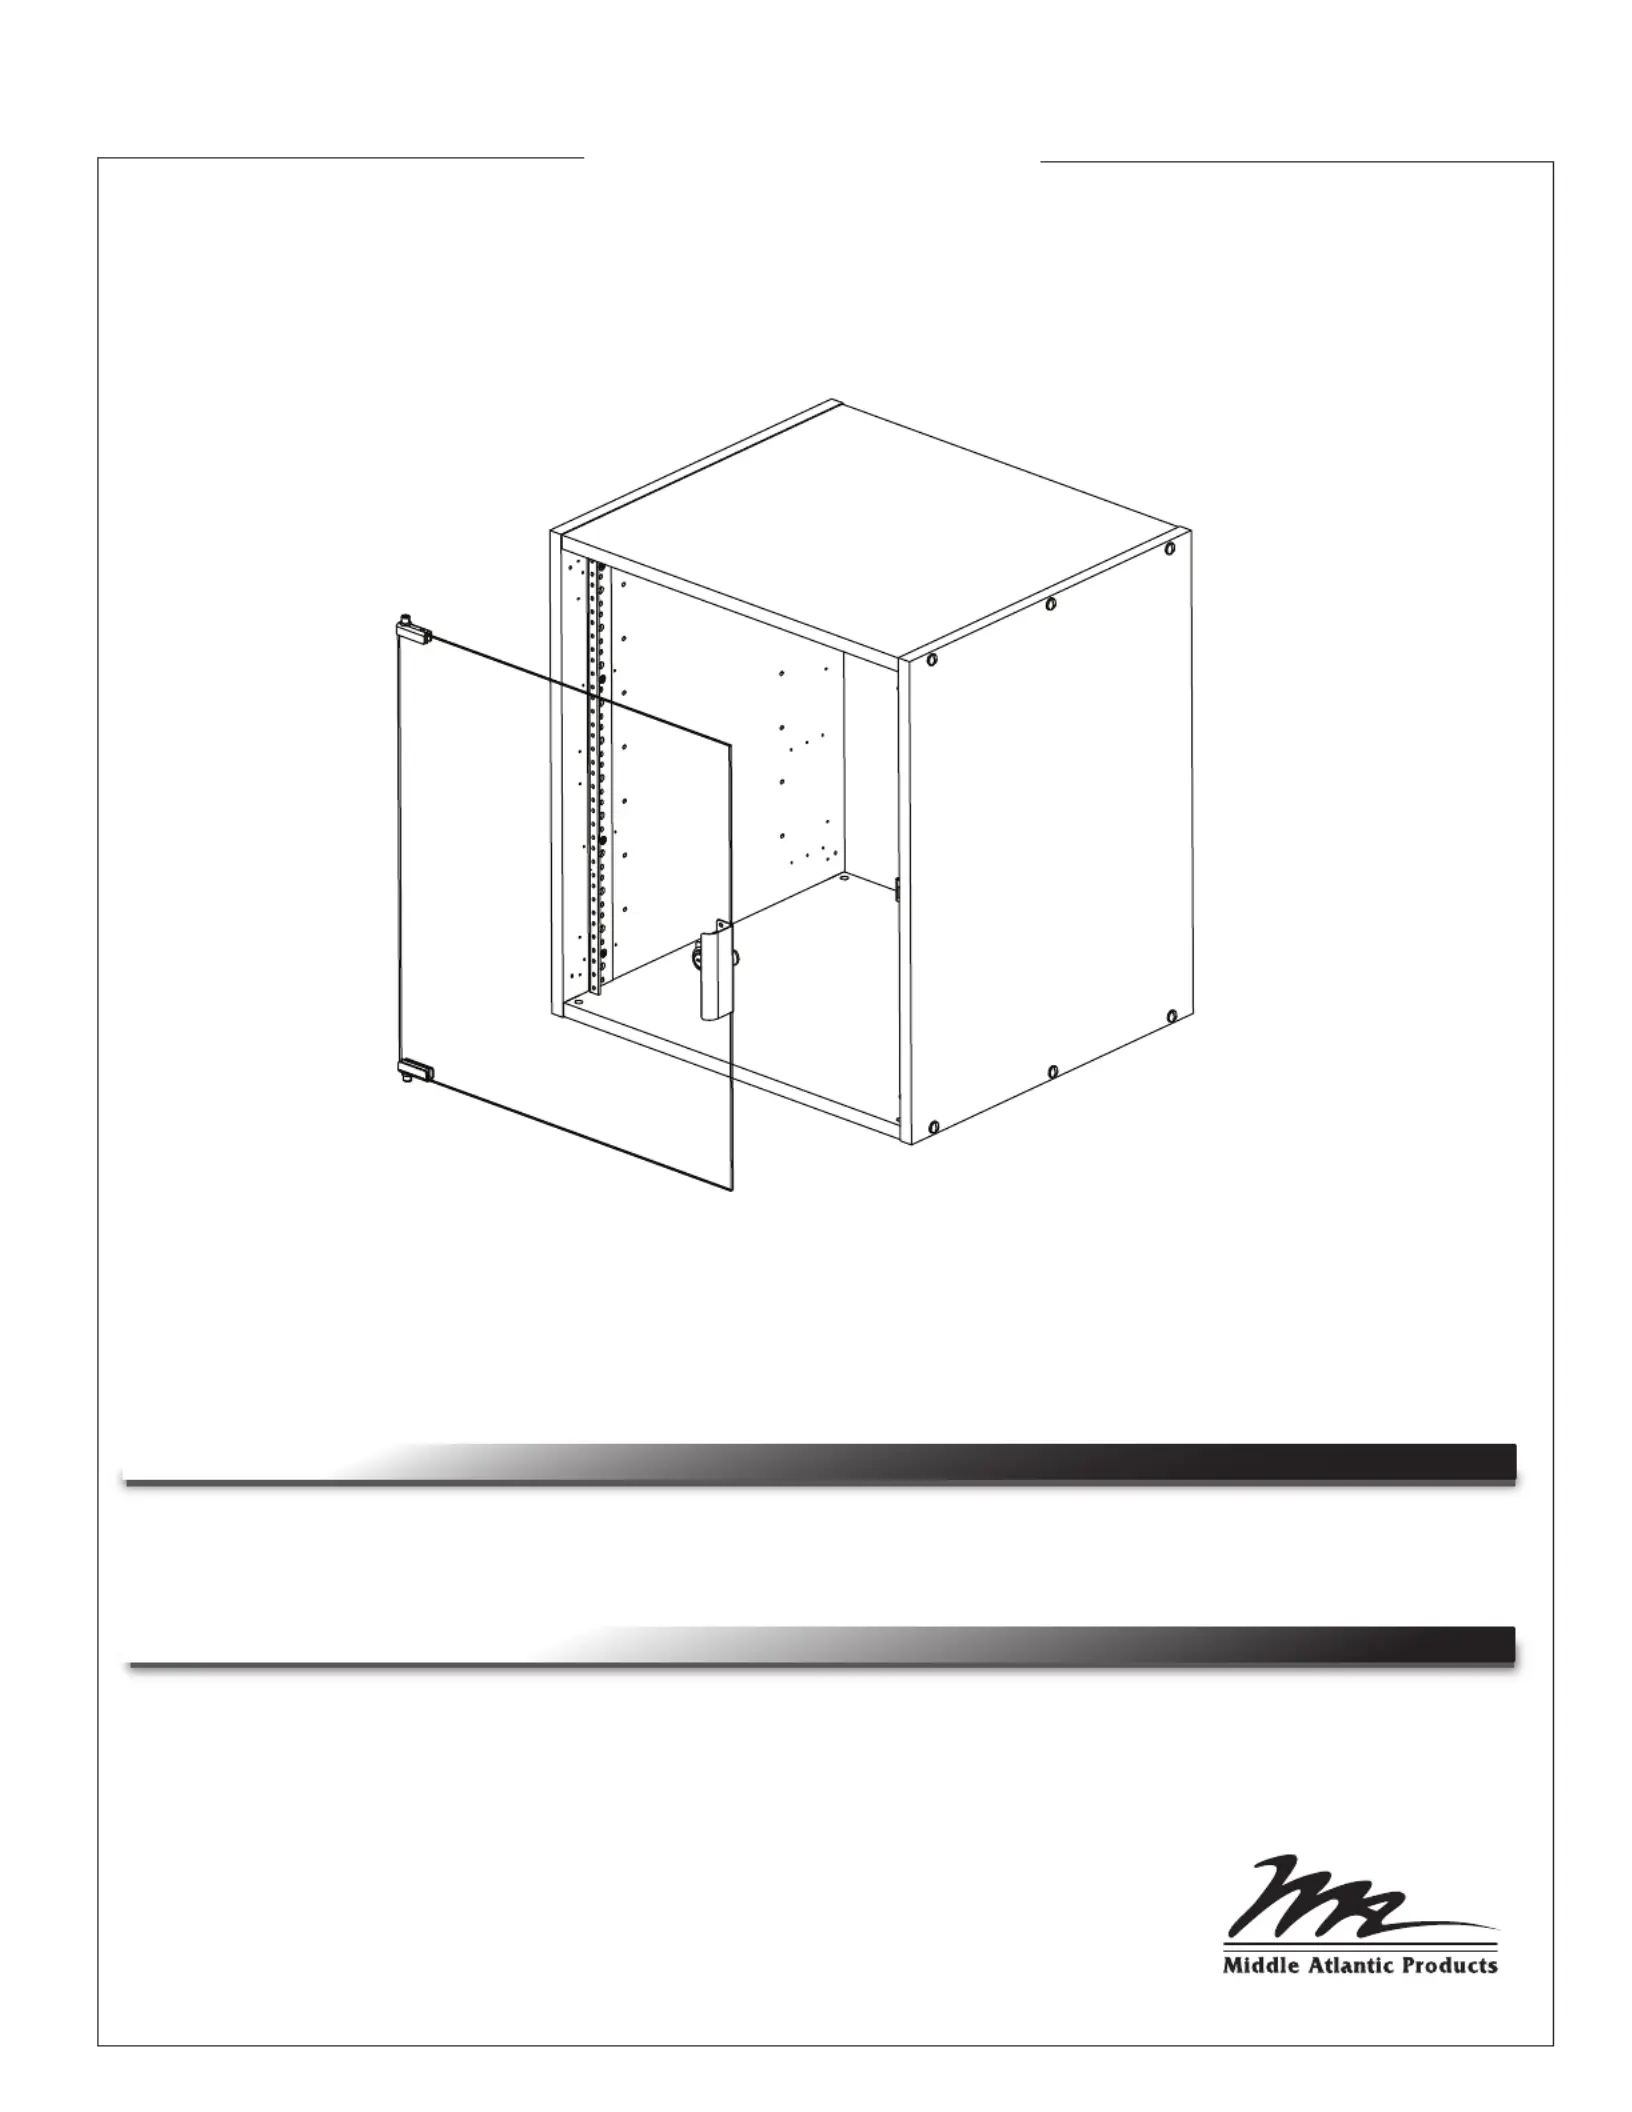
RK-GDXX
Glass Door
Instruction Sheet
Thank you for purchasing the RK-GDXX Glass Door. Please read these instructions thoroughly
before installing this product.
PRODUCT FEATURES
THANK YOU
- Locking door provides security
- Smoked, tempered glass provides a clean look
Specyfikacje produktu
| Marka: | Middle Atlantic |
| Kategoria: | Niesklasyfikowane |
| Model: | RK-GD8 |
Potrzebujesz pomocy?
Jeśli potrzebujesz pomocy z Middle Atlantic RK-GD8, zadaj pytanie poniżej, a inni użytkownicy Ci odpowiedzą
Instrukcje Niesklasyfikowane Middle Atlantic

31 Grudnia 2025
26 Grudnia 2024
26 Grudnia 2024
26 Grudnia 2024
26 Grudnia 2024
26 Grudnia 2024
26 Grudnia 2024
26 Grudnia 2024
26 Grudnia 2024
26 Grudnia 2024
Instrukcje Niesklasyfikowane
Najnowsze instrukcje dla Niesklasyfikowane
29 Stycznia 2025
29 Stycznia 2025
29 Stycznia 2025
29 Stycznia 2025
29 Stycznia 2025
29 Stycznia 2025
29 Stycznia 2025
29 Stycznia 2025
29 Stycznia 2025
29 Stycznia 2025