Instrukcja obsługi Noctua NH-L9i
Noctua Koeler procesora NH-L9i
Przeczytaj poniżej 📖 instrukcję obsługi w języku polskim dla Noctua NH-L9i (1 stron) w kategorii Koeler procesora. Ta instrukcja była pomocna dla 25 osób i została oceniona przez 6 użytkowników na średnio 4.6 gwiazdek
Strona 1/1
Noctua NH-L9i |
Installation Manual | LGA115x
Required mounting parts:
Dear customer,
Congratulations on choosing the Noctua NH-L9.
This small cooler packs all essential technologies of our award-
winning high-end models into a highly compact package in order
to give you the best possible quiet cooling experience for HTPCs
and small form factor builds. I’m confident that you will be able
to sense some of the research, attention and care we’ve put into
making this product.
Enjoy your NH-L9!
Yours sincerely,
Roland Mossig, Noctua CEO
This manual will guide you through the installation process of the
SecuFirm2™ mounting system step by step. Prior to installing
the cooler, please consult the compatibility list on our website
(www.noctua.at/compatibility) and verify that the cooler is fully
compatible with your motherboard.
Should you encounter any difficulties, please check the FAQs on
our website () and don’t hesitate to contact www.noctua.at/faqs
our support team at support@noctua.at. Noctua cannot be held
responsible for any damage or losses caused by compatibility
issues.
Multilingual versions of this manual are available on our website:
www.noctua.at/manuals
Applying thermal paste
If there are residual traces of thermal paste or thermal pads on
your CPU, please clean them off first. Then press a small drop
(4-5mm diameter) of NT-H1 onto the centre of the heatspreader.
Caution: Applying too much thermal paste will lower the heat
conductivity and cooling performance!
4x NM-IBT4 Mounting-Screw
Even with high-grade products and strict quality control, the
possibility of defects cannot be eliminated entirely. Therefore,
we aim at providing the highest possible level of reliability and
convenience by offering a warranty period of 6 years and direct,
fast and straightforward RMA service.
Should you encounter any problems with your NH-L9, please don’t
hesitate to contact our support team (support@noctua.at).
Please also consult the FAQ section on our website:
www.noctua.at/faqs.
Warranty, Support and FAQs
Connect the fan to the mainboard.
Depending on your CPU and the temperature inside the case,
you may interconnect the supplied NA-RC7 Low-Noise Adaptor
(L.N.A.) in order to further reduce the fan’s operating noise.
Caution: When using the L.N.A., check the temperature of your
CPU using appropriate software (e.g. the respective applications
of your mainboard manufacturer), in order to evade automatic
throttling of the CPU due to the increased temperature. If the cool-
ing performance is insufficient, please increase case ventilation or
remove the L.N.A.
In case you would like to use a 92x25mm fan for further improved
performance, please first unscrew the preinstalled NF-A9x14 fan
and use the supplied longer screws to install the 92x25mm fan.
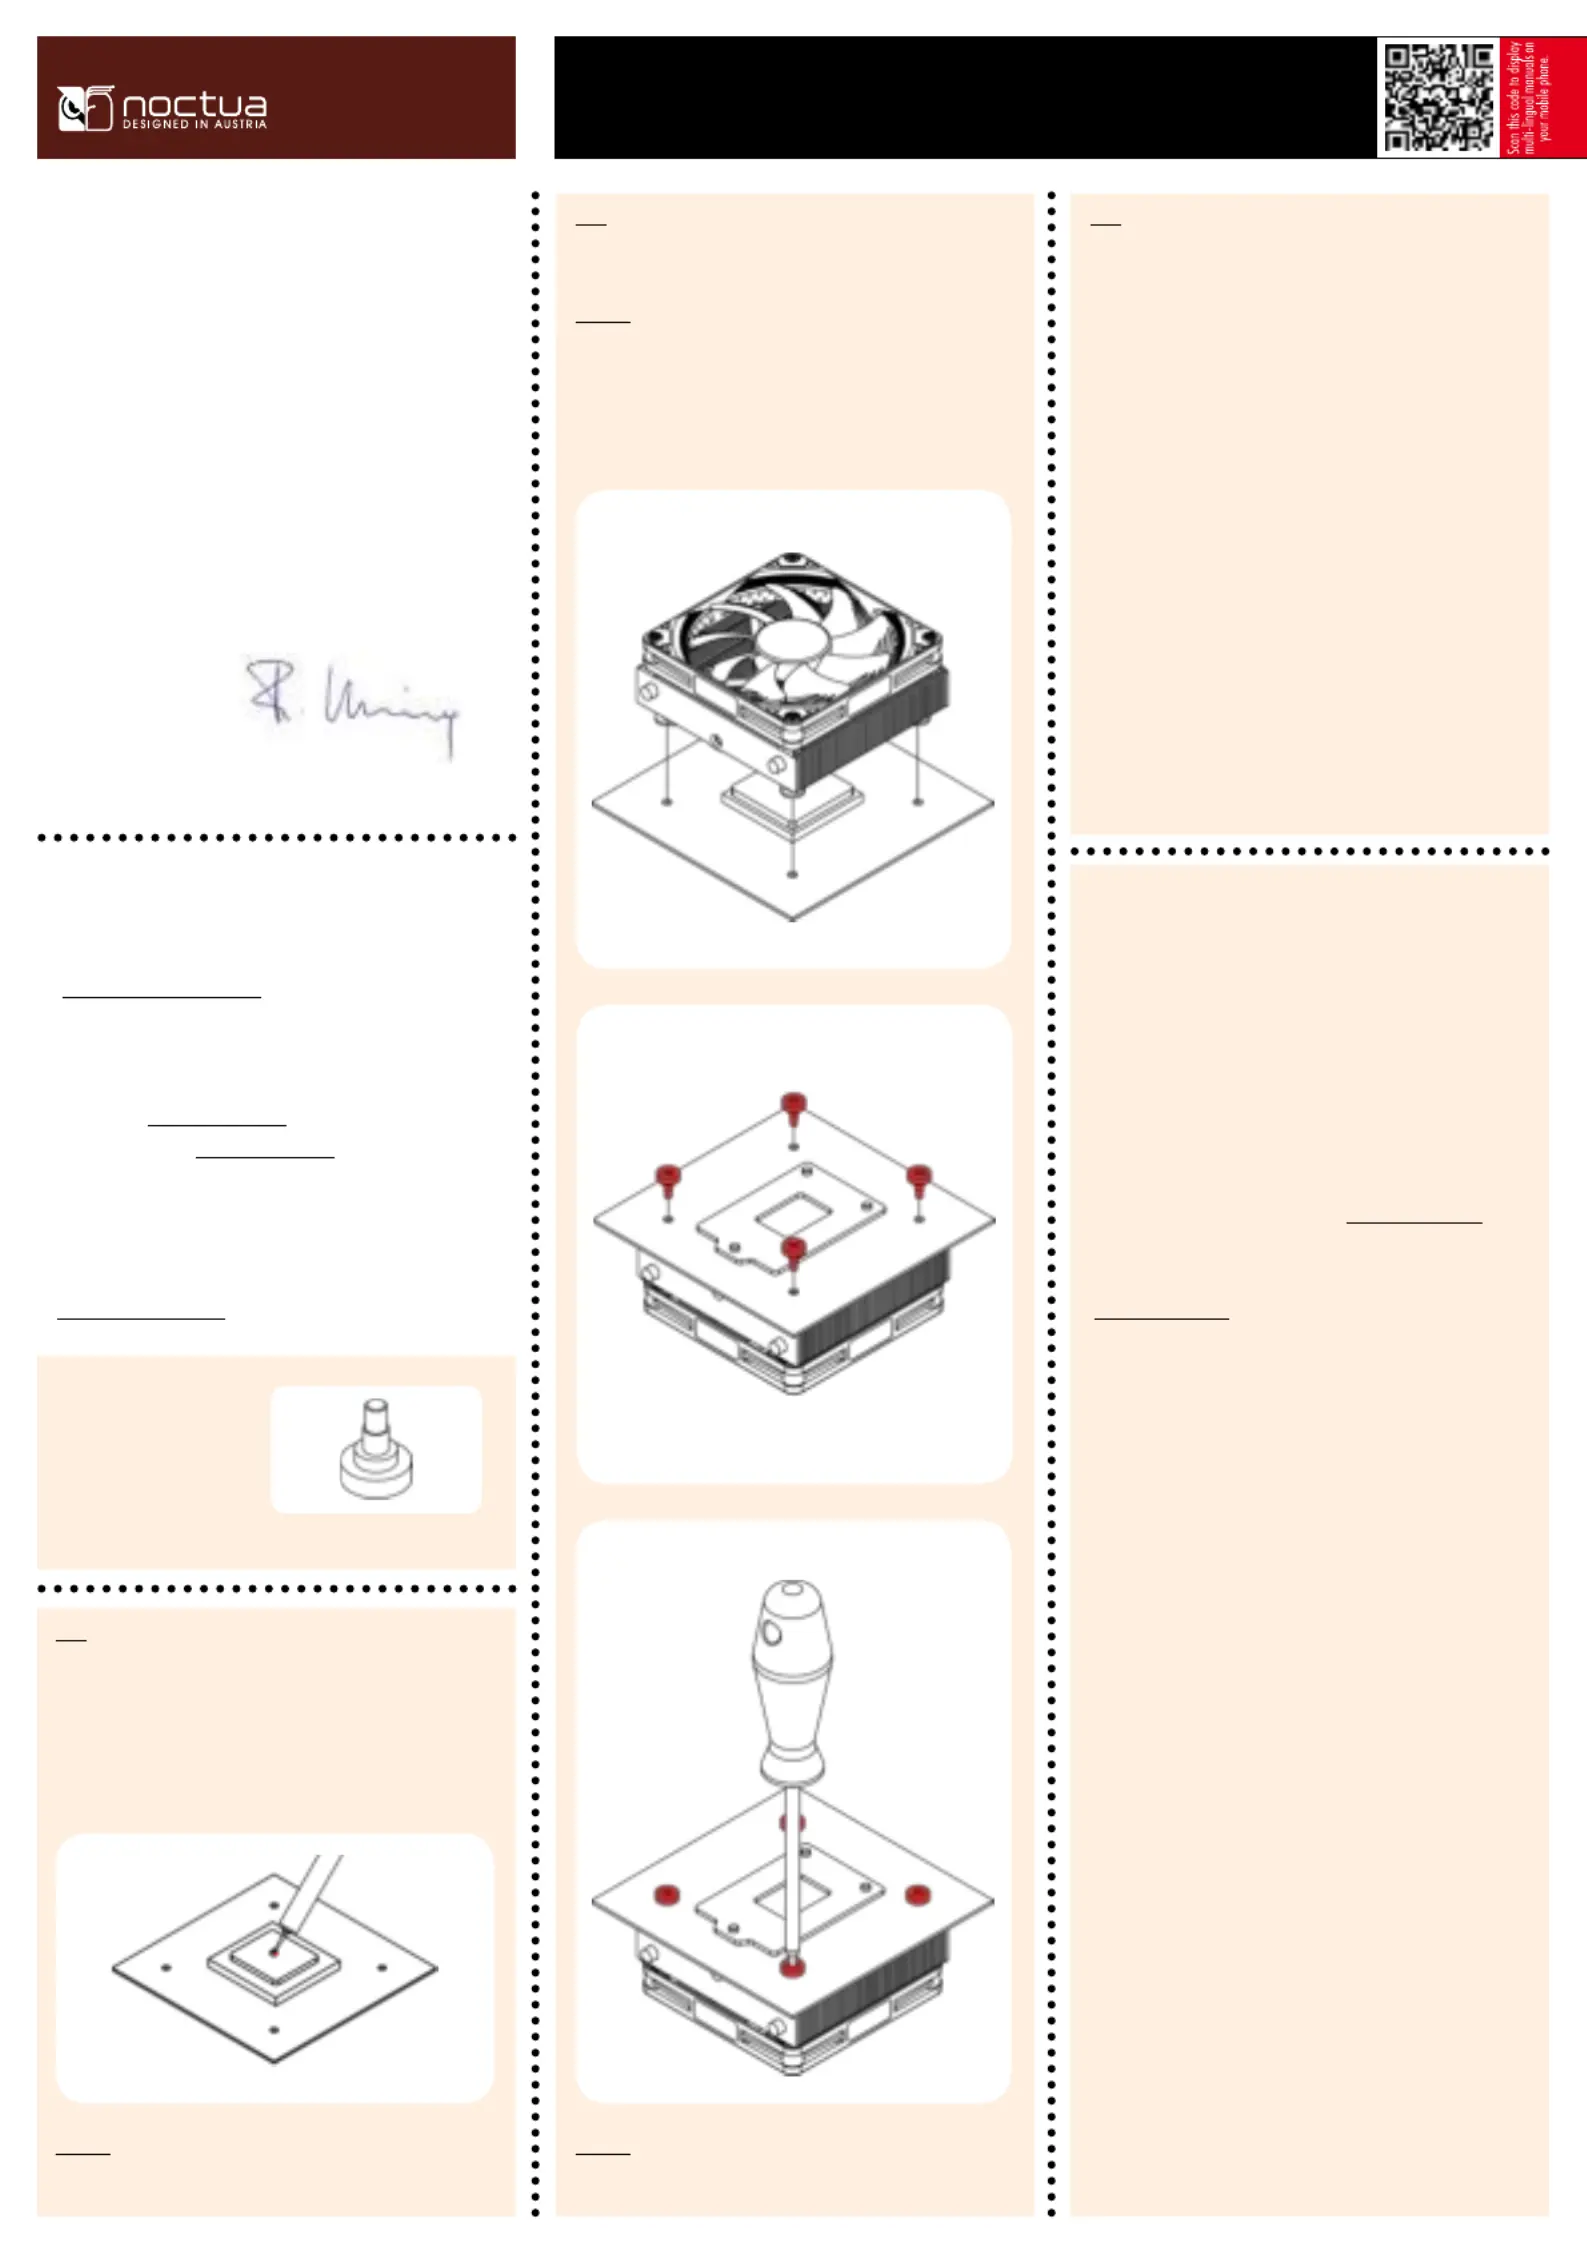
Fan Setup
Step 3
Step 1
Fastening the heatsink to the CPU
Caution: Tighten the screws until they stop, but don’t use exces-
sive force.
Caution: Please first remove the white protective film at the bot-
tom side of the heatsink.
Then put the heatsink onto the CPU and fix it from the rear side of
the motherboard using the mounting screws.
Step 2
1.
2.
3.
Specyfikacje produktu
| Marka: | Noctua |
| Kategoria: | Koeler procesora |
| Model: | NH-L9i |
| Kolor produktu: | Beige, Brown, Silver |
| Odpowiednia lokalizacja: | Procesor |
| Moc: | 2.52 W |
| Wysokość produktu: | 23 mm |
| Szerokość produktu: | 95 mm |
| Głębokość produktu: | 95 mm |
| Waga produktu: | 345 g |
| Kod zharmonizowanego systemu (HS): | 84733080 |
| Napięcie: | 12 V |
| Model: | Chlodnica/wentylator |
| Procesor: | Intel® Pentium® |
| Wymiary produktu (SxGxW): | 95 x 95 x 23 mm |
| Obsługiwane gniazda procesora: | LGA 1150 (Socket H3), LGA 1155 (Socket H2), LGA 1156 (Socket H) |
| Złącze(a): | 4-pin PWM |
| MTBF (Średni okres międzyawaryjny): | 150000 h |
| Poziom hałasu (wysoka prędkość): | 23.6 dB |
| Średnica czaszy wentylatora: | 92 mm |
| Prędkość obrotowa (min): | 300 RPM |
| Prędkość obrotowa (max): | 2500 RPM |
| Przepływ powietrza: | 57.5 m³/h |
| Technologia łożysk: | SSO2 |
| Maksymalne ciśnienie powietrza: | 2.11 mmH2O |
Potrzebujesz pomocy?
Jeśli potrzebujesz pomocy z Noctua NH-L9i, zadaj pytanie poniżej, a inni użytkownicy Ci odpowiedzą
Instrukcje Koeler procesora Noctua

2 Października 2024
2 Października 2024
2 Października 2024
1 Października 2024
1 Października 2024
1 Października 2024
1 Października 2024
1 Października 2024
1 Października 2024
1 Października 2024
Instrukcje Koeler procesora
Najnowsze instrukcje dla Koeler procesora
9 Kwietnia 2025
9 Kwietnia 2025
9 Kwietnia 2025
27 Marca 2025
5 Marca 2025
26 Lutego 2025
26 Lutego 2025
26 Lutego 2025
5 Lutego 2025
30 Grudnia 2025