Instrukcja obsługi Pioneer 12.301190-04
Pioneer Niesklasyfikowane 12.301190-04
Przeczytaj poniżej 📖 instrukcję obsługi w języku polskim dla Pioneer 12.301190-04 (2 stron) w kategorii Niesklasyfikowane. Ta instrukcja była pomocna dla 19 osób i została oceniona przez 4 użytkowników na średnio 4.7 gwiazdek
Strona 1/2
2-DIN 12.301190-04
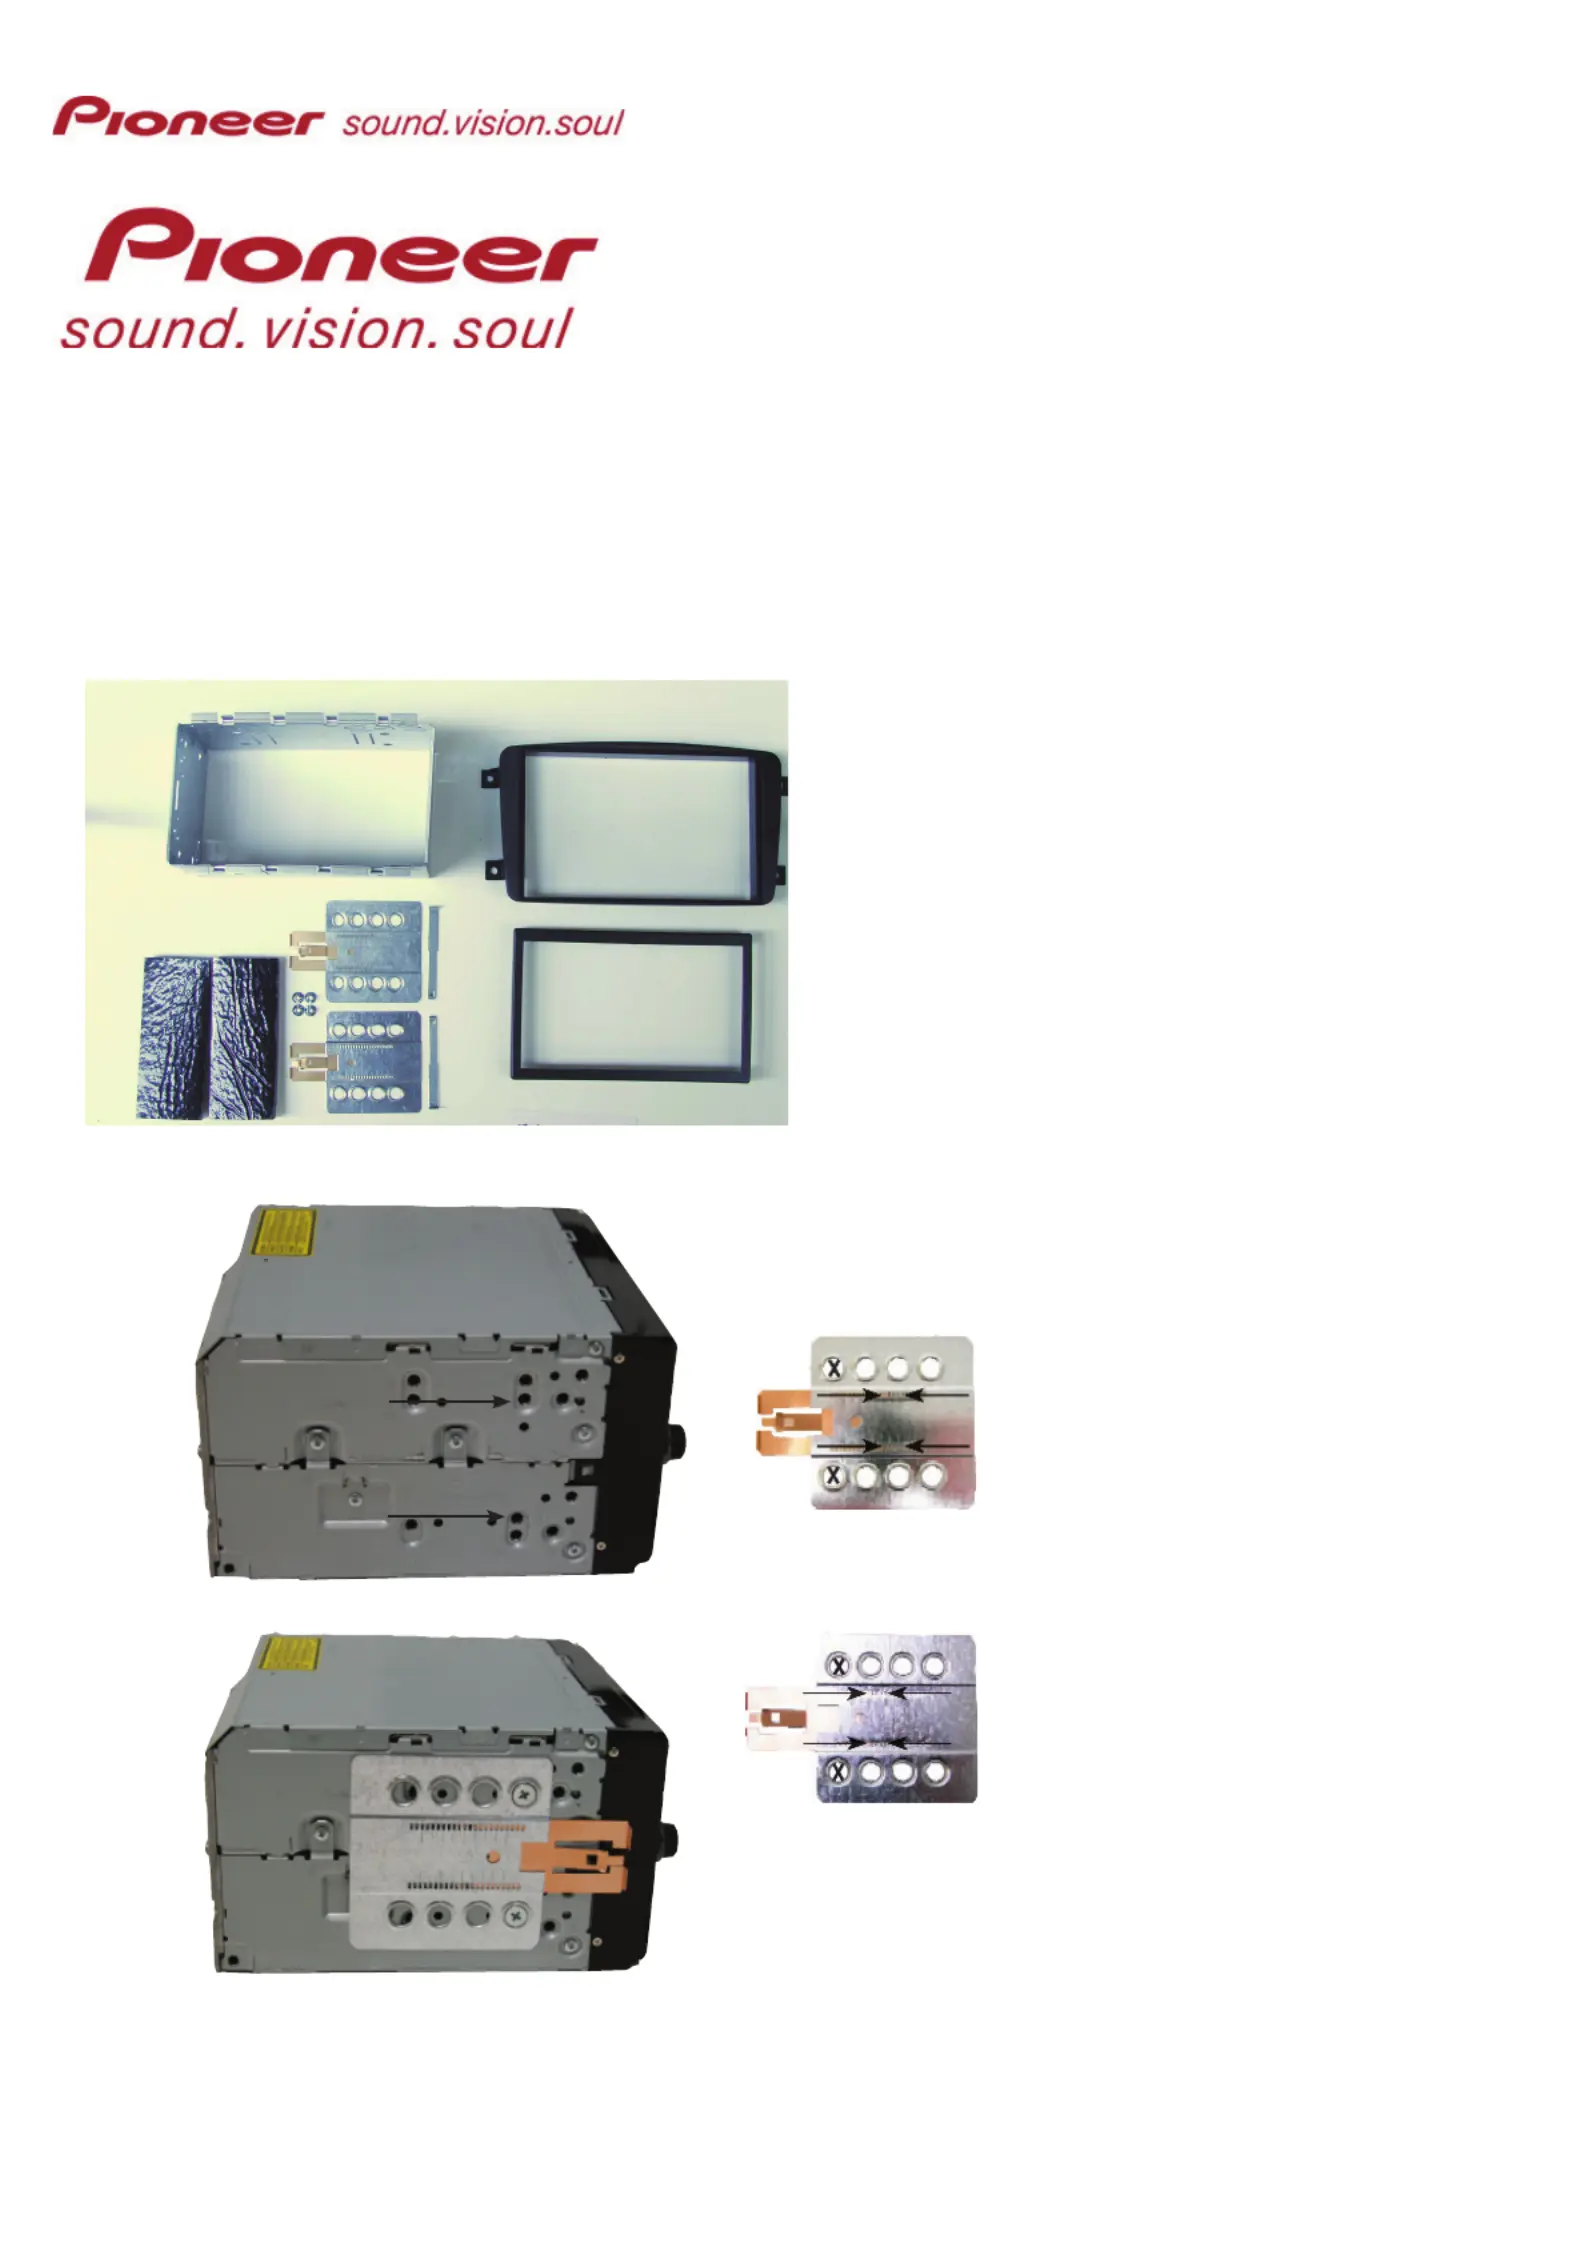
Installation kit includes the following items:
* 1X 2-ISO 110 mm. metal bracket
* 1X Replacement panel
* 1X Radio trim
* 2X Mounting plates
* 2X Mounting spacers
* 2X Radio removal keys
* 4X Screws
* 2X Cushion
Installation manual for:
Mercedes Benz C-Class (W203-004) <-04-2004
C- & T- Models Mercedes Benz CLK (W209-3) <-
04-2004
Mercedes Benz Vito (W639)
* Mount the plates.
Use this hole
Use this hole
Pioneer HD1BT
We advice to use the following positions.
Other positions are also possible.
Use position 1 marked with a cross.
Use position 14 & 16 marked with an arrow.
Measured from left to right.
Pioneer Avic D3
We advice to use the following positions.
Other positions are also possible.
Use position 1 marked with a cross.
Use position 9 & 11 marked with an arrow
Measured from left to right.
Specyfikacje produktu
| Marka: | Pioneer |
| Kategoria: | Niesklasyfikowane |
| Model: | 12.301190-04 |
Potrzebujesz pomocy?
Jeśli potrzebujesz pomocy z Pioneer 12.301190-04, zadaj pytanie poniżej, a inni użytkownicy Ci odpowiedzą
Instrukcje Niesklasyfikowane Pioneer

10 Stycznia 2025
4 Stycznia 2025
1 Stycznia 2025
1 Stycznia 2025
1 Stycznia 2025
30 Grudnia 2025
30 Grudnia 2025
30 Grudnia 2025
21 Grudnia 2024
17 Grudnia 2024
Instrukcje Niesklasyfikowane
Najnowsze instrukcje dla Niesklasyfikowane
29 Stycznia 2025
29 Stycznia 2025
29 Stycznia 2025
29 Stycznia 2025
29 Stycznia 2025
29 Stycznia 2025
29 Stycznia 2025
29 Stycznia 2025
29 Stycznia 2025
29 Stycznia 2025