Instrukcja obsługi Proaim Astra
Proaim Niesklasyfikowane Astra
Przeczytaj poniżej 📖 instrukcję obsługi w języku polskim dla Proaim Astra (4 stron) w kategorii Niesklasyfikowane. Ta instrukcja była pomocna dla 20 osób i została oceniona przez 6 użytkowników na średnio 4.9 gwiazdek
Strona 1/4
1
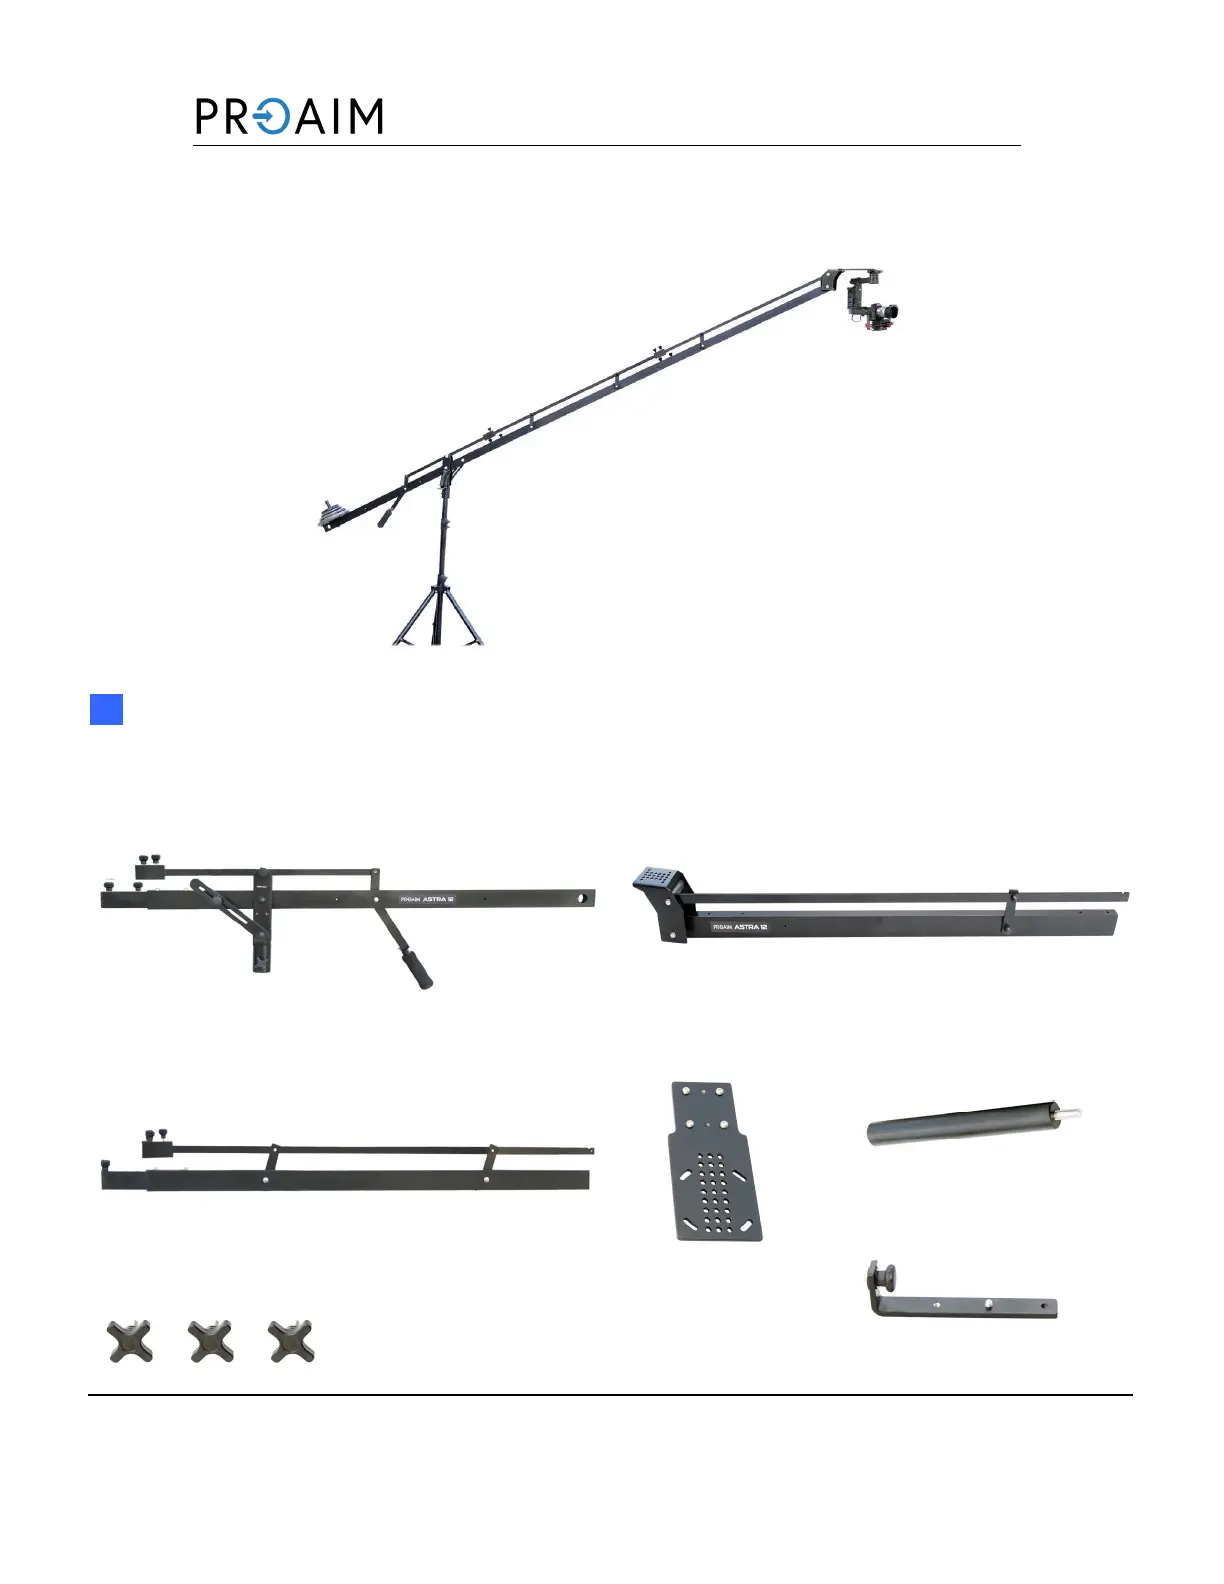
What’s In The Box
Please inspect the contents of your shipped package to ensure you have received everything that
is listed below.
All rights reserved.
No part of this document may be reproduced, stored in a retrieval system, or transmied by any form or by any means,
electronic, mechanical, photo-copying, recording, or otherwise, except as may be expressly permied by the applicable copyright
statutes or in wring by the Publisher.
Astra 8 & 12 Camera Jib Crane
Assembly Manual
Astra comes with a back secon, a front secon with your
choice of camera mount, and vercal and horizontal
counterweight bars.
Camera Mount With Over Slung Mount.
Extension Secon - 4
Extension Camera Plate
Vercal Counterweight Bar
LCDMounng Bracket
Tightening knobs
Specyfikacje produktu
| Marka: | Proaim |
| Kategoria: | Niesklasyfikowane |
| Model: | Astra |
Potrzebujesz pomocy?
Jeśli potrzebujesz pomocy z Proaim Astra, zadaj pytanie poniżej, a inni użytkownicy Ci odpowiedzą
Instrukcje Niesklasyfikowane Proaim

28 Stycznia 2025
27 Grudnia 2024
27 Grudnia 2024
27 Grudnia 2024
27 Grudnia 2024
27 Grudnia 2024
27 Grudnia 2024
27 Grudnia 2024
7 Października 2024
5 Października 2024
Instrukcje Niesklasyfikowane
Najnowsze instrukcje dla Niesklasyfikowane
29 Stycznia 2025
29 Stycznia 2025
29 Stycznia 2025
29 Stycznia 2025
29 Stycznia 2025
29 Stycznia 2025
29 Stycznia 2025
29 Stycznia 2025
29 Stycznia 2025
29 Stycznia 2025