Instrukcja obsługi StarTech.com LTANCHORL
                    StarTech.com
                    
                    szczelina
                    
                    LTANCHORL
                
                                
    Przeczytaj poniżej 📖 instrukcję obsługi w języku polskim dla StarTech.com LTANCHORL (2 stron) w kategorii szczelina. Ta instrukcja była pomocna dla 20 osób i została oceniona przez 10.5 użytkowników na średnio 4.4 gwiazdek
                        Strona 1/2


Quick-Start Guide
To view manuals, FAQs, videos, drivers, downloads, technical drawings, and more, visit www.startech.com/support.
Manual Revision: March 21, 2019 11:10 AM
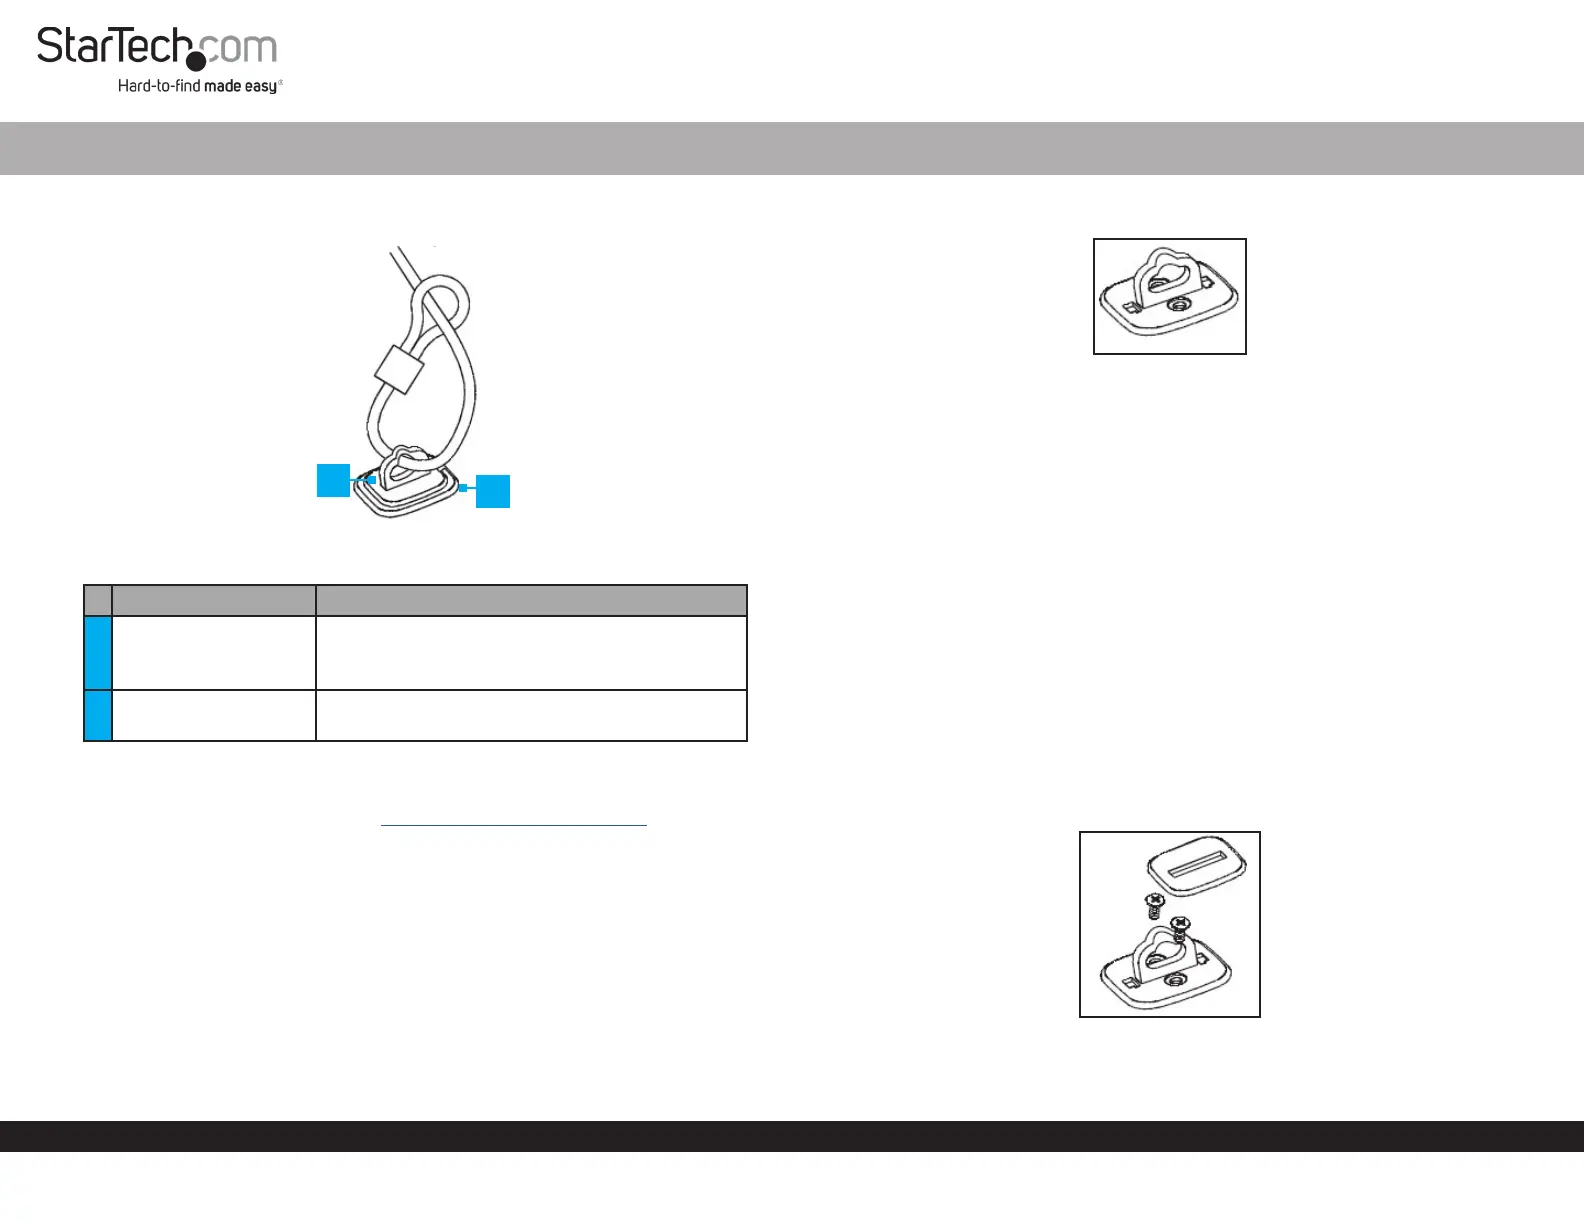
Product Diagram (LTANCHORL)
Note: Security Cable and Lock sold separately.
Component Function 
1Security Plate
•  Used to hide the  .Mounting Screws
•  Used to prevent access to the Mounting 
Screws.
2Desk Anchor •  Used in place of a stationary object to secure a 
connected  .Device
Requirements
For the latest requirements, please visit  .www.startech.com/LTANCHORL
Installation
Notes: The   is not recommend for use outdoors, in high humidity Desk Anchor
conditions, on glass, ceramic tile, or water absorbent materials. 
The following surface types must have a primer applied before the   can Desk Anchor
be properly installed: copper, brass, or plasticized vinyl.
For maximum security, it is recommended that both Adhesive Backing and 
Mounting Screws Desk Anchor are used when installing the  .
Laptop Lock Anchor - Large
1
1.  Position the   on the surface you wish to mount it to.Desk Anchor
Desk Anchor
Note: Use a pencil to draw an outline around the  This will ensure that  Desk Anchor.
you know the area you need to score using the  .Abrasive Pad
2.  Use the   (included) to score the surface area you intend to mount the Abrasive Pad
Desk Anchor Desk Anchor  on. Be careful to only score the surface that the  will 
cover.
3.  Use the   (included) to clean the scored surface prior to installation. Alcohol Pad
Allow the alcohol to dry before installing the   on the surface.Desk Anchor
Note: (Optional) Use the   on the   as a guide to drill pilot Screw Holes Desk Anchor
holes.
4.  Remove the   on the back of the   exposing the Adhesive Backing Desk Anchor,
adhesive surface. Secure the   to the scored area. Apply the adhesive Desk Anchor
backing to the surface at room temperature 60 °F (16°C).
5.  Before connecting a   to the  allow the adhesive Security Cable Desk Anchor, 
backing at least 24 hours to bond to the surface.
6.  Insert the  (x2) into the   on the  .Mounting Screws  Mounting Holes Desk Anchor
Installing the Mounting Screws 
2
Specyfikacje produktu
| Marka: | StarTech.com | 
| Kategoria: | szczelina | 
| Model: | LTANCHORL | 
Potrzebujesz pomocy?
Jeśli potrzebujesz pomocy z StarTech.com LTANCHORL, zadaj pytanie poniżej, a inni użytkownicy Ci odpowiedzą
Instrukcje szczelina StarTech.com
                        
                         9 Października 2024


                         8 Października 2024


                         8 Października 2024


                         8 Października 2024


                         8 Października 2024


                         8 Października 2024


                         8 Października 2024


                         2 Października 2024


                         2 Października 2024


                         2 Października 2024
                        
                    
                                                            Instrukcje szczelina
- Burg Wächter
- Abus
- Olympia
- AXA
- Aqara
- Chamberlain
- Middle Atlantic
- Ruggard
- PNY
- Rocstor
- Tryten
- Welock
- Nemef
- Kidde
- Hamlet
Najnowsze instrukcje dla szczelina
                        
                         8 Kwietnia 2025


                         29 Marca 2025


                         29 Marca 2025


                         29 Marca 2025


                         29 Marca 2025


                         29 Marca 2025


                         27 Marca 2025


                         13 Marca 2025


                         11 Marca 2025


                         10 Marca 2025