Instrukcja obsługi Ventev TW-CTEN-P
Ventev
Niesklasyfikowane
TW-CTEN-P
Przeczytaj poniżej 📖 instrukcję obsługi w języku polskim dla Ventev TW-CTEN-P (2 stron) w kategorii Niesklasyfikowane. Ta instrukcja była pomocna dla 22 osób i została oceniona przez 11.5 użytkowników na średnio 3.6 gwiazdek
Strona 1/2
1. Prepare the ceiling tile grid for a 1’ x 2’ or
2’ x 2’ installation.
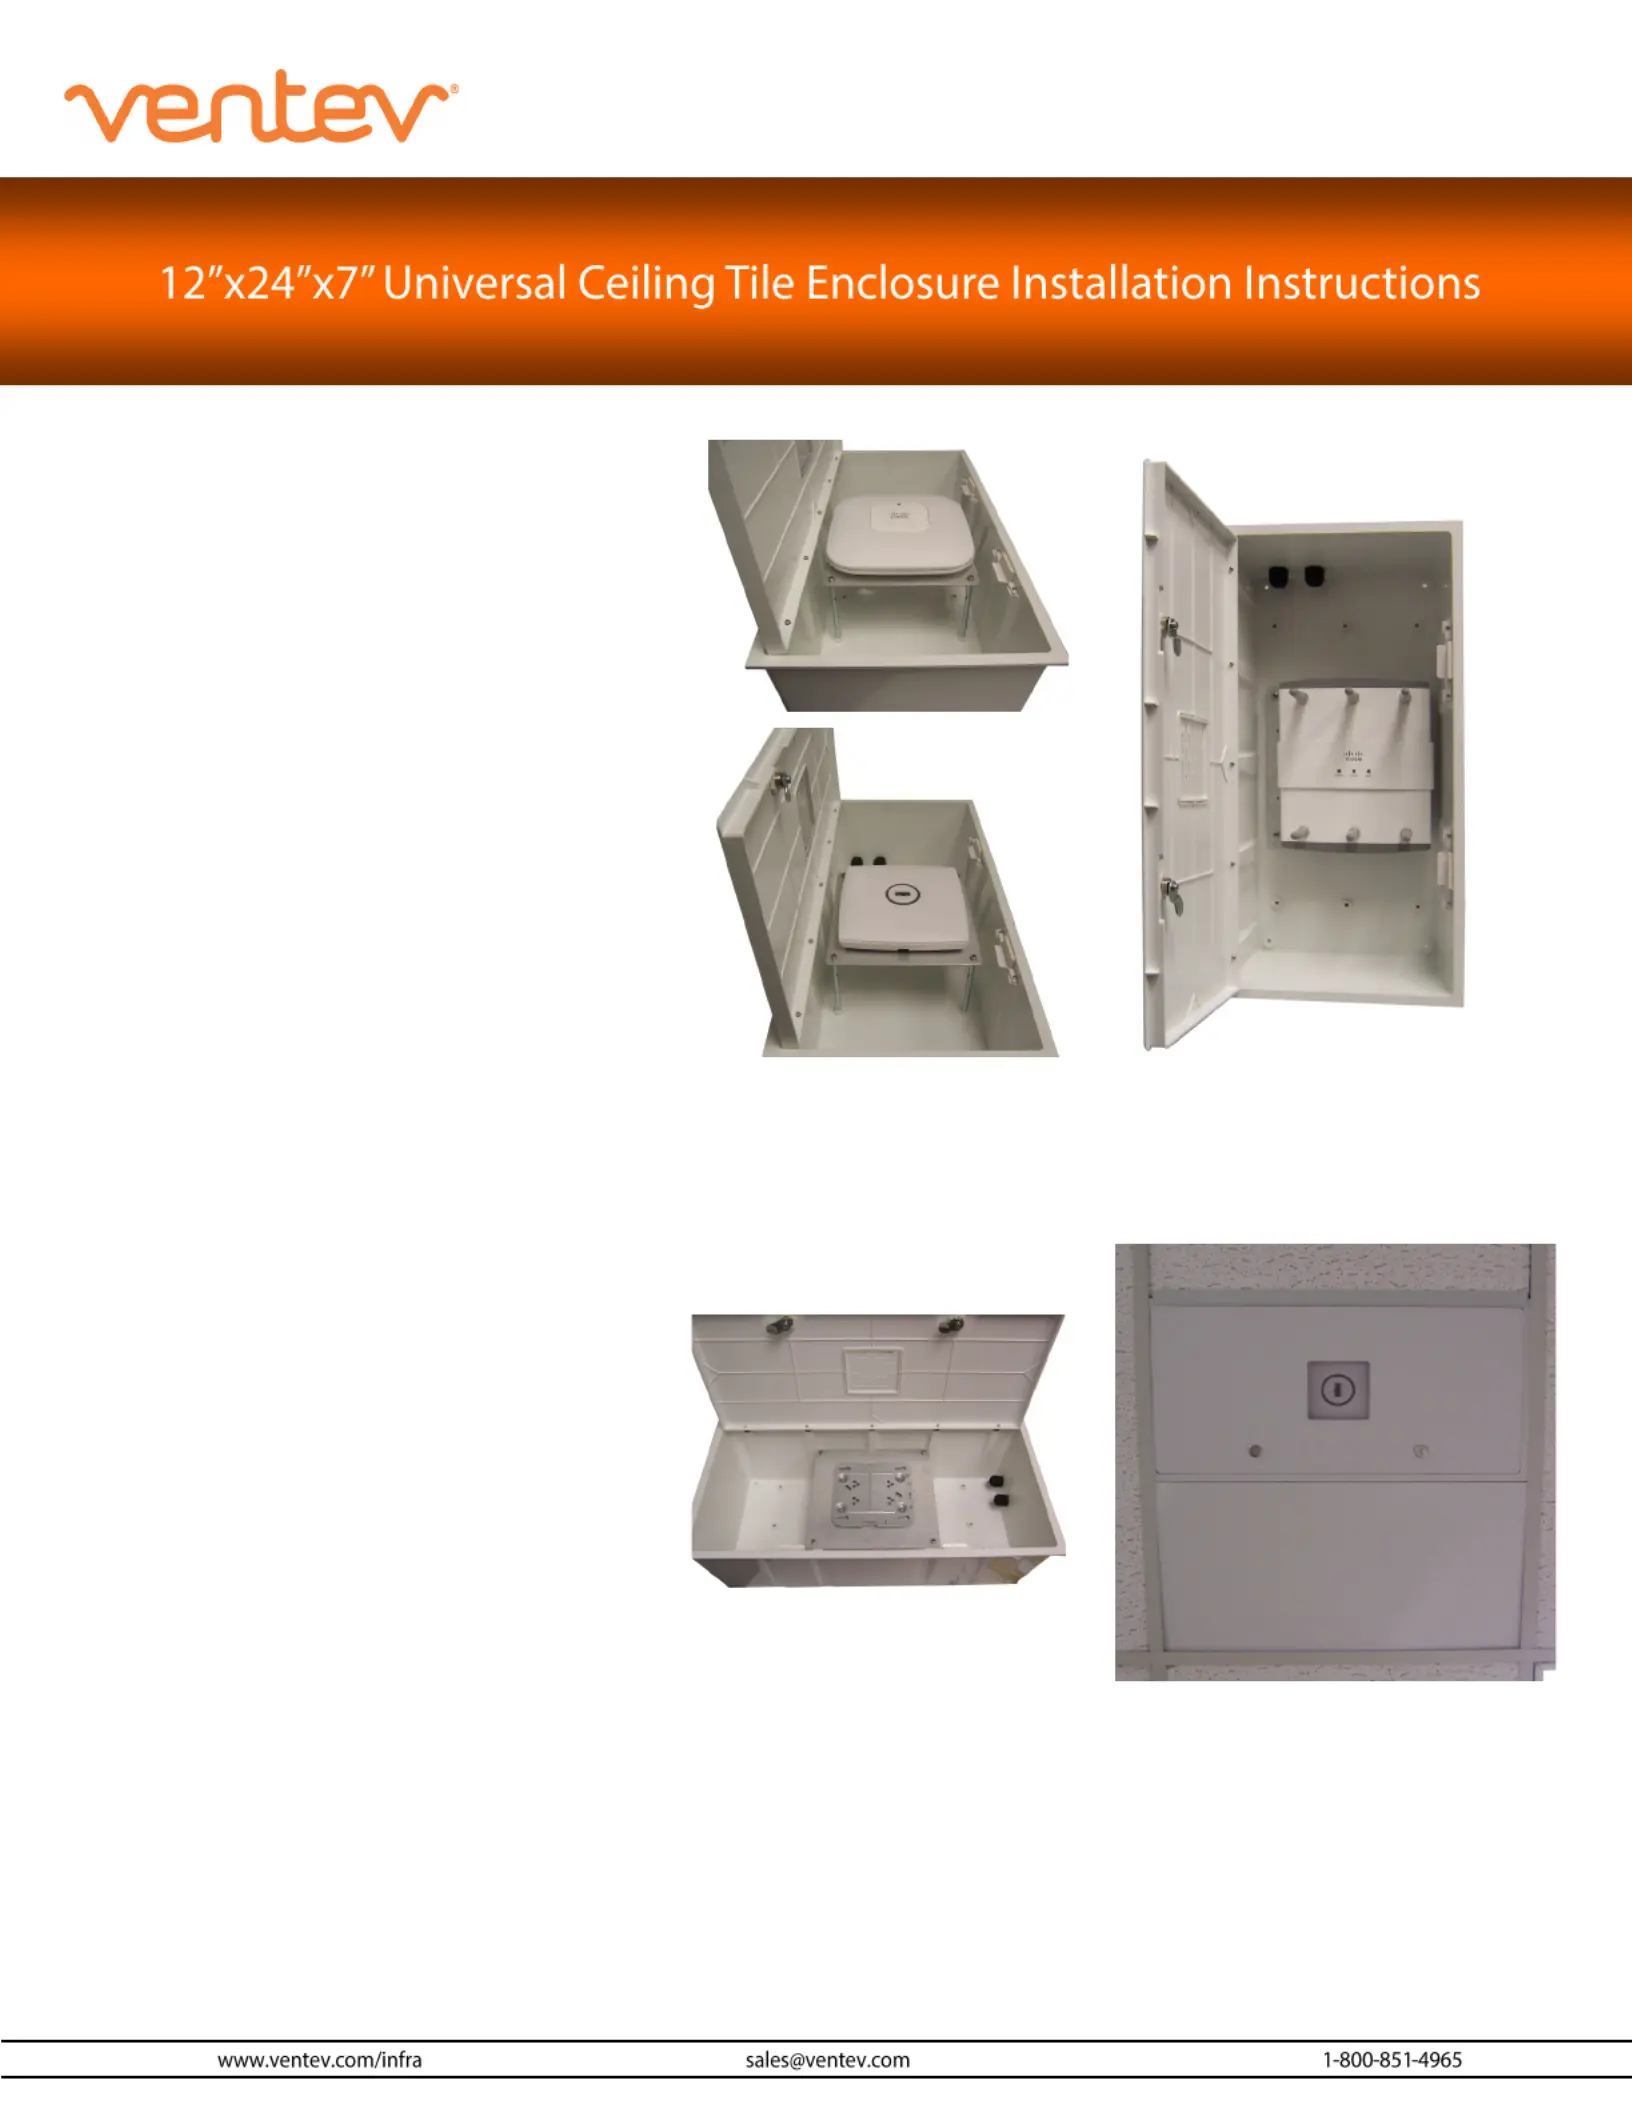
2. Determine the correct mounting height of
the access point (AP) mounting plate.
Use the included standoffs for APs with
integrated antennas (Figure 1). For AP
installations using rubber duck antennas,
do not use the mounting plate standoffs
(Figure 2).
3. Secure the AP mounting plate on the
enclosure mounting plate (Figure 3) with
the appropriate hardware. For most
Cisco APs, the mounting holes are
already pre drilled into the mounting plate. -
For all other APs, use self tapping -
screws.
4. Install the desired door insert.
5. Place the enclosure into the ceiling tile
grid. Pull power and Ethernet
connections through the provided cord
grips as needed.
6. If desired, install the included ceiling tile
insert for a 2’ x 2’ installation.
7. Secure the enclosure to the ceiling
structure if required by local building
codes.
8. Connect the power and Ethernet to the
AP as recommended by the AP
manufacturer.
9. Install the AP onto the mounting plate.
10. Close the enclosure door and turn the
locking mechanism to lock the enclosure
door (Figure 4).
Figure 1
Figure 3
Figure 2
Figure 4
Specyfikacje produktu
| Marka: | Ventev |
| Kategoria: | Niesklasyfikowane |
| Model: | TW-CTEN-P |
Potrzebujesz pomocy?
Jeśli potrzebujesz pomocy z Ventev TW-CTEN-P, zadaj pytanie poniżej, a inni użytkownicy Ci odpowiedzą
Instrukcje Niesklasyfikowane Ventev

7 Października 2024

7 Października 2024

7 Października 2024

7 Października 2024

7 Października 2024

7 Października 2024

7 Października 2024

7 Października 2024

7 Października 2024

7 Października 2024
Instrukcje Niesklasyfikowane
- Olivetti
- Dell
- Braun Phototechnik
- CFH
- PAC
- Dehner
- Sevenoak
- Jocca
- Acer
- JBC
- Home Easy
- C3
- Leviton
- Mousetrapper
- Trace Elliot
Najnowsze instrukcje dla Niesklasyfikowane

29 Stycznia 2025

29 Stycznia 2025

29 Stycznia 2025

29 Stycznia 2025

29 Stycznia 2025

29 Stycznia 2025

29 Stycznia 2025

29 Stycznia 2025

29 Stycznia 2025

29 Stycznia 2025