Instrukcja obsługi AXESS AXDSPH-GL10
AXESS
Niesklasyfikowane
AXDSPH-GL10
Przeczytaj poniżej 📖 instrukcję obsługi w języku polskim dla AXESS AXDSPH-GL10 (8 stron) w kategorii Niesklasyfikowane. Ta instrukcja była pomocna dla 42 osób i została oceniona przez 21.5 użytkowników na średnio 5.0 gwiazdek
Strona 1/8
AXDSPH-GL10
I N S TA L L AT I O N I N S T R U C T I O N S
AxxessInterfaces.com © COPYRIGHT 2022 METRA ELECTRONICS CORPORATION REV. 8/10/22 INSTAXDSPH-GL10
ATTENTION: With the key out of the ignition,
disconnect the negative battery terminal
before installing this product. Ensure that all
installation connections, especially the air
bag indicator lights, are plugged in before
reconnecting the battery or cycling the
ignition to test this product.
NOTE: Refer also to the instructions included
with the aftermarket accessory before
installing this device.
TABLE OF CONTENTS
Installation Options ...............................................2
Installation .............................................................2
20-Pin Harness Pinout...........................................3
Adding A Subwoofer To A Factory System...........4
Adding A Full-Range Amp and
Subwoofer To A Factory System ........................5
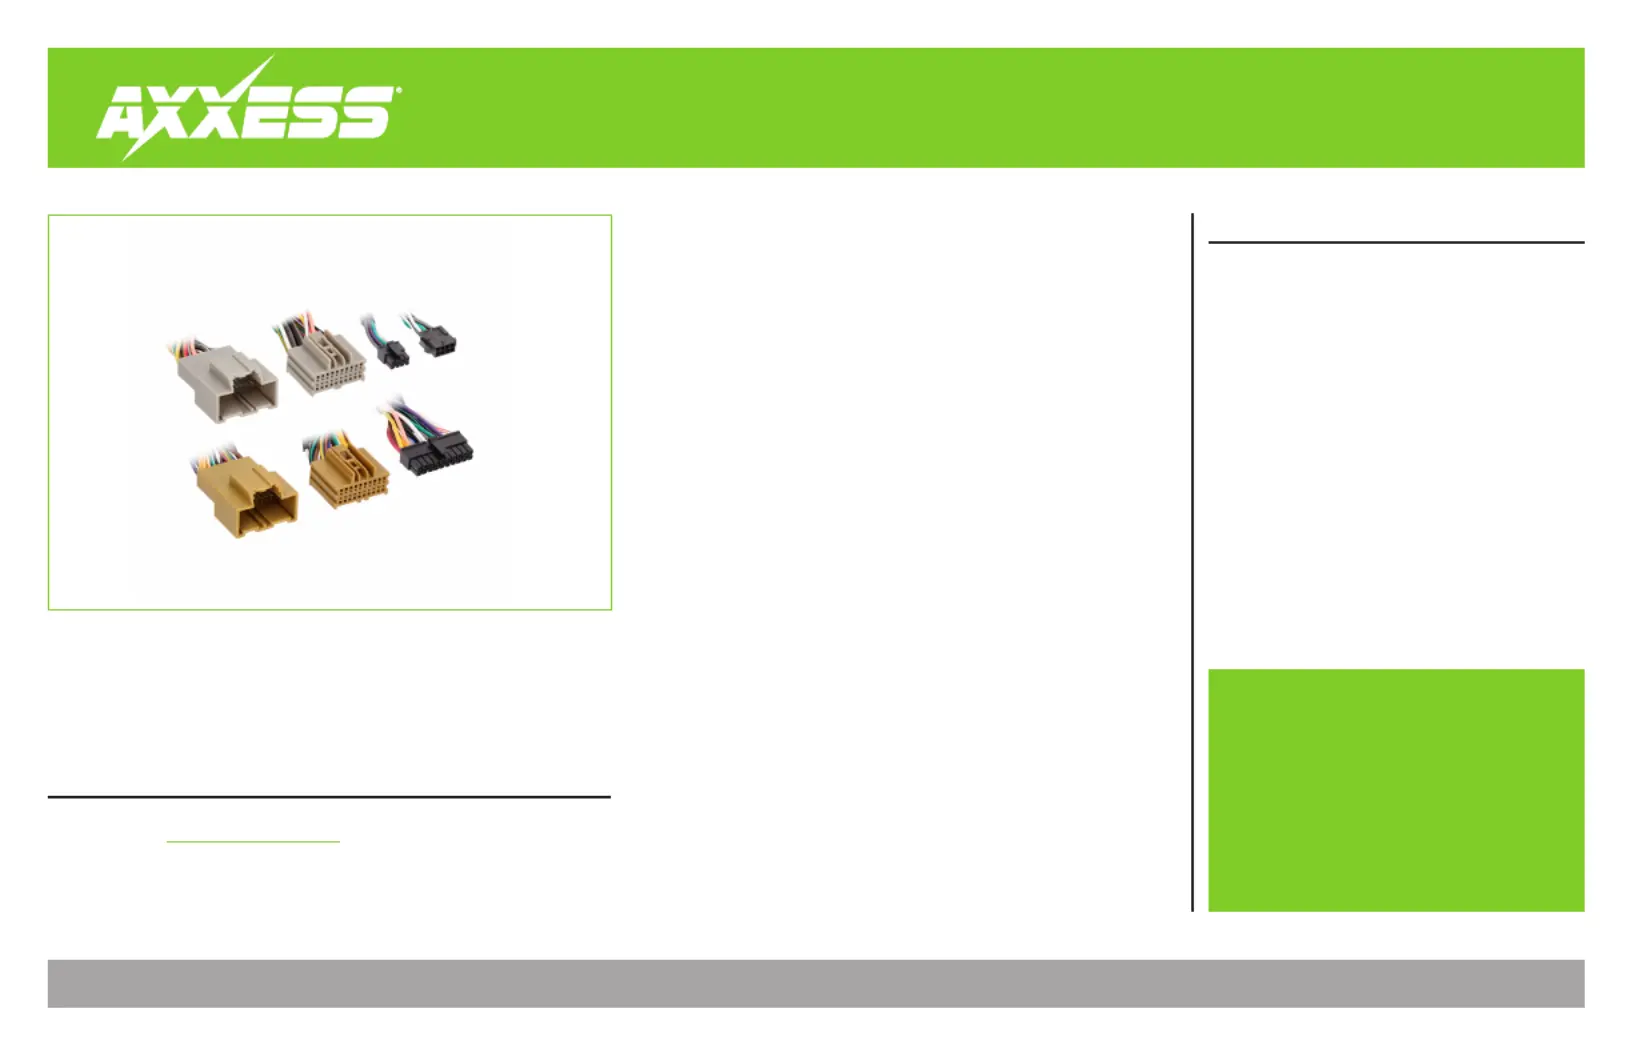
AX-DSP T-Harness
The Axxess T-harness is a basic and simple plug-n-play harness for
easy installation of the AXDSP-X AXDSP-L or (sold separately) for
vehicle specific applications. Most T-harnesses created by Axxess
will have an 8-pin harness, with the speaker wires pinned. If you are
installing a 4-channel amplifier with one of the AXDSP interfaces,
leave these connectors disconnected. The only reason for connecting
these harnesses together would be if the AXDSP interface is being
used for adding a subwoofer amplifier only. Some T-harnesses
require additional wiring and/or installation steps, see page 2.
Refer to page 3 for a pinout legend for the 20-pin harness, and also
additional wiring and notes.
APPLICATIONS
Visit AxxessInterfaces.com for more detailed
information about the product and
up-to-date vehicle specific applications.
Visit Metraonline.com AxxessInterfaces.com or
for harness and interface options.
Visit
AxxessInterfaces.com
for current application list.
Specyfikacje produktu
| Marka: | AXESS |
| Kategoria: | Niesklasyfikowane |
| Model: | AXDSPH-GL10 |
Potrzebujesz pomocy?
Jeśli potrzebujesz pomocy z AXESS AXDSPH-GL10, zadaj pytanie poniżej, a inni użytkownicy Ci odpowiedzą
Instrukcje Niesklasyfikowane AXESS

28 Stycznia 2025

28 Stycznia 2025

10 Stycznia 2025

28 Grudnia 2024

28 Grudnia 2024

27 Grudnia 2024

27 Grudnia 2024

9 Października 2024

8 Października 2024

8 Października 2024
Instrukcje Niesklasyfikowane
- Ugolini
- EMG
- Saki
- Möhlenhoff
- Martin Audio
- IBEAM
- FireKing
- AJH Synth
- Deltex
- Superrollo
- Magmatic
- Plasma Cloud
- Roxio
- DEXP
- Calligaris .com
Najnowsze instrukcje dla Niesklasyfikowane

29 Stycznia 2025

29 Stycznia 2025

29 Stycznia 2025

29 Stycznia 2025

29 Stycznia 2025

29 Stycznia 2025

29 Stycznia 2025

29 Stycznia 2025

29 Stycznia 2025

29 Stycznia 2025