Instrukcja obsługi AXESS AXTO-CH1
AXESS
Niesklasyfikowane
AXTO-CH1
Przeczytaj poniżej 📖 instrukcję obsługi w języku polskim dla AXESS AXTO-CH1 (8 stron) w kategorii Niesklasyfikowane. Ta instrukcja była pomocna dla 16 osób i została oceniona przez 8.5 użytkowników na średnio 4.3 gwiazdek
Strona 1/8

AXTO-CH1
I N S T A L L A T I O N I N S T R U C T I O N S
AxxessInterfaces.com © COPYRIGHT 2020 METRA ELECTRONICS CORPORATION REV. 2/4/20 INSTAXTO-CH1
Product Info
INTERFACE FEATURES
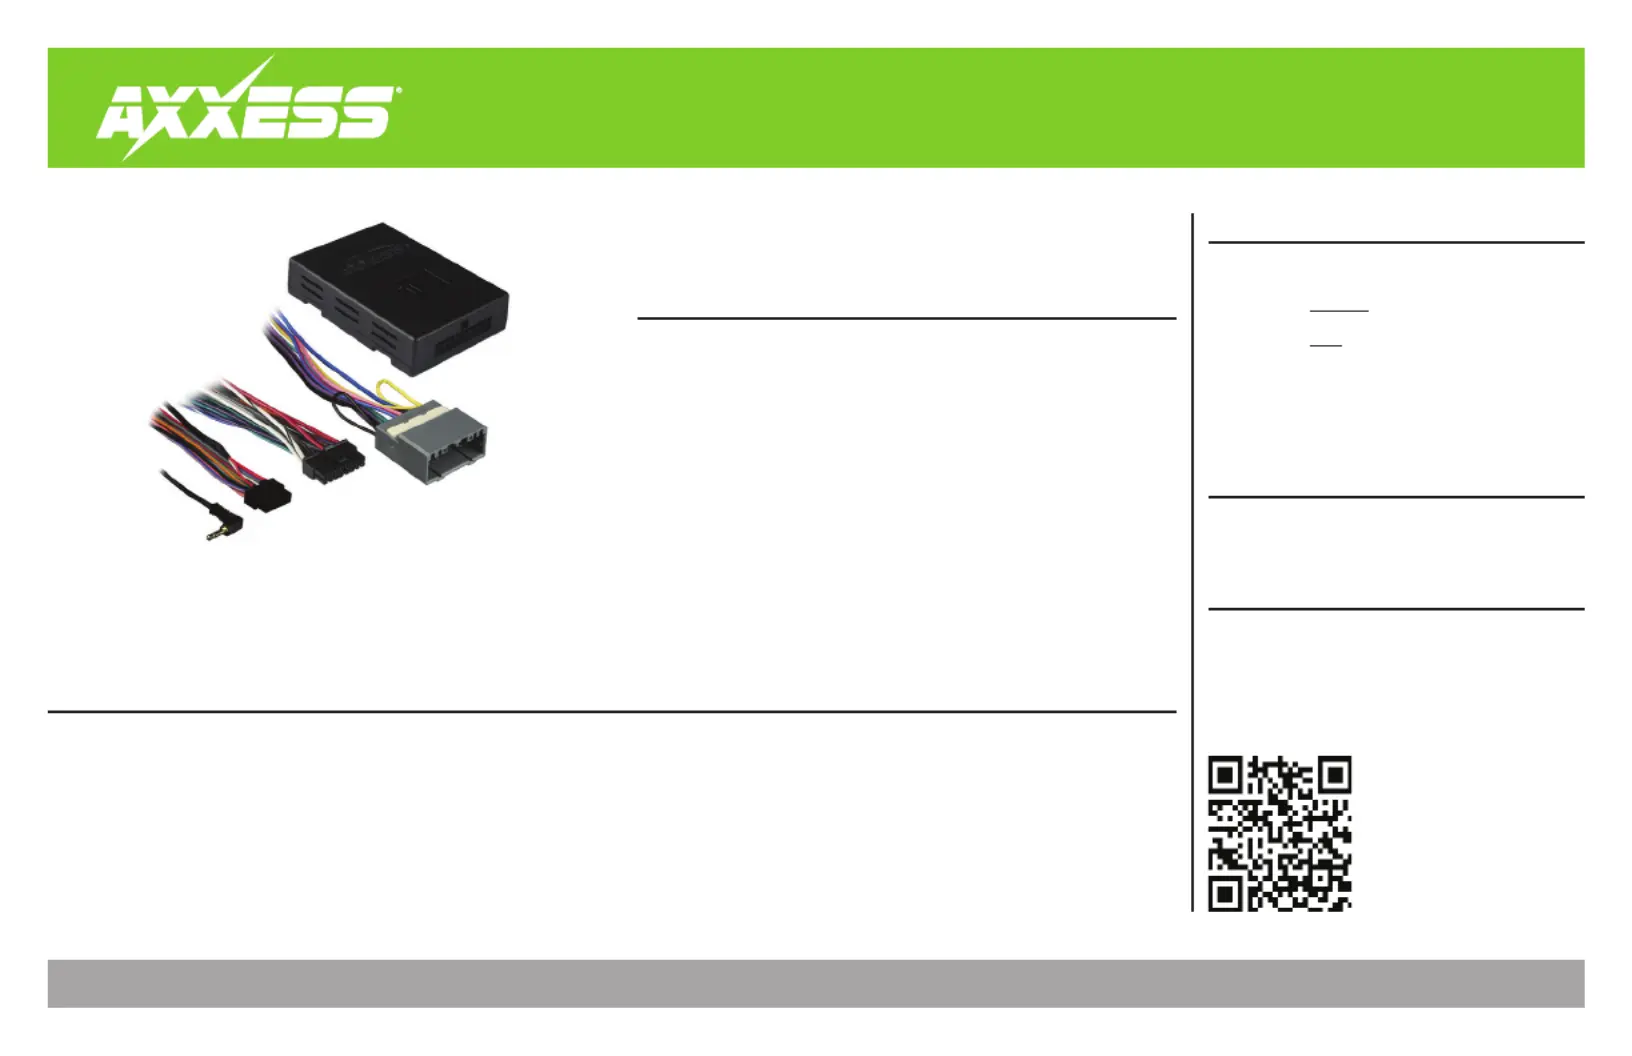
INTERFACE COMPONENTS
TOOLS & INSTALLATION ACCESSORIES REQUIRED
• Crimping tool and connectors, or solder gun,
solder, and heat shrink • Tape • Wire cutter
• Zip ties • Small flat-blade screwdriver
TABLE OF CONTENTS
Connections
- For models
without
an amplifier .......................2
- For models
with
an amplifier .............................3
Installation .............................................................4
Programming .........................................................4
Audio Level Adjustment ........................................4
Chrysler Data Interface 2004-2010
• Provides accessory power
(12-volt 10 amp)
• Retains R.A.P. (retained
accessory power)
• Used in amplified or non-
amplified systems
•
Provides NAV outputs (parking
brake, reverse, and speed sense)
• Pre-wired AXSWC harness
(AXSWC sold separately)
• Adjustable gain control for
overall volume (on amplified
systems)
• Retains blind spot detection
system (if equipped)
• High level speaker input
• Retains balance and fade
• Micro-B USB updatable
• AXTO-CH1 harness • AXTO-CH1 interface
• 16-pin harness • 4-pin harness
APPLICATIONS
CHRYSLER
300 2005-2007
Aspen 2007
PT Cruiser 2006-2010
DODGE
Caliber 2007-2008
DODGE (CONT)
Charger 2006-2007
Dakota 2005-2007
Durango 2004-2007
Magnum 2005-2007
Ram 1500 2006-2008
Ram 2500/3500 2006-2009
JEEP
Commander 2006-2007
Compass 2007-2008
Grand Cherokee 2005-2007
Patriot 2007-2008
MITSUBISHI
Raider 2006-2007

2
CONNECTIONS
For models
without
a factory amplifier:
From the 16-pin harness to the aftermarket radio, connect the:
• wire to the accessory wire.Red
• Orange/White wire to the illumination wire (if applicable).
Attention! The following (4) wires are reversed on purpose. These wires will not match “color
code” to the aftermarket radio.
• wire to the rear right positive speaker output.Gray
• Gray/Black wire to the rear right negative speaker output.
• White wire to the rear left positive speaker output.
• White/Black wire to the rear left negative speaker output.
The following (3) wires are only for multimedia/navigation radios that require these wires.
• wire to the VSS/speed sense wire.Blue/Pink
• Green/Purple wire to the reverse wire.
• Light Green wire to the parking brake wire
• Tape off and disregard the following (6) wires, they will not be used in this application:
Blue/White Brown Green Green/Black Purple Purple/Black, , , , ,
From the AXTO-CH1 harness to the aftermarket radio, connect the:
• wire to the ground wire.Black
• Yellow wire to the battery wire.
• or Blue Blue/White wire depending on which harness is used, to the power antenna wire.
• wire to the front right positive speaker output.Gray
• Gray/Black wire to the front right negative speaker output.
• White wire to the front left positive speaker output.
• White/Black wire to the front left negative speaker output.
• Make sure the (2) 4-pin connectors are connected together.
12-pin AXSWC harness & 3.5mm jack:
The 12-pin harness & 3.5mm jack is to be used with the (sold separately) to AXSWC AXSWC
retain steering wheel audio controls. If the is not being used, disregard this harness. AXSWC
If it is to be used, refer to the instructions for radio connections and programming. AXSWC
Disregard the harness that comes with the .AXSWC
Continue to Installation

3
REV. 2/4/2020 INSTAXTO-CH1
CONNECTIONS
For models
with
a factory amplifier:
From the 16-pin harness to the aftermarket radio, connect the:
• wire to the accessory wire.Red
• Blue/White wire to the amp turn on wire.
• Orange/White wire to the illumination wire (if applicable).
• wire to the front right positive speaker output.Gray
• Gray/Black wire to the front right negative speaker output.
• White wire to the front left positive speaker output.
• White/Black wire to the front left negative speaker output.
• wire to the rear right positive speaker output.Purple
• wire to the rear right negative speaker output.Purple/Black
• Green wire to the rear left positive speaker output.
• Green/Black wire to the rear left negative speaker output.
The following (3) wires are only for multimedia/navigation radios that require these wires.
• wire to the VSS/speed sense wire.Blue/Pink
• Green/Purple wire to the reverse wire.
• Light Green wire to the parking brake wire
• Tape off and disregard the following (1) wire, it will not be used in this application:
Brown
From the AXTO-CH1 harness to the aftermarket radio, connect the:
• wire to the ground wire.Black
• Yellow wire to the battery wire.
• or Blue Blue/White wire depending on which harness is used, to the power antenna wire.
• Make sure the (2) 4-pin connectors are connected together.
• Disregard the , it will not be used in this application.4-pin harness
• Tape off and disregard the following (4) wires, they will not be used in this application:
Gray, Gray/Black White White/Black, ,
12-pin AXSWC harness & 3.5mm jack:
The 12-pin harness & 3.5mm jack is to be used with the (sold separately) to AXSWC AXSWC
retain steering wheel audio controls. If the is not being used, disregard this harness. AXSWC
If it is to be used, refer to the instructions for radio connections and programming. AXSWC
Disregard the harness that comes with the .AXSWC
Continue to Installation
Specyfikacje produktu
Marka: | AXESS |
Kategoria: | Niesklasyfikowane |
Model: | AXTO-CH1 |
Potrzebujesz pomocy?
Jeśli potrzebujesz pomocy z AXESS AXTO-CH1, zadaj pytanie poniżej, a inni użytkownicy Ci odpowiedzą
Instrukcje Niesklasyfikowane AXESS
28 Stycznia 2025
28 Stycznia 2025
10 Stycznia 2025
28 Grudnia 2024
28 Grudnia 2024
27 Grudnia 2024
27 Grudnia 2024
9 Października 2024
8 Października 2024
8 Października 2024
Instrukcje Niesklasyfikowane
- Niesklasyfikowane Brabantia
- Niesklasyfikowane Western Digital
- Niesklasyfikowane Super Rod
- Niesklasyfikowane Havis
- Niesklasyfikowane Caple
- Niesklasyfikowane 9.solutions
- Niesklasyfikowane Fujitsu
- Niesklasyfikowane Gami
- Niesklasyfikowane Bigben
- Niesklasyfikowane Mikrotik
- Niesklasyfikowane Summer Infant
- Niesklasyfikowane Asaklitt
- Niesklasyfikowane Peavey
- Niesklasyfikowane Eta
- Niesklasyfikowane V7
Najnowsze instrukcje dla Niesklasyfikowane
29 Stycznia 2025
29 Stycznia 2025
29 Stycznia 2025
29 Stycznia 2025
29 Stycznia 2025
29 Stycznia 2025
29 Stycznia 2025
29 Stycznia 2025
29 Stycznia 2025
29 Stycznia 2025