Instrukcja obsługi Bazooka BPB-KP7W-G3
Bazooka
Niesklasyfikowane
BPB-KP7W-G3
Przeczytaj poniżej 📖 instrukcję obsługi w języku polskim dla Bazooka BPB-KP7W-G3 (2 stron) w kategorii Niesklasyfikowane. Ta instrukcja była pomocna dla 23 osób i została oceniona przez 12 użytkowników na średnio 4.2 gwiazdek
Strona 1/2
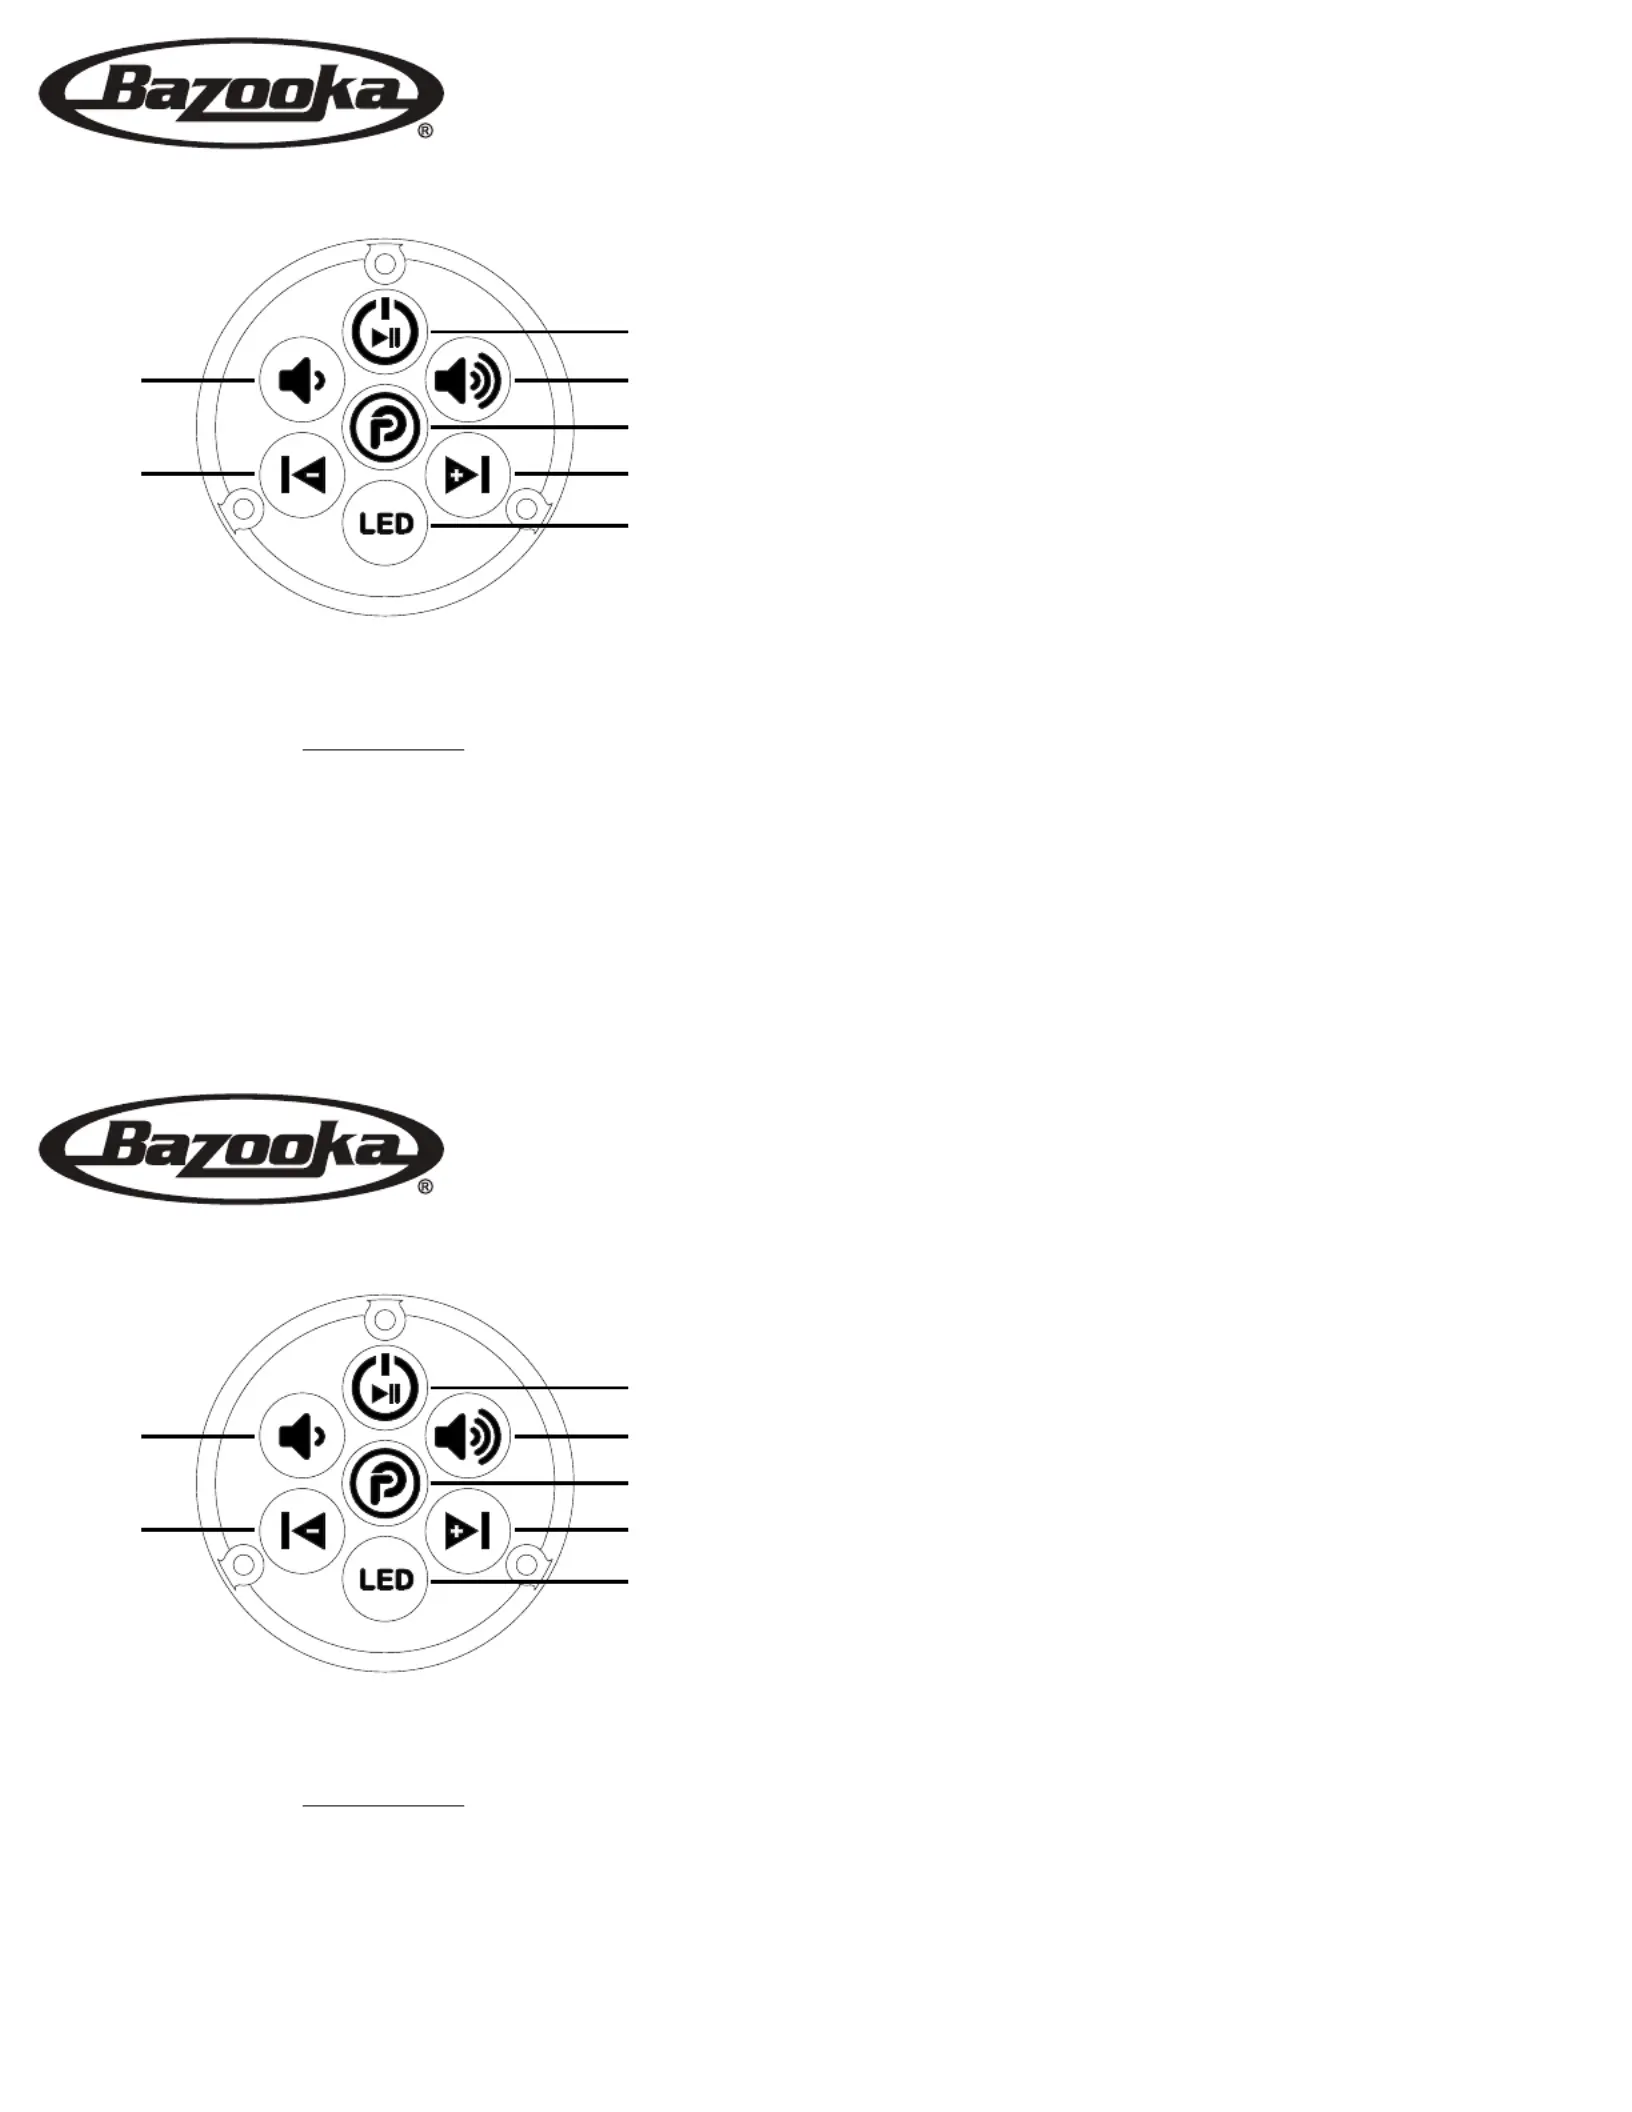
Volume Decrease
Song Reverse
Volume Increase
Song Forward
Party Button
On/Off, Play/Pause
LED Button
Power On/Off, Play/Pause: Press and hold turns bar on/off.
Click-press when music is playing causes music to pause.
Press again to play
LED: Press and hold turns led on/off. Click-press cycles the
sequence. Double-click turns beat to the music option on.
Party Button: Will illuminate for 10 seconds when any button is
pressed. Click-press cycles through the party modes. Party Button
on sound bar will change colors along with a voice prompt for that
mode. Party Button on remote will not change color.
Modes below:
Party Button on bar Voice Prompt
Blue Single Listener Mode
Purple DJ Broadcast Mode
Red DJ listening Mode
BPB24-G3, BPB24-DS-G3, BPB36-G3
Pairing Instructions:
Unplug the power wire from the Party Bar hold both the volume
decrease and volume increase buttons down on remote until the
Party Button is blinking. Plug the Party Bar’s power wire back in.
The remote will quickly blink 6 times, and then will be solid, indicat-
ing pairing was successful.
BPB16-G3, BPB16-G3-BAT, BPB16-G3-BAT-WH
Pairing Instructions:
Turn the master power button off on the bar. Hold both the volume
decrease and volume increase buttons down on remote until the
Party Button is blinking. Turn the master power button on. The
remote will quickly blink 6 times, and then will be solid, indicating
pairing was successful.
BPB-KP7W-G3
Note:
The Master Power button on the , BPB16-G3 BPB16-G3-BAT, and
BPB16-G3-BAT-WH MECHANICAL is a switch that kills all power
to insure there is no parasitic current draw while your (battery drain)
vehicle is in storage. The PWR button on the new dashboard remote
does and cannot operate that Master Power button. The PWR NOT
button on the dashboard remote will turn the internal Bluetooth module
ON/OFF as well as Pause/Play the music provided the Master Power
button on the unit is already ON.
Specyfikacje produktu
| Marka: | Bazooka |
| Kategoria: | Niesklasyfikowane |
| Model: | BPB-KP7W-G3 |
Potrzebujesz pomocy?
Jeśli potrzebujesz pomocy z Bazooka BPB-KP7W-G3, zadaj pytanie poniżej, a inni użytkownicy Ci odpowiedzą
Instrukcje Niesklasyfikowane Bazooka

1 Stycznia 2025

7 Października 2024

7 Października 2024

7 Października 2024

23 Września 2024

23 Września 2024

21 Września 2024

5 Lipca 2024
Instrukcje Niesklasyfikowane
- Iadea
- Maneco Labs
- Havis
- Hive
- GoXtreme
- ClearOne
- Yeyian
- Total Chef
- Thermomate
- Learning Resources
- Audibax
- Lingg & Janke
- Spacedec
- Friedland
- Kyoritsu
Najnowsze instrukcje dla Niesklasyfikowane

29 Stycznia 2025

29 Stycznia 2025

29 Stycznia 2025

29 Stycznia 2025

29 Stycznia 2025

29 Stycznia 2025

29 Stycznia 2025

29 Stycznia 2025

29 Stycznia 2025

29 Stycznia 2025