Instrukcja obsługi Busch + Müller LINE K Brake
Busch + Müller Ulga LINE K Brake
Przeczytaj poniżej 📖 instrukcję obsługi w języku polskim dla Busch + Müller LINE K Brake (2 stron) w kategorii Ulga. Ta instrukcja była pomocna dla 16 osób i została oceniona przez 7 użytkowników na średnio 5.0 gwiazdek
Strona 1/2
Anleitung TOPLIGHT Line K brake E (323KB)
Rücklicht mit Bremslicht, für E-Bikes
Dieses Rücklicht ist ausschließlich zum Anschluss an eine Gleichspannungsquelle von 5 bis 50 V (z.B. an einen E-
Bike-Akku) oder zum Anschluss an die 6-V-Rücklicht-Abgänge eines E-Bike-Scheinwerfers von Busch + Müller
geeignet.
Aufgrund der komplexen Technik bei E-Bike-Systemen kann keine Kompatibilität mit jedem Antriebsmodell
garantiert werden.
Niemals an eine Wechselspannungsquelle (z. B. an einen Dynamo) anschließen! Wenn Ihr E-Bike über einen
Dynamo zur Versorgung der Lichtanlage verfügt, benötigen Sie ein Standard-Dynamo-Rücklicht.
Das Rücklicht darf nur an Fahrzeuge angeschlossen werden, bei denen das Licht auch noch dann mindestens
zwei weitere Stunden mit Strom versorgt wird, wenn der Akku bereits so leer ist, dass er den Antrieb nicht
mehr versorgt. Alternativ darf übergangsweise der Antriebsmotor als Lichtmaschine dienen.
Dieses Rücklicht darf nicht an kennzeichenpflichtigen Fahrzeugen (z.B. schnelle E-Bikes) eingesetzt werden.
Das Rücklicht darf nur von einer Fachwerkstatt montiert und angeschlossen werden.
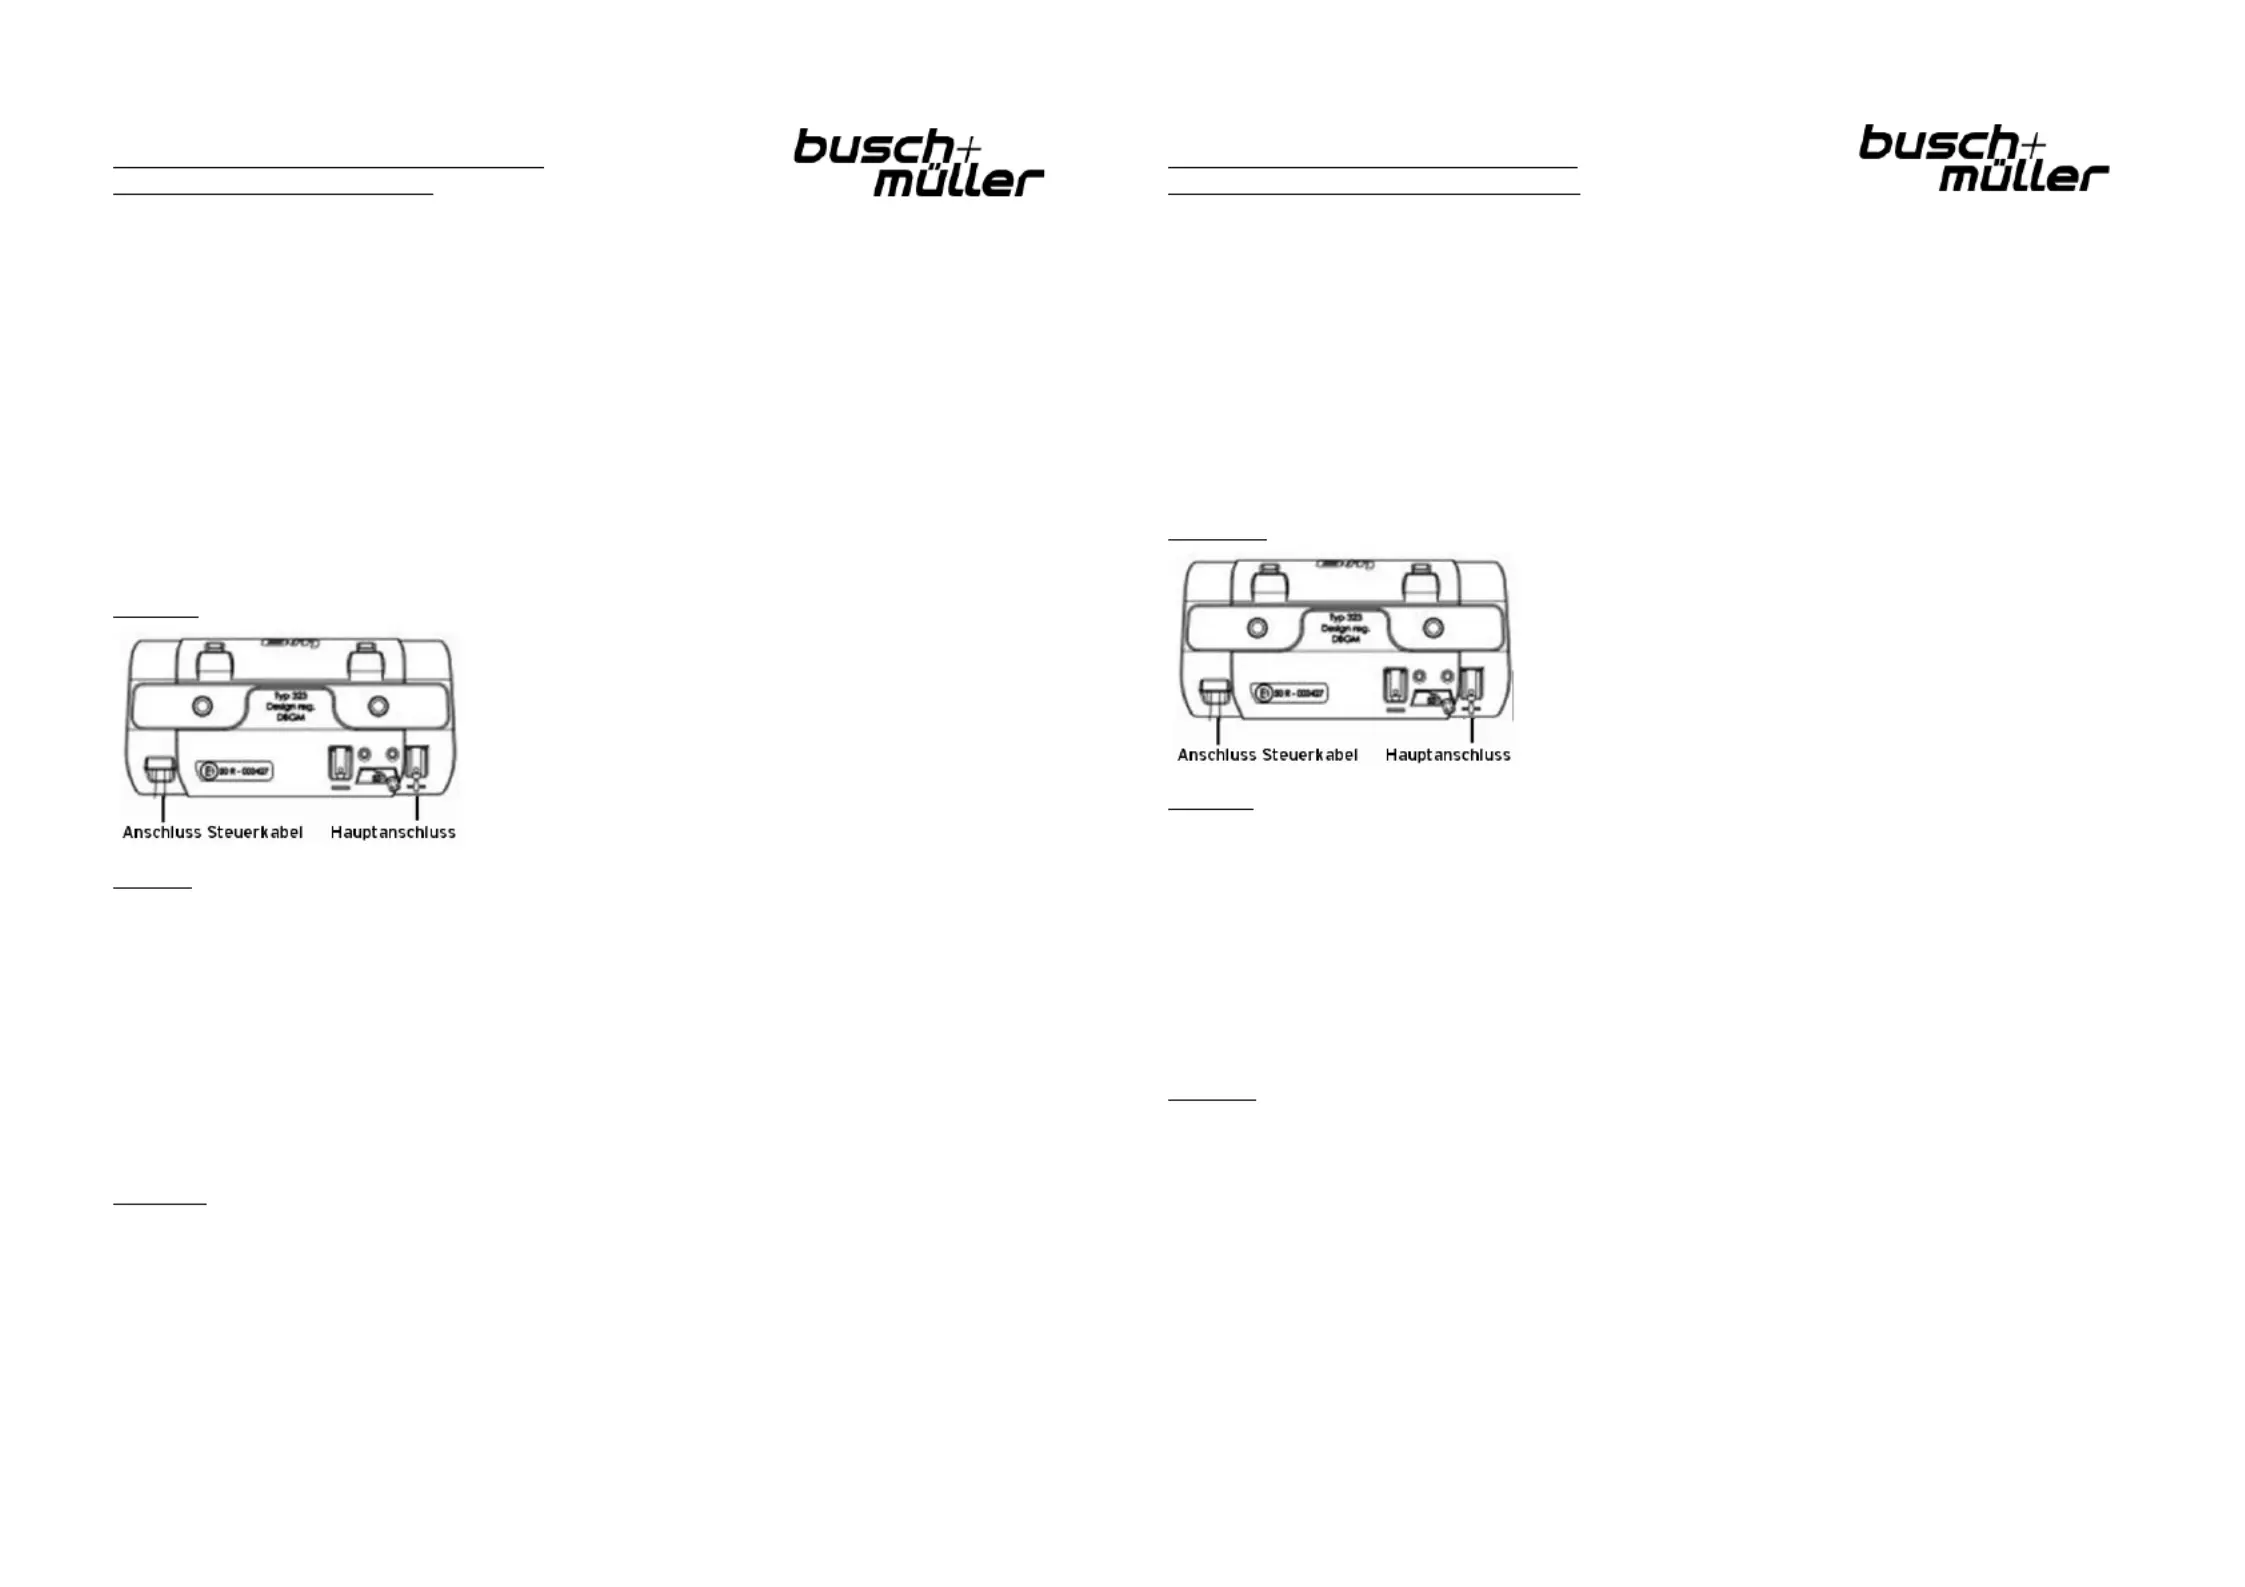
Anschluss
Zum Anschluss an die Stromversorgung die Steckkontakte
verwenden; + und – sind gekennzeichnet.
Mit dem vormontierten Kabel (schwarz-weiß = „+“, schwarz = „–“)
ist eine Verbindung nach vorne zu den Bremshebeln zu schaffen.
Benötigt wird ein sich beim Bremsen schließender, nicht öffnender
Kontakt. Entsprechend kompatible Bremsen mit Schließer liefern
Magura, Tektro und Formula.
Montage
Rücklicht mit den beiden rückseitigen Bolzen und dem mitgelieferten Befestigungsmaterial am Gepäckträger
befestigen. Das Rücklicht ist für ein Montagemaß von 50 mm ausgelegt.
Die Fläche des Rückstrahlers muss senkrecht zur Fahrbahn und im rechten Winkel zur Fahrzeugmittelachse
stehen.
Wie alle lichttechnischen Einrichtungen am Fahrrad dürfen sowohl das Rücklicht als auch der damit
verbundene Rückstrahler während der Fahrt zu keiner Zeit verdeckt sein.
Schrauben nur so fest anziehen, dass das Rücklicht nicht verrutschen oder abfallen kann.
Beim Anbau die gesetzlichen Vorschriften beachten. So muss die Anbauhöhe in Deutschland zwischen 25 und
120 cm betragen.
Bedienung
Das Rücklicht hat keinen EIN/AUS-Schalter. Sobald über das Eingangskabel Strom anliegt, leuchtet es. Bei
Betätigen der Bremshebel leuchtet das Rücklicht heller und signalisiert dem nachfolgenden Verkehr den
Bremsvorgang. (Das Bremslicht wird in diesem Fall dadurch aktiviert, dass die Spannung am Steuerkabel
zwischen 0 und 1,5 V beträgt. Auch kann das Bremslicht dadurch aktiviert werden, dass am Steuerkabel eine
Gleichspannung zwischen 4 und 50 V angelegt wird.)
Technische Änderungen vorbehalten.
890112|0819
Busch & Müller KG – Auf dem Bamberg 1, 58540 Meinerzhagen
02354/9156000 – info@bumm.de – www.bumm.de
Manual TOPLIGHT Line K brake E (323KB)
Rear light with brake light function, for e-bikes
This system is only suitable for connection to DC power sources 5.5 to 48 V (e-bike battery), either directly to
the e-bike battery or to the 6 to 12 V accessories power loop of the system.
Due to the complex technology of e-bike systems, compatibility with every drive system cannot be guaranteed.
Never connect to an AC power source (e.g. dynamo)! If your e-bike has a dynamo for powering the light
system, a standard dynamo rear light is required.
The rear light may only be connected to vehicles that power the light for two more hours after the battery
stops supplying the drive system. Alternatively, the motor may serve as an electric generator for the lights.
The rear light may not be used on vehicles that carry licence plates (e.g. speed e-bikes).
This system may only be mounted and connected by specialised workshops.
Connection
To connect to a power source, use push-on contacts; + and – are
marked.
Use the pre-mounted cable (black-and-white = „+“, black = „–“) to
connect to the brake lever. The brake lever must create a close-
circuit contact. Compatible brakes are available from Magura,
Tektro and Formula.
Mounting
Use the rear studs and the included accessories to mount the rear light to the carrier. Suitable for 50 mm
mounting distance.
The reflector area must be at a right angle both to the road and the centre line of the vehicle.
Like all light installations on a bicycle, both the rear light and the reflector may never be concealed while
riding. The same goes for the licence plate and its light.
Tighten the screws only firm enough so the system does not shift or detach.
When mounting, observe all relevant regulations.
For example, the mounting height in Germany must be between 25 and 120 cm.
Operation
The system has no ON/OFF switch. It shines, as soon as current is applied to the power connection wire. When
the brake lever is triggered, the rear light shines brighter and signalises the brake application to succeeding
traffic. (The brake light is activated by applying a voltage between 0 and 1.5 V to the control wire. The brake
light may also be activated by applying DC voltage between 4 and 50 V to the power connection wire.)
Technical modifications reserved
890112|0819
Busch & Müller KG – Auf dem Bamberg 1, 58540 Meinerzhagen
02354/9156000 – info@bumm.de – www.bumm.de
Specyfikacje produktu
| Marka: | Busch + Müller |
| Kategoria: | Ulga |
| Model: | LINE K Brake |
Potrzebujesz pomocy?
Jeśli potrzebujesz pomocy z Busch + Müller LINE K Brake, zadaj pytanie poniżej, a inni użytkownicy Ci odpowiedzą
Instrukcje Ulga Busch + Müller

11 Stycznia 2025
7 Grudnia 2024
3 Października 2024
3 Października 2024
3 Października 2024
3 Października 2024
3 Października 2024
3 Października 2024
3 Października 2024
3 Października 2024
Instrukcje Ulga
Najnowsze instrukcje dla Ulga
9 Kwietnia 2025
8 Kwietnia 2025
8 Kwietnia 2025
8 Kwietnia 2025
8 Kwietnia 2025
7 Kwietnia 2025
5 Kwietnia 2025
5 Kwietnia 2025
5 Kwietnia 2025
5 Kwietnia 2025