Instrukcja obsługi Cherry MW 3000
Przeczytaj poniżej 📖 instrukcję obsługi w języku polskim dla Cherry MW 3000 (2 stron) w kategorii mysz. Ta instrukcja była pomocna dla 20 osób i została oceniona przez 9 użytkowników na średnio 4.1 gwiazdek
Strona 1/2
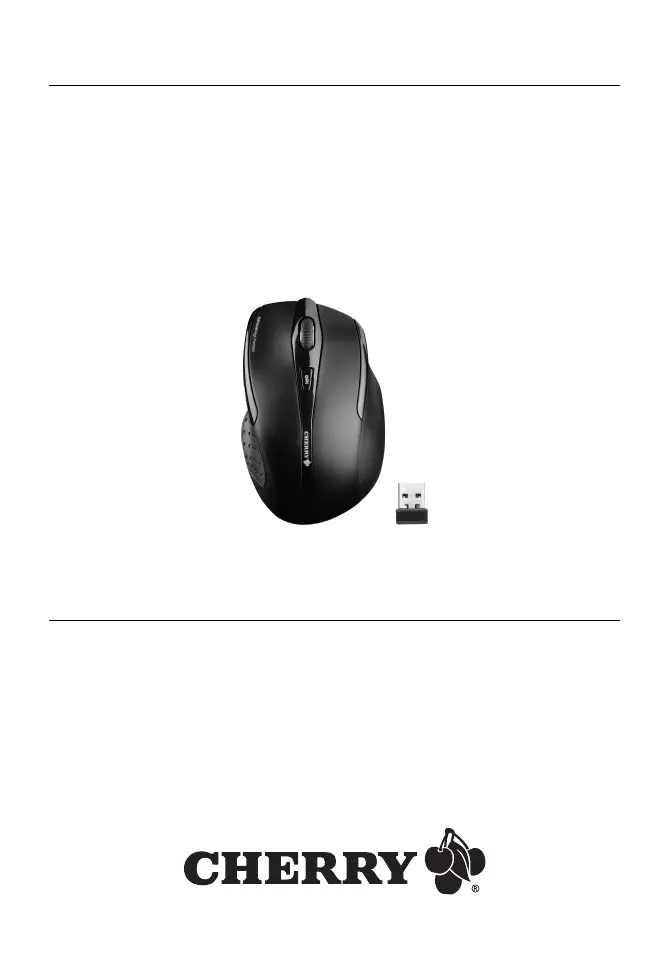
CHERRY MW 3000
Wireless Mouse
BEDIENUNGSANLEITUNG
Operating Manual – Mode d’emploi – Manual de instrucciones
Istruzione d'uso – Gebruikshandleiding
Instruções de utilização
6440583-01 DE, US, FR, ES, IT, NL, PT, Nov 2011 (JW-T0100 = Mod. JF-T01, JF-T01-D)
Specyfikacje produktu
| Marka: | Cherry |
| Kategoria: | mysz |
| Model: | MW 3000 |
| Kolor produktu: | Czarny |
| Materiał obudowy: | Plastik |
| Wbudowany wyłącznik: | Tak |
| Moc: | 150 W |
| Źródło zasilania: | Baterie |
| Wysokość produktu: | 68 mm |
| Szerokość produktu: | 106 mm |
| Głębokość produktu: | 39 mm |
| Waga produktu: | 126 g |
| Szerokość opakowania: | 120 mm |
| Wysokość opakowania: | 50 mm |
| Głębokość opakowania: | 80 mm |
| Rekomendowane użycie: | Uniwersalne |
| Pasmo częstotliwości: | 2.4 GHz |
| Zasięg bezprzewdowego router'a: | 5 m |
| Certyfikaty: | c-tick, CE, FCC, cTUVus |
| Przeznaczenie: | Biuro |
| Zakres temperatur (eksploatacja): | 0 - 40 °C |
| Układ: | Po prawej stronie |
| Kod zharmonizowanego systemu (HS): | 84716070 |
| Typ odbiornika: | Odbiornik nano |
| Interfejs urządzenia: | RF Wireless |
| Technologia wykrywania ruchu: | Optyczny |
| Typ przewijania (scroll type): | Koło |
| Liczba przycisków: | 5 |
| Rodzaj przycisków: | Wciskane przyciski |
| Rozdzielczość ruchu: | 1750 DPI |
| Liczba kółek przewijania myszy: | 1 |
| Kierunki przewijania: | Pionowy |
| Szerokość odbiornika: | 19 mm |
| Głębokość odbiornika: | 6 mm |
| Waga odbiornika: | 2 g |
| Odbiornik dołączony: | Tak |
| Interfejs odbiornika bezprzewodowego: | USB Typu-A |
| Waga wraz z opakowaniem: | 208 g |
| Ergonomiczna konstrukcja: | Tak |
| Kolor powierzchni: | Monochromatyczny |
| Gumowe uchwyty: | Tak |
| Rodzaj baterii: | AA |
| Oświetlenie: | Nie |
| Zakres temperatur (przechowywanie): | -15 - 60 °C |
| Liczba baterii: | 2 |
| Baterie w zestawie: | Tak |
| Wymiary produktu (SxGxW): | 343 x 260 x 204 mm |
| Przewodnik użytkownika: | Tak |
| Zużycie energii: | 35 mA |
| Obsługa funkcji Plug & Play: | Tak |
| Produkty w skrzyni głównej (zewnętrznej): | 10 szt. |
| Regulowana rozdzielczość ruchu: | Tak |
| Wydanie gry: | Nie |
| Funkcje przycisków: | DPI switch, Off, On |
| Rodzaj krajalnicy: | Prąd elektryczny |
| Maksymalna grubość plastra: | 20 mm |
| Ostrza ze stali nierdzewnej: | Tak |
| Zintegrowana klawiatura: | Nie |
| Wbudowana pamięć: | Nie |
| Regulowana waga: | Nie |
Potrzebujesz pomocy?
Jeśli potrzebujesz pomocy z Cherry MW 3000, zadaj pytanie poniżej, a inni użytkownicy Ci odpowiedzą
Instrukcje mysz Cherry

2 Stycznia 2025
2 Stycznia 2025
2 Października 2024
20 Września 2024
18 Września 2024
17 Września 2024
17 Września 2024
15 Sierpnia 2024
11 Sierpnia 2024
11 Sierpnia 2024
Instrukcje mysz
Najnowsze instrukcje dla mysz
8 Kwietnia 2025
3 Kwietnia 2025
30 Marca 2025
30 Marca 2025
30 Marca 2025
28 Marca 2025
28 Marca 2025
28 Marca 2025
27 Marca 2025
27 Marca 2025