Instrukcja obsługi Electro-Voice TR-P
Przeczytaj poniżej 📖 instrukcję obsługi w języku polskim dla Electro-Voice TR-P (4 stron) w kategorii Niesklasyfikowane. Ta instrukcja była pomocna dla 33 osób i została oceniona przez 4 użytkowników na średnio 4.5 gwiazdek
Strona 1/4
01
01
01
0101
02
02
02
0202
03
03
03
0303
04
04
04
0404
05
05
05
0505
06
06
06
0606
07
07
07
0707
08
08
08
0808
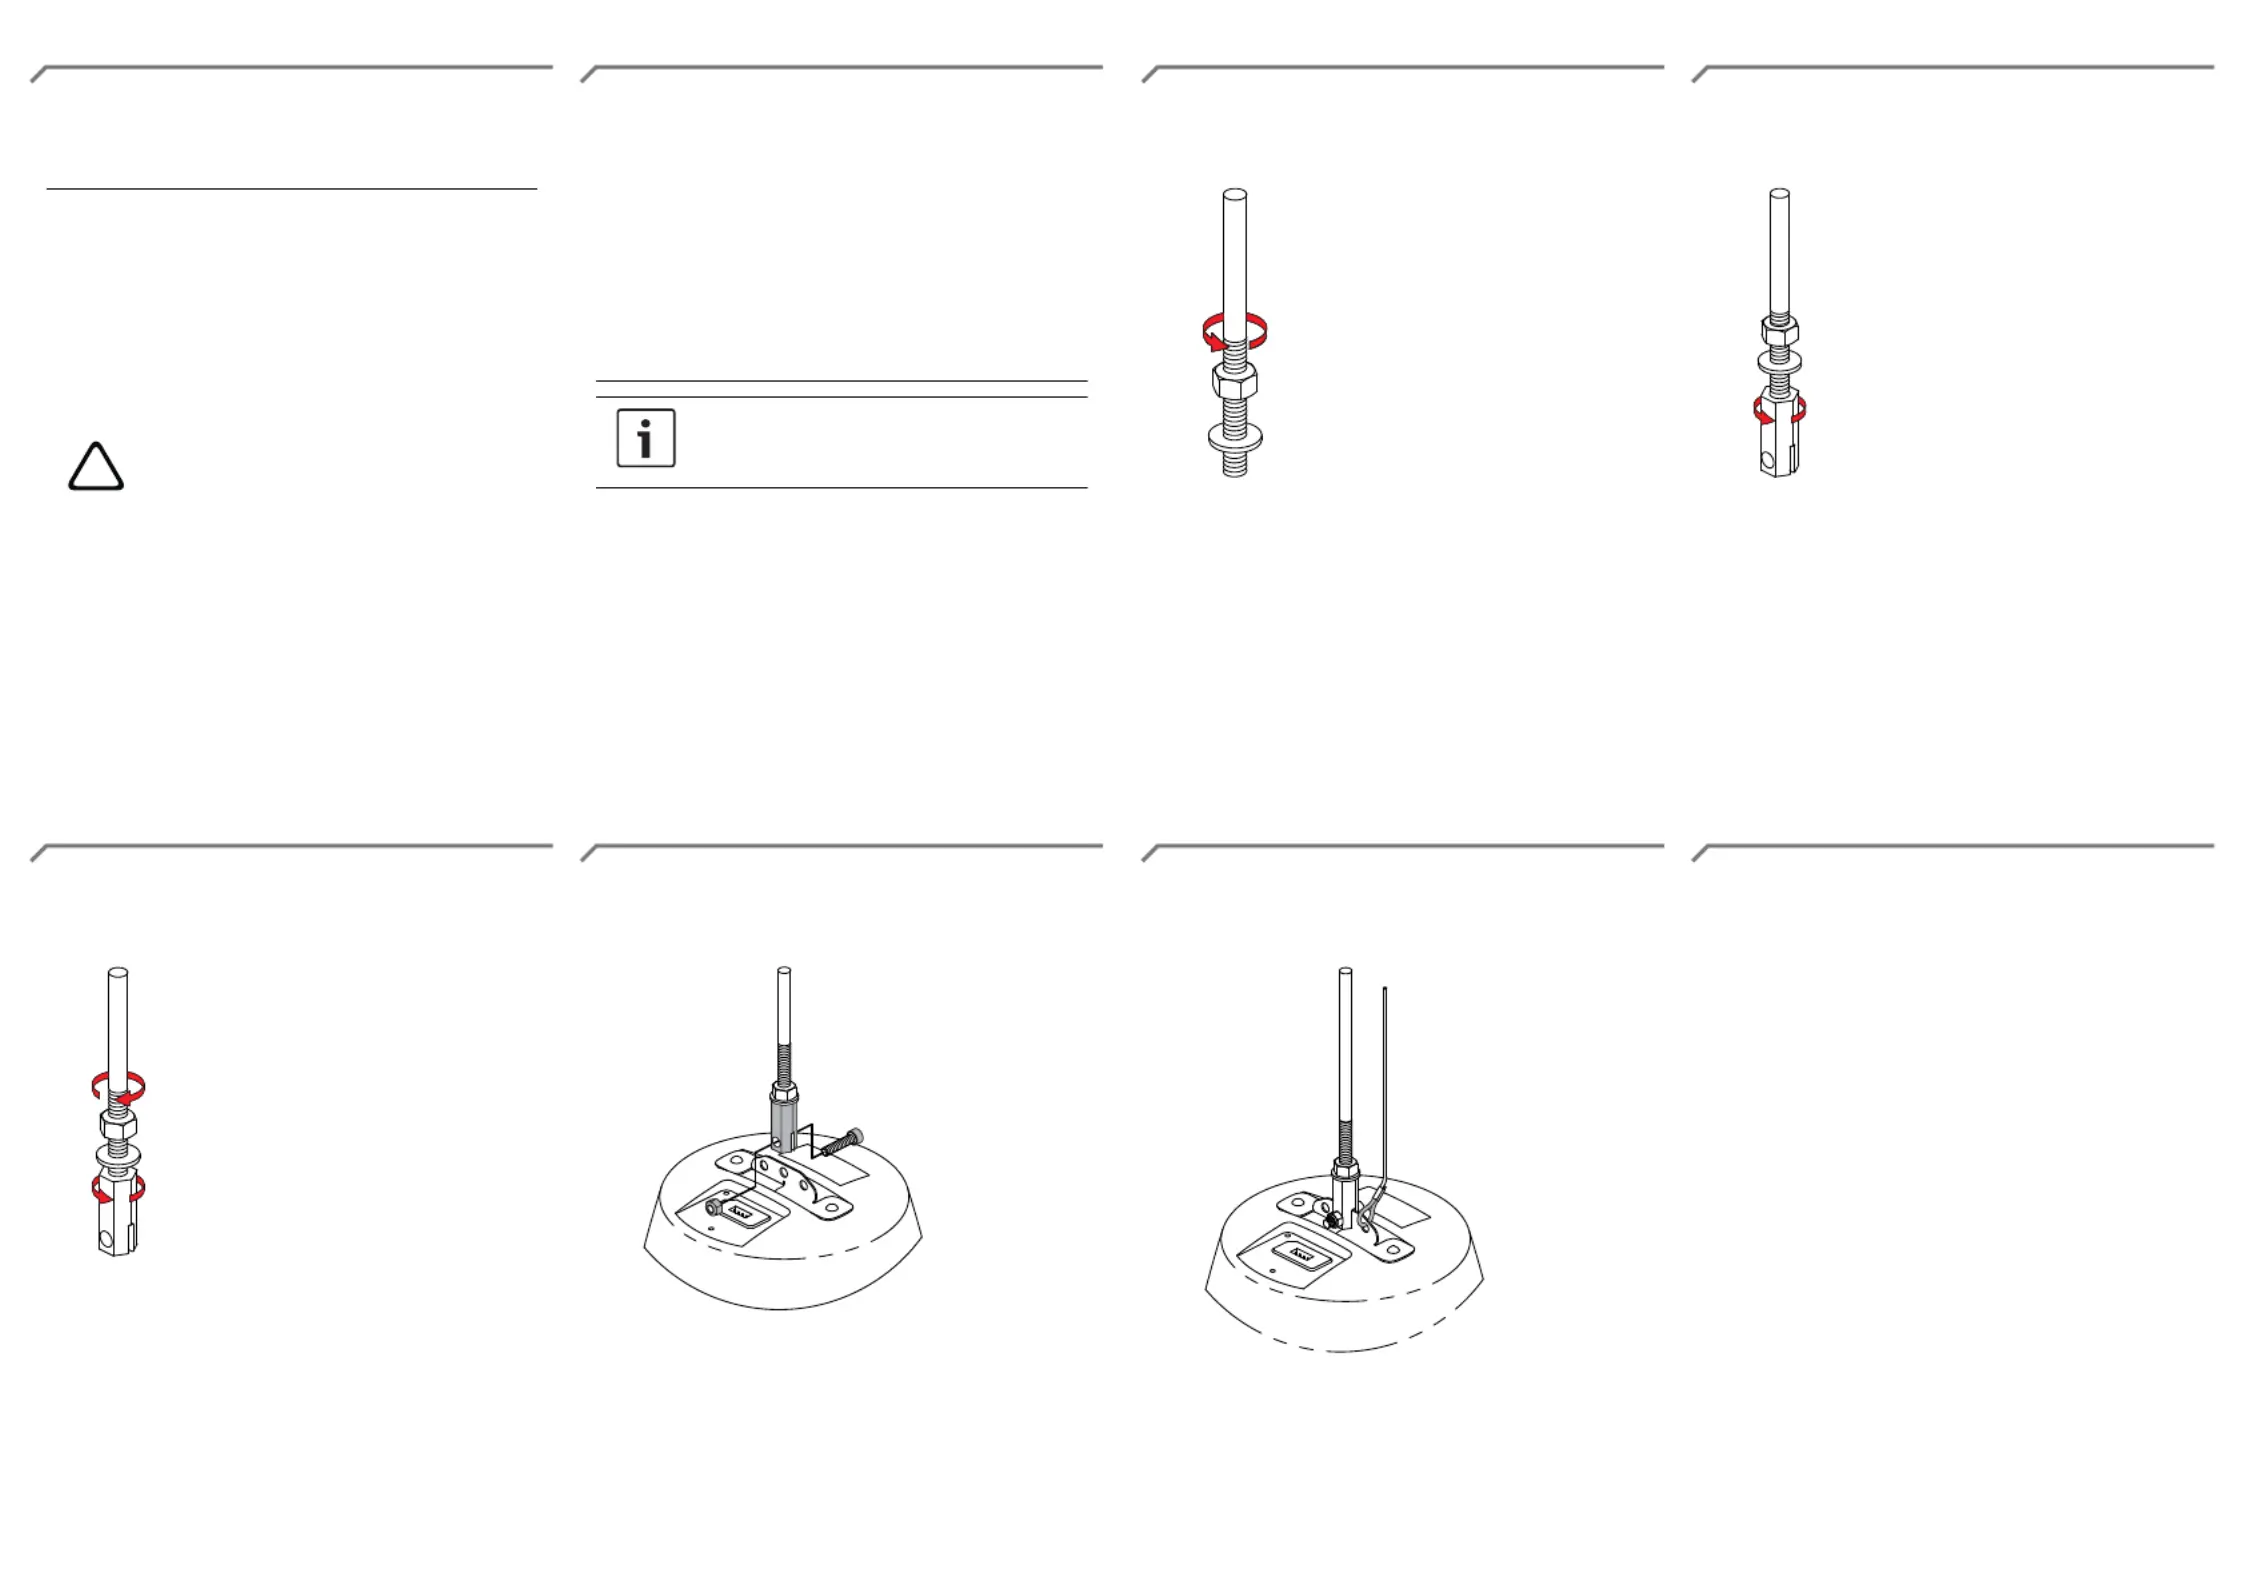
Installing with the threaded rod
adapter
!
Warning!
Suspending any object is potentially
dangerous and should only be attemp-
ted by individuals who have a thorough
knowledge of the techniques and regu-
lations of suspending objects overhead.
Electro-Voice strongly recommends
that loudspeakers be suspended taking
into account all current national, fed-
eral, state, and local laws and regula-
tions. It is the responsibility of the in-
staller to ensure all loudspeakers are
safely installed in accordance with all
such requirements. When loudspeakers
are suspended, Electro-Voice strongly
recommends the system be inspected
at least once per year or as laws and
regulations require. If any sign of weak-
ness or damage is detected, remedial
action should be taken immediately.
The user is responsible for making sure
the wall, ceiling, or structure is capable
of supporting all objects suspended
overhead. Any hardware used to sus-
pend a loudspeaker not associated
with Electro-Voice is the responsibility
of others.
Notice!
Use a steel threaded rod size 7/16"-20.
To , do the follow-install using a threaded rod
ing:
1.Mount (not included) to ceil-threaded rod
ing.
We highly suggest double nutting the threaded
rod, whenever possible.
2.Screw (not included) on the speakerjam-nut
end of the threaded rod on.
Leave enough space to screw the adapter.
3.Screw into threaded rod at leastadapter
3/4".
Align mounting slot, if needed.
4.Screw down until it contacts thejam-nut
surface of the threaded rod adapter.
Fully tighten against each other.
5.Insert into threadedpendant mounting plate
rod mounting slot.
6.Insert the threaded rod adapter locking
screw through the adapter holes and
speaker mounting plate center hole.
7.Tighten to the other endnylon locking nut
of the suspension screw.
8.Attach a secondary auxiliary support cable
(not included) onto one of the suspension
tab side holes in the top of the speaker.
9.Secure the secondary auxiliary support
cable (not included) to a different ceiling
support point of the building structure.
Specyfikacje produktu
| Marka: | Electro-Voice |
| Kategoria: | Niesklasyfikowane |
| Model: | TR-P |
Potrzebujesz pomocy?
Jeśli potrzebujesz pomocy z Electro-Voice TR-P, zadaj pytanie poniżej, a inni użytkownicy Ci odpowiedzą
Instrukcje Niesklasyfikowane Electro-Voice

8 Stycznia 2025
8 Stycznia 2025
8 Stycznia 2025
8 Stycznia 2025
8 Stycznia 2025
8 Stycznia 2025
8 Stycznia 2025
8 Stycznia 2025
8 Stycznia 2025
8 Stycznia 2025
Instrukcje Niesklasyfikowane
Najnowsze instrukcje dla Niesklasyfikowane
29 Stycznia 2025
29 Stycznia 2025
29 Stycznia 2025
29 Stycznia 2025
29 Stycznia 2025
29 Stycznia 2025
29 Stycznia 2025
29 Stycznia 2025
29 Stycznia 2025
29 Stycznia 2025