Instrukcja obsługi Extron IN1806
Extron Niesklasyfikowane IN1806
Przeczytaj poniżej 📖 instrukcję obsługi w języku polskim dla Extron IN1806 (6 stron) w kategorii Niesklasyfikowane. Ta instrukcja była pomocna dla 9 osób i została oceniona przez 5 użytkowników na średnio 4.5 gwiazdek
Strona 1/6
1
IMPORTANT:
Go to www.extron.com for the complete
user guide, installation instructions, and
specifications before connecting the
product to the power source.
IN1806 • Setup Guide
The Extron IN1806 is a six input seamless scaling presentation switcher that supports signal resolutions up to 4K @ 60 Hz at
4:4:4. It features DisplayPort and HDMI inputs, an HDMI output, and a mirrored Extron DTP2 output for extending video, audio,
and control signals up to 330 feet (100 meters) over a shielded CATx cable. The IN1806 delivers high image quality, fast and
reliable switching, Extron ProDSP audio processing, seamless video transition effects, logo keying, and HDMI loop-out. The
scaler can be controlled and congured over Ethernet, RS-232, or USB.
This guide provides instructions for an experienced user to set up and congure the IN1806 scaler. It covers how to perform basic
setup operations using the front panel controls and selected Simple Instruction Set (SIS™) commands.
NOTES:
• For full installation, configuration, menus, connector wiring, and operation details, see the IN1806 and IN1808 Series
User Guide at www.extron.com.
• The IN1806 can also be configured via the Extron Product Configuration Software (PCS), available at
www.extron.com. For information on using PCS, see the IN1806 and IN1808 Series Help File.
Installation
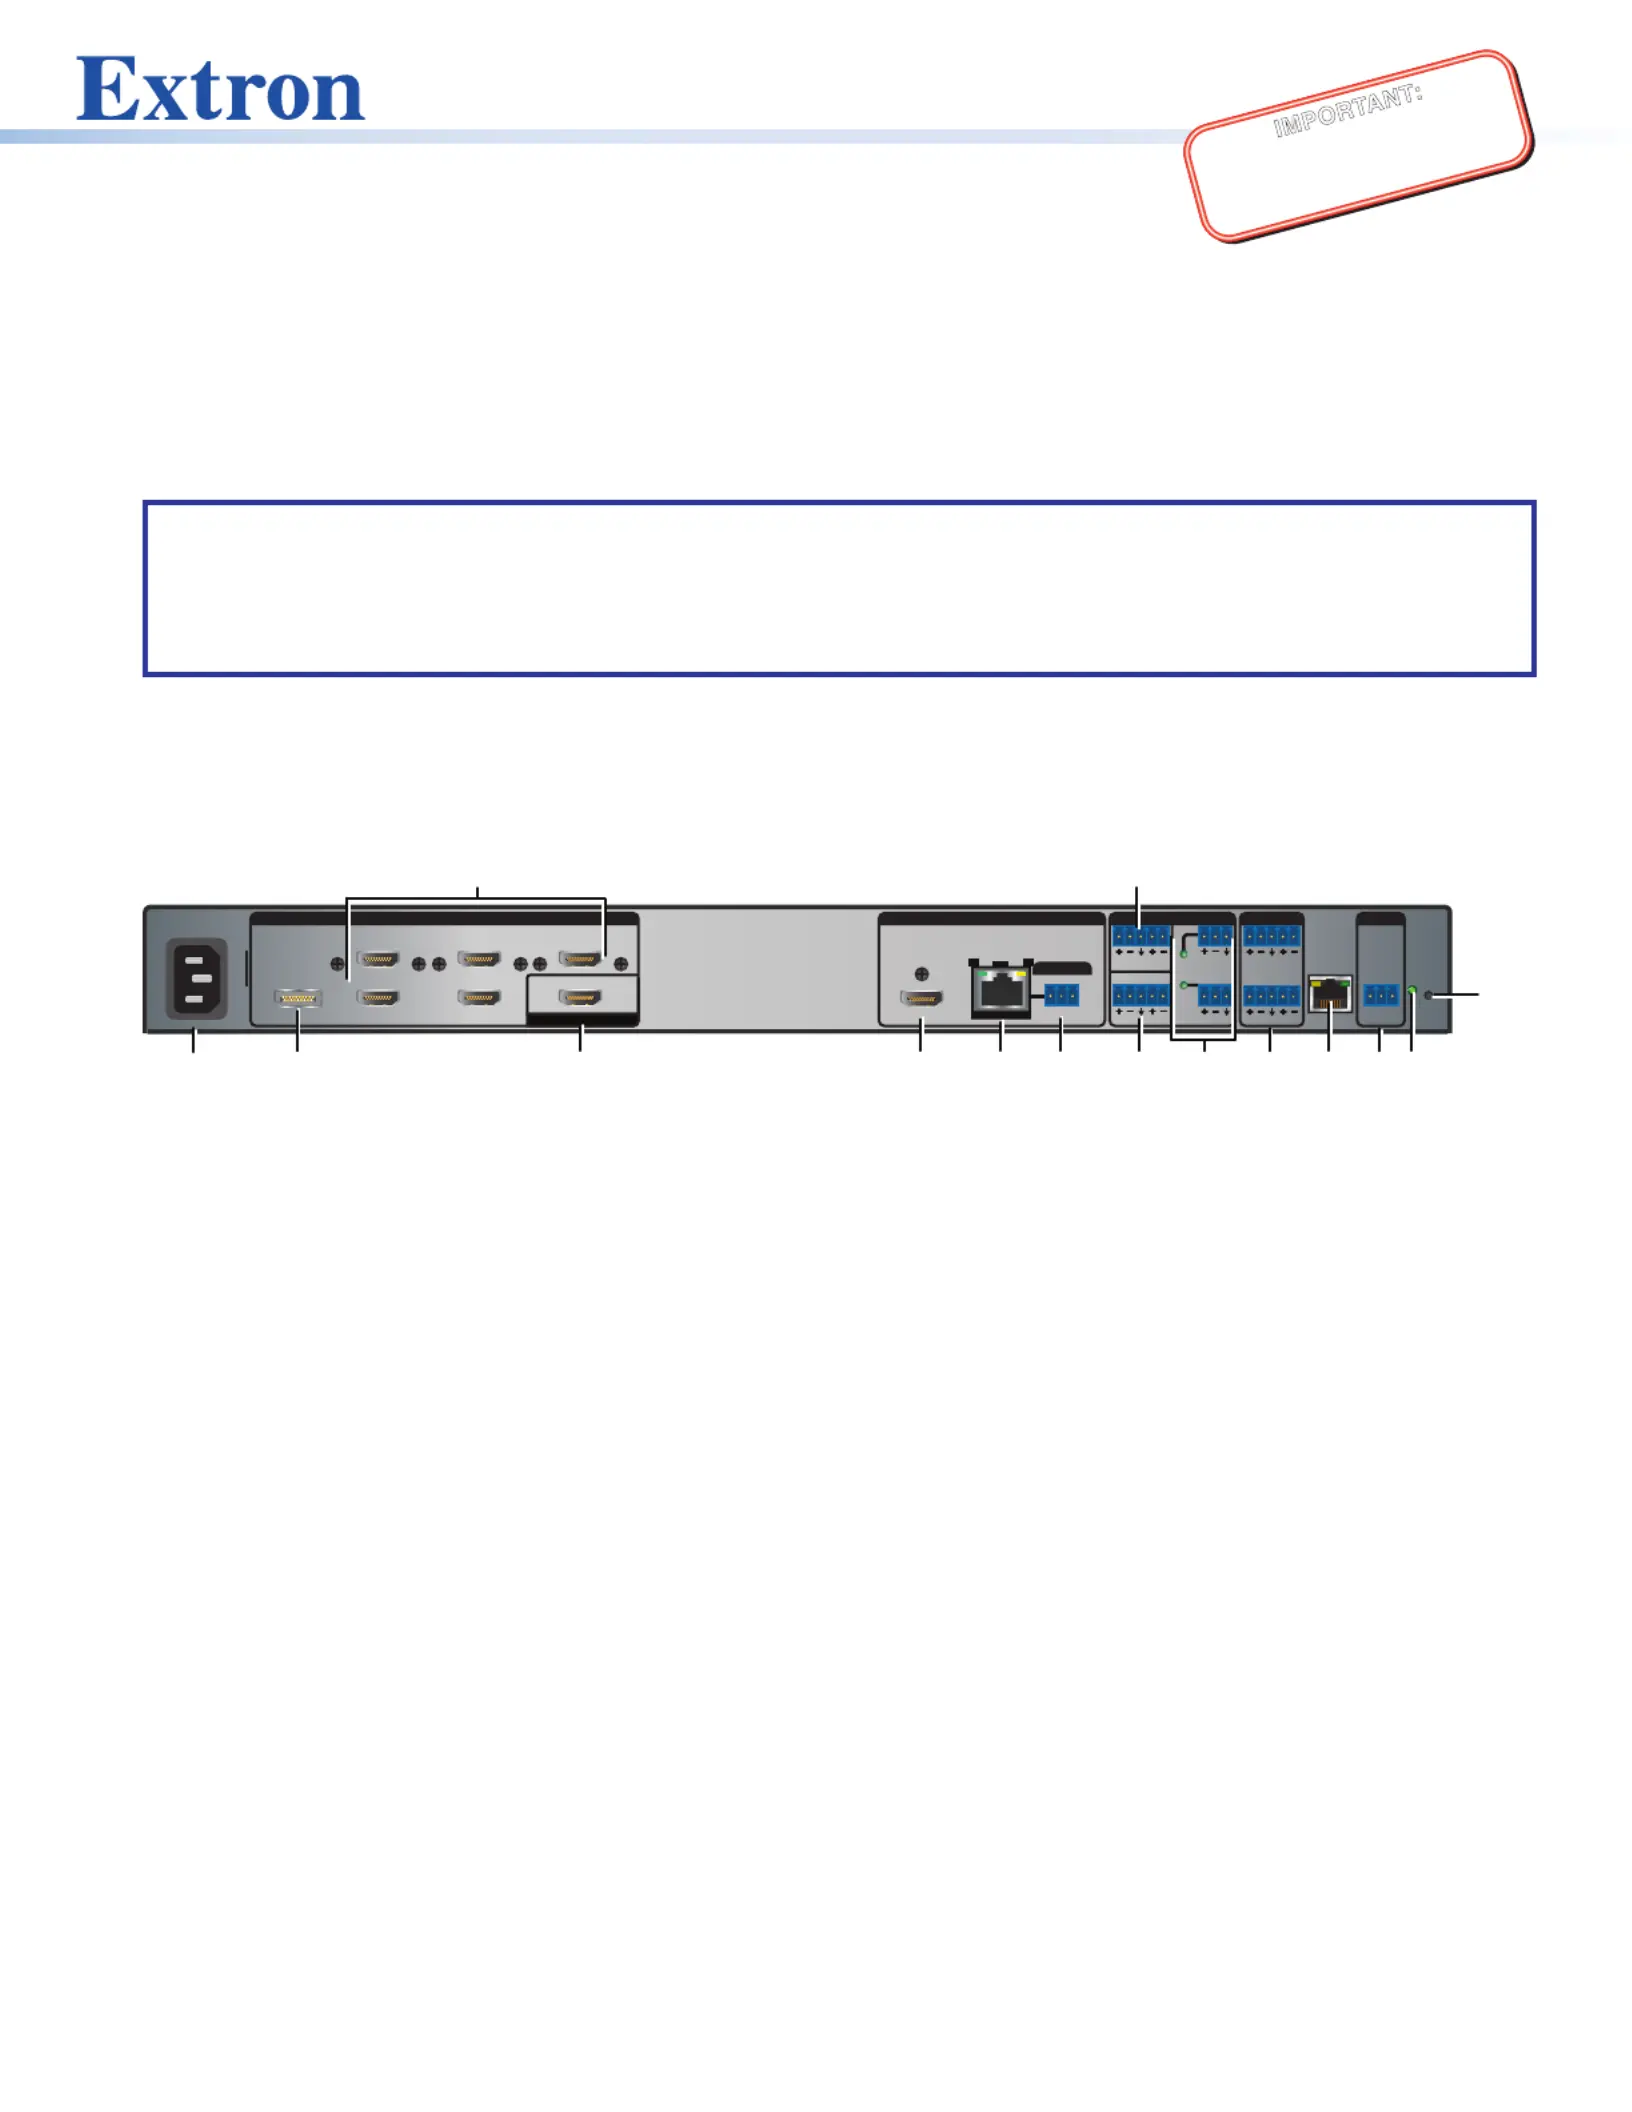
Rear Panel Features
100-240V0.7A MAX ~
31
2
5
46
HDMI/CEC
INPUTSAUDIO INPUTSOUTPUTSREMOTE
OVER TP
IN1806
1A1B
SIG LINK
OUT
TxRx
RS-232
GTxRx
IR
G
RESET
12
34
+48V
+48V
1
2
MIC/LINE
LR
AUX
34
LAN
LOOP OUT
A
C
H
M
N
B
DE
F
G
I
J
K
L
O
OUTPUTS (DTP2/XTP/HDBT)
50-60 Hz
A
AC power connector
B
DisplayPort input connector (input 1)
C
HDMI (with CEC) loop out connector
D
HDMI (with CEC) output connector (1A)
E
DTP2/XTP/HDBaseT (with CEC)
output connector (1B)
F
Over TP IR pass-through connector
G
Analog line audio inputs 3 and 4
H
Analog mic/line audio inputs 1 and 2
and adjacent phantom power LEDs
I
Analog line audio outputs 1 through 4
J
LAN connector
K
Remote RS-232 port
L
Reset LED
M
Reset button
N
Aux mono or stereo analog
line audio input connector
O
HDMI inputs 2 through 6
Figure 1. Rear Panel Connectors — IN1806
Mounting and Cabling
Step 1 Mount the device—
a. Turn off or disconnect all equipment power sources.
b. Mount the IN1806 to a rack using the pre-installed side mounting brackets, or remove the brackets and use an optional
19-inch kit for under-desk mounting (see the instructions provided with the mounting kit, available at www.extron.com).
Step 2 Connect inputs—
a. Make the following video input connections as needed:
• Connect a DP source to the Input 1 DisplayPort connector (see figure 1,
B
).
• Connect digital HDMI or DVI (with an appropriate adapter) sources to HDMI input connectors 2 through 6 (
O
).
b. Connect analog audio sources to:
• The 5-pole captive screw line audio input connectors 3 and 4 (
G
) and the Aux connector (
N
) for balanced or
unbalanced stereo audio. The Aux Line input (
N
) is shared and can be associated with one or more video inputs.
• Connect balanced or unbalanced mic or line level inputs to 3-pole Mic/Line captive screw connectors 1 and 2 (
H
).
These inputs support optional +48 VDC phantom power, which is indicated by the LEDs at the left of the connectors.
Specyfikacje produktu
| Marka: | Extron |
| Kategoria: | Niesklasyfikowane |
| Model: | IN1806 |
Potrzebujesz pomocy?
Jeśli potrzebujesz pomocy z Extron IN1806, zadaj pytanie poniżej, a inni użytkownicy Ci odpowiedzą
Instrukcje Niesklasyfikowane Extron

10 Stycznia 2025
10 Stycznia 2025
6 Stycznia 2025
6 Stycznia 2025
6 Stycznia 2025
3 Stycznia 2025
3 Stycznia 2025
3 Stycznia 2025
3 Stycznia 2025
3 Stycznia 2025
Instrukcje Niesklasyfikowane
Najnowsze instrukcje dla Niesklasyfikowane
29 Stycznia 2025
29 Stycznia 2025
29 Stycznia 2025
29 Stycznia 2025
29 Stycznia 2025
29 Stycznia 2025
29 Stycznia 2025
29 Stycznia 2025
29 Stycznia 2025
29 Stycznia 2025