Instrukcja obsługi FeiyuTech WG Mini
FeiyuTech Niesklasyfikowane WG Mini
Przeczytaj poniżej 📖 instrukcję obsługi w języku polskim dla FeiyuTech WG Mini (2 stron) w kategorii Niesklasyfikowane. Ta instrukcja była pomocna dla 28 osób i została oceniona przez 2 użytkowników na średnio 4.1 gwiazdek
Strona 1/2
Do not power on the gimbal before
completing all the installation steps
WARNING !
POWERING ON / OFF
Power on: Ensure the camera
is mounted securely, then hold
down the function button for 2
seconds to turn on the gimbal.
Power off: Hold down the
function button for 3 seconds
to turn off the gimbal.
Panning
Tilting
1
2
3
FY WG
Mini
is a lightweight, yet feature-rich, wearable 2 axis gimbal capable of capturing immersive and fully stabilized footages. It is compatible
with GoPro HERO4/ 3+/ 3 (with optional mounting space for GoPro LCD BacPac) and other cameras with similar dimensions.
The FY WG
Mini
is a miniaturized version of the best-selling FeiYu gimbal, offering exceptional stabilization technology in a wearable
form factor for action cameras. A GoPro T-Clamp adapter is packaged with every FY WG
Mini
. Users can attach the gimbal to any accessories
supporting the GoPro three-prong mount. The FY WG
Mini
also contains two 1/4"-20 tripod mounts on its gimbal body, allowing the gimbal to be
mounted in different orientations to all universal tripod screw mount accessories (including helmets, bikes,
selfie sticks and other accessories).
OperationLED StatusFunction
Turn On And Switch To
The Mode’s LED Status
Turn Off After
A moment
Power On
OperationLED StatusFunctionSound
Two Beeps
Three BeepsShutdown
The LED light will flash distinctively to indicate different operating modes.
Switch between different operating modes by pressing the function button.
Remove the screws on the
battery compartment,
insert two16340 batteries
and tighten the screws.
Mount the camera carefully
to the mounting bracket
and tighten the screws.
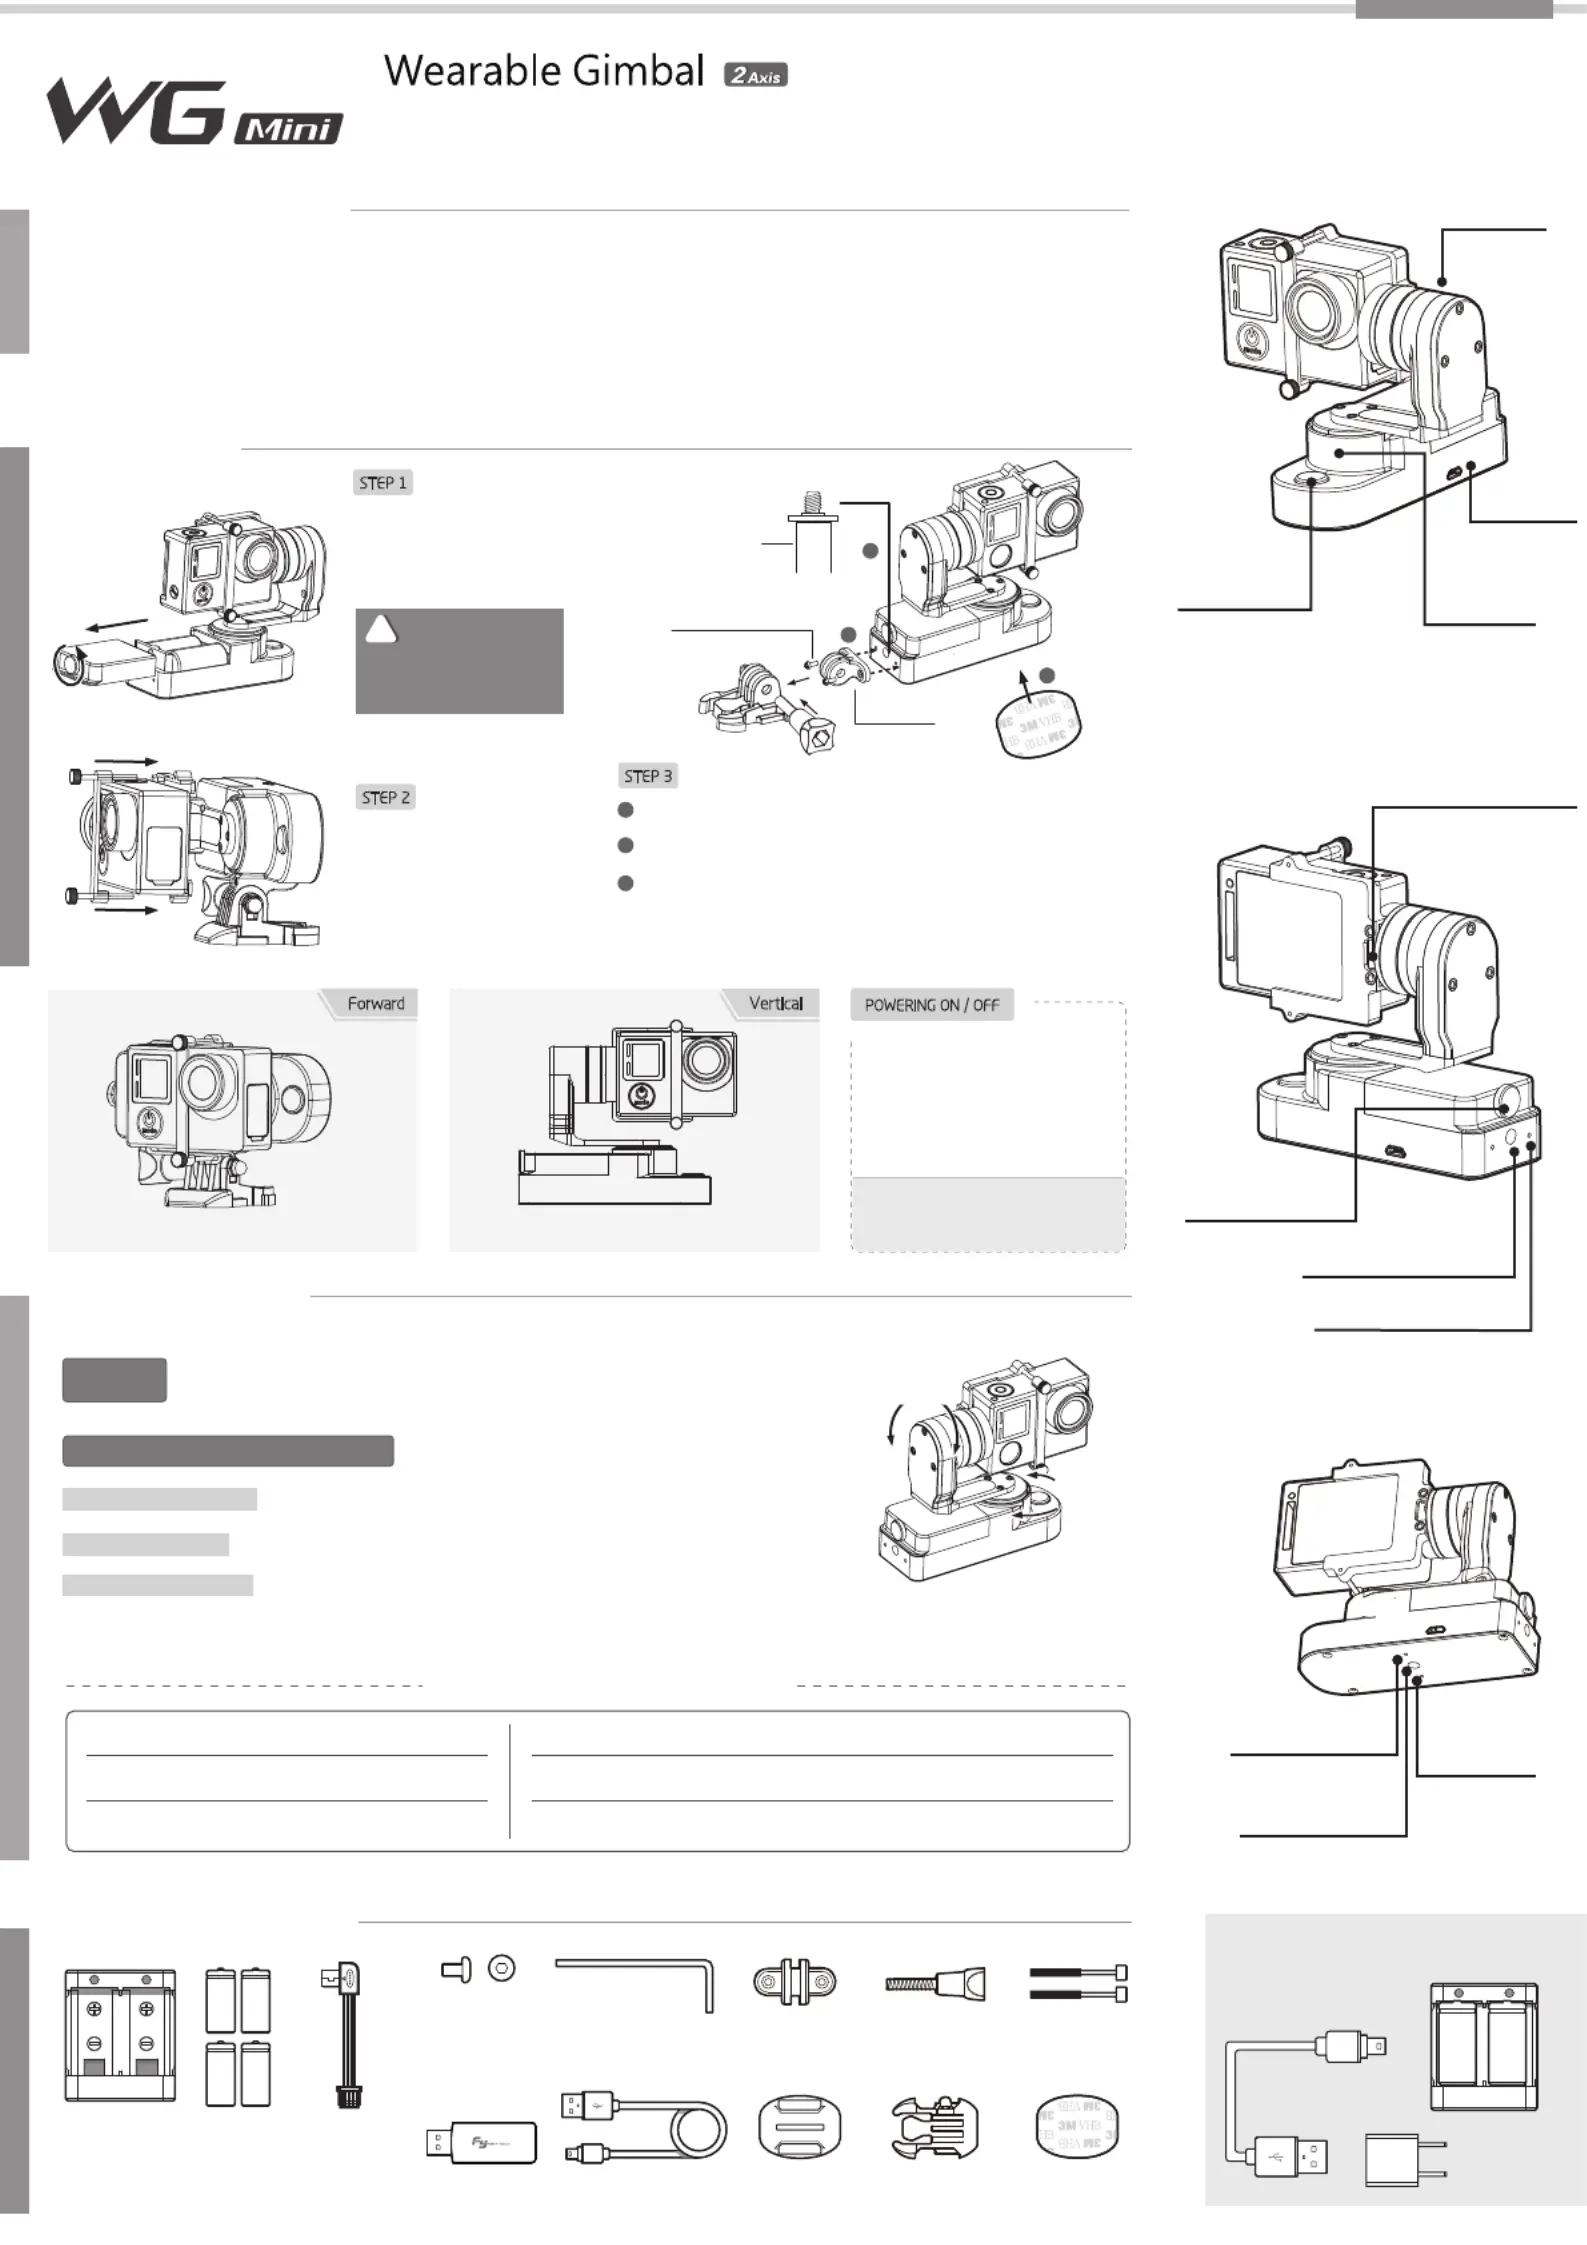
Function
Button
Function
Button
Introduction
Install
4
Accessories
Operation
Hexagonal socket
head cap screw
T-clamp
Accessories for
1/4 inch screws
STEP 1
STEP 2
STEP 3
Remove the L-clamp, use the 3M Adhesive to fix the bottom of
the Gimbal.
Use with GoPro Accessories, mount the provided T-clamp
to the side or the bottom of the gimbal. Attach T-clamp to any
accessories supporting the standard GoPro three-prong
mount.
The gimbal can also be mounted directly to other accessories
using the standard 1/4" tripod mount. Tighten all screws and
ensure it is mounted firmly before using the gimbal.
USB CableUSB Connector
Extension Knurled
Thumb Screw
How to Charging
USB Cable
FY WG Mini 2 Axis Wearable Gimbal is compatible with GoPro HERO4 / 3+ / 3 and
cameras with similar dimensions. Reserved mounting space for GoPro LCD Touch
BacPac
Do not power on the
gimbal before completing
all the installation steps.
Do not power on the
gimbal before completing
all the installation steps.
!
WARNING !WARNING !
Operating Modes and Functions
Operating Modes and Functions
Camera stays in its current orientation. All panning are restricted.
Mode #1 - Tilng Mode
Camera is permitted to tilting up or down. Panning is restricted.
Mode #2 - Lock Mode
Manual Pulling Locking
After the gimbal has been powered on for eight seconds, the tilt angle
can be adjusted manually in the Lock Mode. Adjust the titl angle to the desired position and wait for
0.5 second until the gimbal registers the new angle.
Long Press
For 1 Second
Long Press
For 2 Second
Long Press
For 3 Second
On ConstantlyLock Mode
Function Button Quick Reference
Single Tap
LED Flashes Once
Tilting Mode
Charger
Input: DC 5V
Output: DC 4.2V
Type: 16340
M2*6mm
Rechargeable
Battery
Long screwM 1.5 Allen KeyT-Clamp
Quick-Release
Buckle
Curved Adhesive
Mounts
3M Adhesive
5V USB Power
Adapter
(Not Included)
Hexagonal
Socket Head
Cap Screw
Forward
Vertical
3M
adhesive
Please choose one installing way:
1
2
3
Video Output
and Camera
Charging Cable
Function
Button
(
ON
/
OFF
)
Function
Interface
1/4 Inch
Screw Hole
T-Clamp
Screw Hole
T-Clamp
Screw Hole
Panning
Axis
Tilting Axis
3
2
Manual Version 1.0
1
1/4 Inch Screw Hole
Screws For
The Battery
Compartment
Video And Camera
Charging Interface
T-Clamp Screw Hole
Specyfikacje produktu
| Marka: | FeiyuTech |
| Kategoria: | Niesklasyfikowane |
| Model: | WG Mini |
Potrzebujesz pomocy?
Jeśli potrzebujesz pomocy z FeiyuTech WG Mini, zadaj pytanie poniżej, a inni użytkownicy Ci odpowiedzą
Instrukcje Niesklasyfikowane FeiyuTech

26 Grudnia 2024
26 Grudnia 2024
26 Grudnia 2024
3 Października 2024
3 Października 2024
Instrukcje Niesklasyfikowane
Najnowsze instrukcje dla Niesklasyfikowane
29 Stycznia 2025
29 Stycznia 2025
29 Stycznia 2025
29 Stycznia 2025
29 Stycznia 2025
29 Stycznia 2025
29 Stycznia 2025
29 Stycznia 2025
29 Stycznia 2025
29 Stycznia 2025