Instrukcja obsługi Holosun Paralow HS403B
Holosun
Niesklasyfikowane
Paralow HS403B
Przeczytaj poniżej 📖 instrukcję obsługi w języku polskim dla Holosun Paralow HS403B (3 stron) w kategorii Niesklasyfikowane. Ta instrukcja była pomocna dla 23 osób i została oceniona przez 12 użytkowników na średnio 5.0 gwiazdek
Strona 1/3
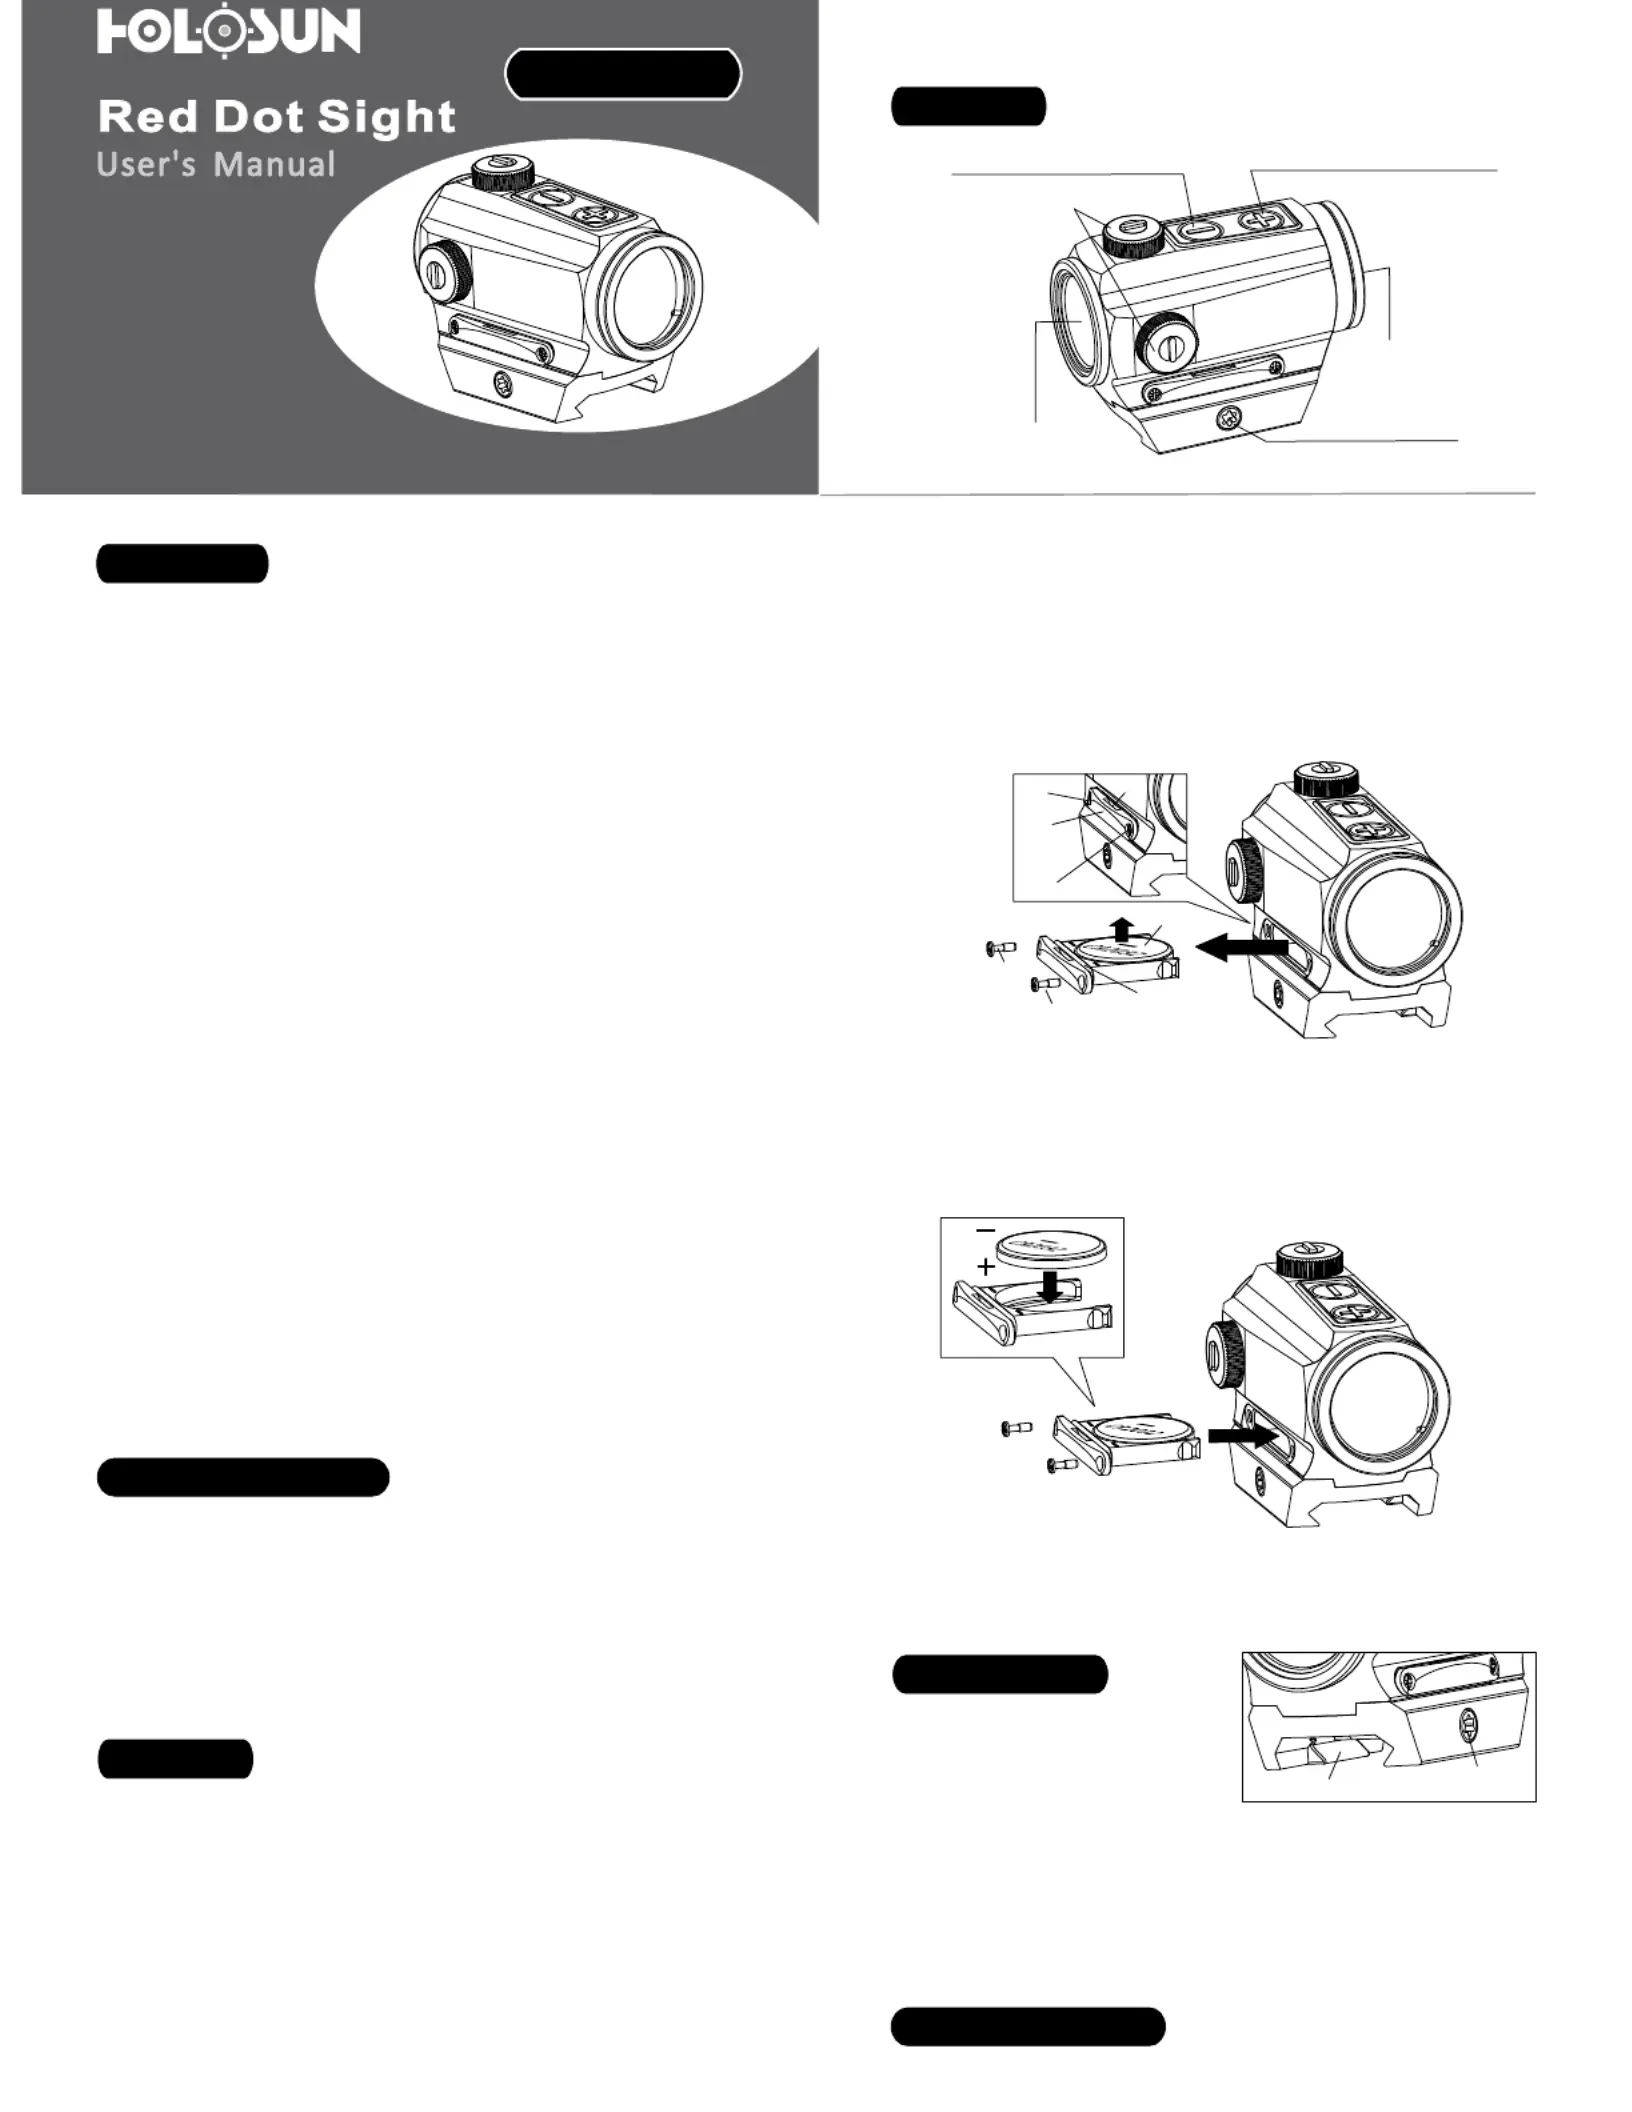
Fig 2-1
Features
Important notices
Battery
Installation
Fig1 PARALOW HS403B Red Dot Sight
www.holosun.com
HS403B
PARALOW
Thank you for purchasing the PARALOW HS403B Red Dot
sight,Please read the User's Manual carefully.
1. The HS403B projects its aiming dot in
a way that prevents visibility when viewed from the front
beyond several meters.
2. The user can gain
rapid target acquisition and situational awareness while aiming
with both eyes open.
3. Only a few micro-amperes of current
are required for sight operation. Sight runs on one battery for
up to 30,000 hours.
Concealed aiming:
Full field of view for target acquisition:
Low power consumption:
4. The sensitive motion sensor will turn the
power on with any motion detecon when in sleep mode.
5. arallax 1MOA
Motion power on:
Parallax free optical system: P is .
≤
±
6. The sight will be automatically entered into
sleep mode motionless for 8 hours.
7. There are 12 settings(10 Daylight+2NV)
for the reticle so as to match the ambient lighting conditions.
8. The sight will remember the last saved
brightness setting when powered on and off.
9 The top mounted buttons allow
Sleep time delay:
Brightness adjustment:
Memory function:
.
Two top mounted buttons:
for easy operation without obstructing the user's vision.
10. IP67 Waterproof:
1. Ensure that the firearm is completely unloaded and safe
before device installation or installing/replacing the
baery.
2. Please keep the packaging should you need to make a
warranty claim.
1.The operating voltage for this device is DC3V using one high
quality CR2032 Lithium battery.
2.The baery life is rated up to 50,000 hours at a mid-brightness
seing.
3.Baery Replacement:
Please follow the steps below for battery replacement
1. The included mount is
compatible with Picatinny Rails.
2. First insert the appropriate Torx wrench(included) into the
crossbolt head, then rotate to loosen cross bolt then
aach the sight into a suitable position,
and finally tighten the clamp screw to 15 IN/LBS using
non-permanent thread locker. (Fig3)
Bri ghtness Decrease
Bri ghtness Increase
Protective Cap
Objective Lens
Eyepiece Lens
T10 Torx Crossbolt
Model
Fig 3
Clamp
screw head
Cross bolt
2) Baery installation(Fig2-2):
a) Insert the baery into the battery tray 2032 with
oriented with the POSITIVE SIDE DOWN.
b) Insert and press the tray into the battery compartment.
c)
Fasten screw 1,2.
Caution:
The loss or damage of seal ring will cause water to leak into
the compartment and may damage electronic circuits and
the device.
when battery runs out or for other condions that require
the baery to be changed :
1) Removing the battery (Fig 2-1):
a)Loosen screws 1,2.
b)Insert coin or similar object in the battery tray slot, pry
out the battery tray, and remove the discharged baery
by liing it up. A tool is provided for this purpose.
Fig 2-2
Slot
Screw 1
Screw 2
Screw 2
Screw 1
Battery
cabin
Battery
Seal ring
Sight operation
The operation panel is on the top of sight.(see Fig4)
Specyfikacje produktu
| Marka: | Holosun |
| Kategoria: | Niesklasyfikowane |
| Model: | Paralow HS403B |
Potrzebujesz pomocy?
Jeśli potrzebujesz pomocy z Holosun Paralow HS403B, zadaj pytanie poniżej, a inni użytkownicy Ci odpowiedzą
Instrukcje Niesklasyfikowane Holosun

24 Grudnia 2024

7 Października 2024

7 Października 2024
Instrukcje Niesklasyfikowane
- Milestone Systems
- Saramonic
- Phonak
- Lancom
- Oro-Med
- Basbau
- Reflecta
- Caroma
- 909 Outdoor
- MooreCo
- Phoenix
- Privileg
- Jabra
- MDT
- Laserluchs
Najnowsze instrukcje dla Niesklasyfikowane

29 Stycznia 2025

29 Stycznia 2025

29 Stycznia 2025

29 Stycznia 2025

29 Stycznia 2025

29 Stycznia 2025

29 Stycznia 2025

29 Stycznia 2025

29 Stycznia 2025

29 Stycznia 2025