Instrukcja obsługi Maxsa 43319-X
Maxsa Niesklasyfikowane 43319-X
Przeczytaj poniżej 📖 instrukcję obsługi w języku polskim dla Maxsa 43319-X (3 stron) w kategorii Niesklasyfikowane. Ta instrukcja była pomocna dla 20 osób i została oceniona przez 2 użytkowników na średnio 4.2 gwiazdek
Strona 1/3
ASSEMBLY AND INSTRUCTION GUIDE
ABOUT YOUR LED OUTDOOR WALL SCONCE
The
LED Outdoor Wall Sconce
is perfect for porches,
doorways, or around the house.
The
LED Outdoor Wall Sconce
has a built-in motion sensor,
which automatically turns on the light when movement of a
heat source (such as people, animals, or cars) is detected in
the area. The light remains on while motion continues to be
detected in the area.
The
LED Outdoor Wall Sconce
also has a built-in photosensor
so that the light only turns on at night.
The
LED Outdoor Wall Sconce
may function irregularly or not
at all at temperatures below ˚F/˚C. 0 -17.8
Normal operation will return when the temperature rises.
The
LED Outdoor Wall Sconce
requires 4 C cell batteries (not
included). The batteries typically last up to 1 year under
normal use.
The 5 super bright LEDs in the
LED Outdoor Wall Sconce
have an estimated life of 30,000 hours so they should never
need changing.
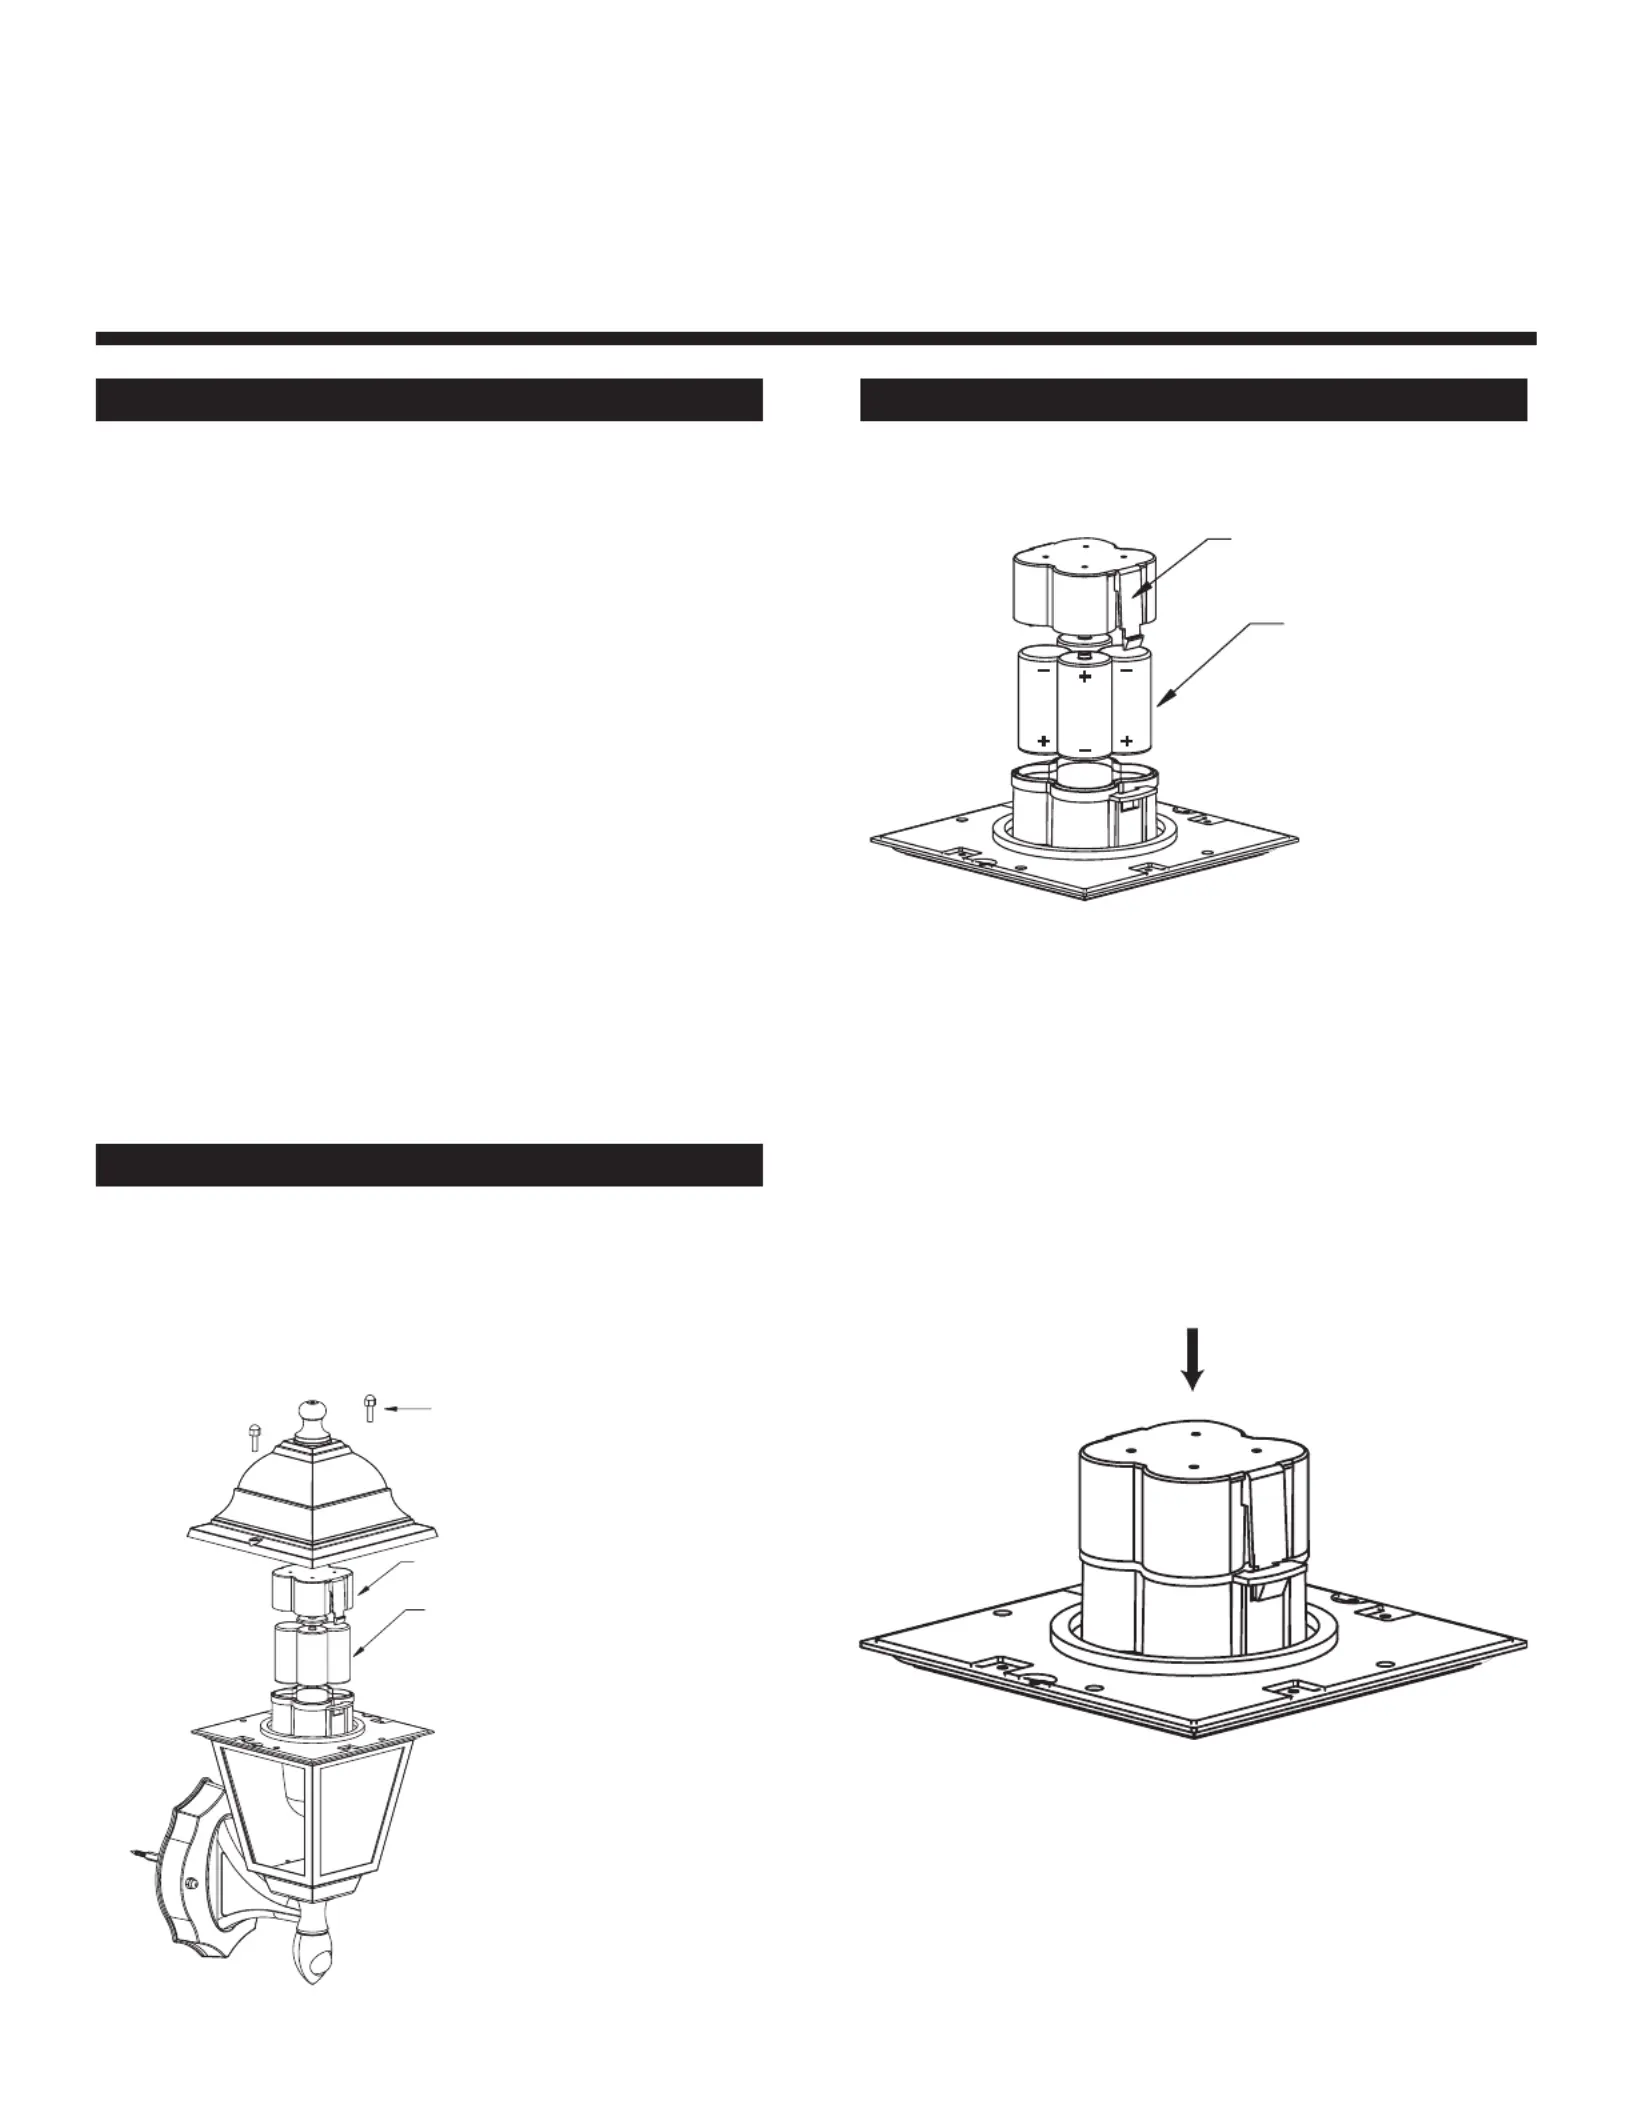
BATTERY INSTALLATION
1. The
LED Outdoor Wall Sconce
requires 4 C cell batteries
(not included).
2. To access the battery compartment, remove the 2 thumb
screws from the top cover. Remove the top cover.
BATTERY INSTALLATION (CONTINUED)
3. Remove the battery compartment cover by squeezing
the two tabs on the cover inward and pulling up.
4. Install the 4 C cell batteries in the proper +/- polarity
orientation as shown in the illustration above. The
positive ends of the batteries should face the low battery
contacts and the negative ends of the batteries should
face the elevated spring terminals in the battery
compartment. If your unit includes a clear rubber spacer
between the two halves of the battery compartment,
please reinsert it between the two halves.
5. Reinstall the battery compartment cover by aligning the
tabs and pressing the battery compartment cover down
until the battery compartment cover clicks into place.
6. Reassemble the
LED Outdoor Wall Sconce
by replacing
the top cover and re-installing the two thumb screws.
Tighten the thumb screws by hand as tightly as possible
to ensure a waterproof seal.
Model # 49
page 1
LED Outdoor Wall Sconce
BATTERY-POWERED MOTION-ACTIVATED
Thumb Screw
Battery Compartment Cover
4 C Batteries
Squeeze tabs inward
Insert 4 C batteries
in the proper +/
-
orientation
Specyfikacje produktu
| Marka: | Maxsa |
| Kategoria: | Niesklasyfikowane |
| Model: | 43319-X |
Potrzebujesz pomocy?
Jeśli potrzebujesz pomocy z Maxsa 43319-X, zadaj pytanie poniżej, a inni użytkownicy Ci odpowiedzą
Instrukcje Niesklasyfikowane Maxsa

9 Października 2024
9 Października 2024
9 Października 2024
9 Października 2024
9 Października 2024
9 Października 2024
28 Sierpnia 2024
Instrukcje Niesklasyfikowane
Najnowsze instrukcje dla Niesklasyfikowane
29 Stycznia 2025
29 Stycznia 2025
29 Stycznia 2025
29 Stycznia 2025
29 Stycznia 2025
29 Stycznia 2025
29 Stycznia 2025
29 Stycznia 2025
29 Stycznia 2025
29 Stycznia 2025