Instrukcja obsลugi McIntosh MX200
McIntosh
Niesklasyfikowane
MX200
Przeczytaj poniลผej ๐ instrukcjฤ obsลugi w jฤzyku polskim dla McIntosh MX200 (3 stron) w kategorii Niesklasyfikowane. Ta instrukcja byลa pomocna dla 11 osรณb i zostaลa oceniona przez 6 uลผytkownikรณw na ลrednio 4.4 gwiazdek
Strona 1/3

McIntosh Laboratory, Inc. 2 Chambers Street Binghamton, New York 13903-2699 Phone: 607-723-3512 www.mcintoshlabs.com
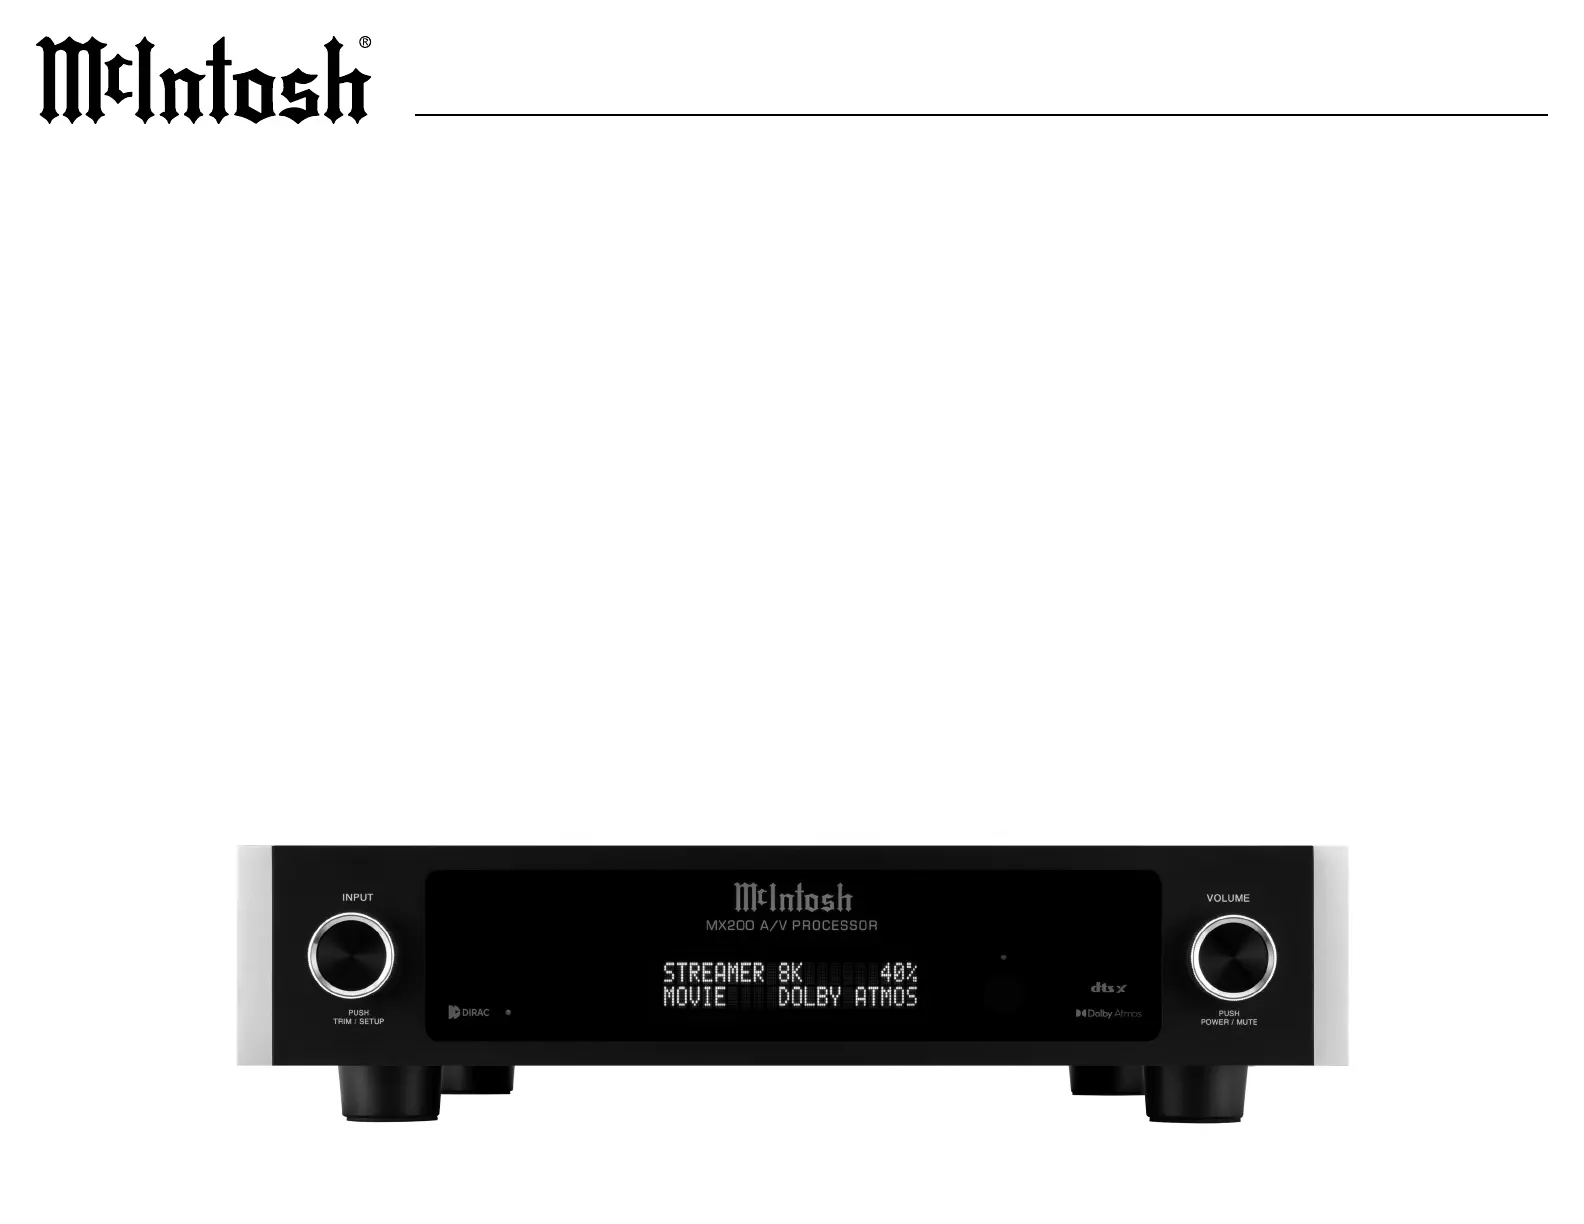
MX200MX200
A/V PROCESSOR
OWNERโS MANUAL

2
Performance Features
โข Special Power Supply
Separate high speed switching power supply plus
low noise analog supply applied for optimum low
noise performace.
โข Front Panel Illumination
The even illumination of the front panel is
accomplished by the combination of custom
๎๎๎๎๎๎๎๎๎๎๎๎๎๎๎๎๎๏ต๎๎๎๎๎๎๎๎๎๎๎๎๎๎๎๎๎๎๎๎๎๎๎๎๎๎
Light Emitting Diodes (LEDs).
โข Glass Front Panel Display
The famous McIntosh illuminated glass front
๎๎๎๎๎๎๎๎๎๎๎๎๎๎๎๎๎๎๎๎๎๎๎๎๎๎๎๎๎๎๎๎๎๎๎๎๎๎๎๎๎๎๎๎๎
๎๎๎๎๎๎๎๎๎๎๎๎๎๎๎๎๎๎๎๎๎๎๎๎๎๎๎๎๎๎๎๎๎๎๎๎๎๎๎๎๎๎๎๎๎๎๎๎๎๎๎
setup and status notices
.
โข
Remote Control with External Sensor Input
๎ท๎๎๎๎ซ๎ต๎๎๎๎๎ต๎๎๎๎๎๎๎ฆ๎๎๎๎๎๎๎๎๎๎๎๎๎๎๎๎๎๎๎๎๎๎๎๎๎๎๎๎๎๎๎
๎ฐ๎ป๎๎๎๎๎๎๎๎๎๎๎๎๎๎๎๎๎๎๎๎๎๎๎๎๎๎๎๎๎๎๎๎๎๎๎ฐ๎๎ฌ๎๎๎๎๎๎
source components. Enjoy your McIntosh system
from other rooms in your home by connecting
๎๎๎๎๎๎๎๎๎๎๎๎๎๎๎๎๎
Thank You from all of us at McIntosh
You have invested in a precision instrument that
will provide you with many years of enjoyment.
Please take a few moments to familiarize yourself
with the features and instructions to get the
๎๎๎๎๎๎๎๎๎๎๎๎๎๎๎๎๎๎๎๎๎๎๎๎๎๎๎๎๎๎๎๎๎๎๎๎๎๎๎๎
If you need further technical assistance, please
contact your dealer who may be more familiar with
your particular setup including other brands. You
๎๎๎๎๎๎๎๎๎๎๎๎๎๎๎๎๎๎ฐ๎๎ฌ๎๎๎๎๎๎๎๎๎๎๎๎๎๎๎๎๎๎๎๎๎๎๎๎๎๎๎๎๎๎๎๎
or in the unlikely event of needing service.
McIntosh Laboratory, Inc.
๎๎๎ฆ๎๎๎๎
๎๎๎๎๎ถ๎๎๎๎๎
๎ฅ๎๎๎๎๎๎๎๎๎๎๎๎ฑ๎๎๎๎ผ๎๎๎๎๎๎๎๎๎
Technical Assistance๎ ๎๎๎๎๎๎๎๎๎๎๎๎๎๎
๎ ๎ฉ๎๎๎ ๎๎๎๎๎๎๎๎๎๎๎๎๎๎
Customer Service๎ ๎๎๎๎๎๎๎๎๎๎๎๎๎๎
๎ ๎ฉ๎๎๎ ๎๎๎๎๎๎๎๎๎๎๎๎๎๎
Email support@mcintoshlabs.com
www.mcintoshlabs.com
Safety First
Please read the safety instructions included in a
separate document called Important Additional
Operation Information Guide.
Please Take A Moment
For future reference, you can write down your
serial number and purchase information here.
We can identify your purchase from this informa๎
tion if the occasion should arise:
Serial Number: __________________________
Purchase Date: ___________________________
Dealer Name: ___________________________
Introduction
Now you can take advantage of traditional McIntosh
๎๎๎๎๎๎๎๎๎๎๎๎๎๎๎๎๎๎๎๎๎๎๎๎๎๎๎๎๎๎๎๎ฐ๎ป๎๎๎๎๎๎ท๎๎๎๎ฐ๎ป๎๎๎๎
Audio/Video Processor marries a long tradition of
๎๎๎๎๎๎๎๎๎๎๎๎๎๎๎๎๎๎๎๎๎๎๎๎๎๎๎๎๎๎๎๎๎๎๎๎๎๎๎๎๎๎๎๎๎๎๎๎๎๎๎๎
๎๎๎๎๎๎๎๎๎๎๎๎๎๎๎๎๎
๎๎๎๎๎๎๎๎๎๎๎๎๎๎๎๎๎๎๎๎๎๎๎๎๎๎๎๎๎๎๎
๎๎๎๎๎๎๎๎๎๎๎๎๎๎๎๎๎๎๎๎๎๎๎๎๎๎๎ท๎๎๎๎ฐ๎๎ฌ๎๎๎๎๎๎๎๎๎๎๎๎๎๎๎
โthe sound of the music itself.โ
What is in the box
๎ซ๎๎๎๎๎๎๎๎๎๎๎๎๎๎๎๎๎๎๎๎๎๎๎
๎๎๎๎
๎๎๎๎๎๎๎๎๎๎๎๎๎๎๎๎๎๎๎๎๎๎๎๎
materials:
โข ๎ฒ๎๎๎๎ฐ๎ป๎๎๎๎๎ค๎๎น๎๎ณ๎๎๎๎๎๎๎๎
โข One accessory package including:
โข Microphone with attached cable
โข Microphone stand
โข ๏๎ป๏๎๎๎๎๎๎๎๎๎๎๎๎๎๎๏๎ป๏๎๎๎๎๎๎๎๎๎๎๎๎๎๎๎๎๎๎๎๎๎
โข One hardware package including:
โข Two Side Rack Mounting brackets
โข ๎ฉ๎๎๎๎๎๎๎๎๎๎๎๎๎๎ณ๎๎๎๎๎๎๎๎๎๎๎๎๎๎๎๎๎๎๎๏๎ป๏๎ด
โข ๎ฉ๎๎๎๎๎ณ๎๎๎๎๎๎๎๎๎๎๎๎๎๎๎๎๎๎๎๏๎ป๏๎ด
โข One manual package including this manual
โข ๎ฒ๎๎๎๎ซ๎ต๎๎๎๎๎ต๎๎๎๎๎๎๎ฆ๎๎๎๎๎๎๎
โข ๎ฒ๎๎๎๎ค๎ฆ๎๎๎๎๎๎๎๎๎๎๎

3
MX200
Table of Contents
Introduction . .. .. .. .. .. .. .. .. .. .. .. .. .. .. 2
Performance Features
.. .. .. .. .. .. .. .. .. .. .. 2
Custom Installation
. .. .. .. .. .. .. .. .. .. .. .. 3
Rack Mounting
.. .. .. .. .. .. .. .. .. .. .. .. .. 3
Connector and Cable Information
. .. .. .. .. .. 4
Balanced Audio Outputs
.. .. .. .. .. .. .. .. .. ๎
Trademark and License Information
. .. .. .. .. 5
Dimensions
.. .. .. .. .. .. .. .. .. .. .. .. .. .. .. 6
Navigating the Remote Control
.. .. .. .. .. .. .. 7
๎ต๎๎๎๎๎๎๎ฆ๎๎๎๎๎๎๎๎ฅ๎๎๎๎๎๎๎๎
.. .. .. .. .. .. .. .. .. ๎
๎ค๎๎๎๎๎๎๎๎๎๎๎ง๎๎๎๎๎๎๎๎๎ฆ๎๎๎๎๎๎๎
. .. .. .. .. .. .. ๎
Front Panel
.. .. .. .. .. .. .. .. .. .. .. .. .. .. .. 8
Rear Panel
.. .. .. .. .. .. .. .. .. .. .. .. .. .. .. 9
Trim Menu
.. .. .. .. .. .. .. .. .. .. .. .. .. .. ..10
Input Mode
.. .. .. .. .. .. .. .. .. .. .. .. .. ..๎๎
Assigning Input Modes
.. .. .. .. .. .. .. .. .. ..๎๎
Voici ng EQ
. .. .. .. .. .. .. .. .. .. .. .. .. .. ..11
Setup Menu
.. .. .. .. .. .. .. .. .. .. .. .. .. .. ..12
Inputs Setup Menu
.. .. .. .. .. .. .. .. .. .. .. ..13
General Setup Menu
.. .. .. .. .. .. .. .. .. 14-15
Audio Setup Menu
.. .. .. .. .. .. .. .. .. .. 16 -17
Video Setup Menu
.. .. .. .. .. .. .. .. .. .. .. ..18
Network Setup Menu
.. .. .. .. .. .. .. .. .. .. ..19
Speakers Setup Menu
.. .. .. .. .. .. .. .. .. .. . 20
Speaker Placement
.. .. .. .. .. .. .. .. .. .. .. ..21
Dirac Live
ยฎ
Setup. .. .. .. .. .. .. .. .. .. .. .. ..22
๎น๎๎๎๎๎๎๎ฆ๎๎๎๎
๎๎๎๎๎๎
. .. .. .. .. .. .. .. .. .. .. . 22
Connection Diagram
.. .. .. .. .. .. .. .. .. .. . 23
Setting Up Surround Sound
.. .. .. .. .. .. 24-25
Specifications
.. .. .. .. .. .. .. .. .. .. .. .. .. . 26
Packing Instructions
.. .. .. .. .. .. .. .. .. .. ..27
Part List
.. .. .. .. .. .. .. .. .. .. .. .. .. .. .. ..27
Custom Installation
๎ต๎๎๎๎๎๎๎๎๎๎๎๎๎๎๎๎๎๎๎๎๎๎๎๎๎๎๎๎๎๎๎๎๎๎๎๎๎๎๎๎๎ฐ๎ป๎๎๎๎๎๎๎๎๎๎๎๎๎๎๎๎๎๎๎๎๎๎๎๎๎๎๎๎๎
๎๎๎๎๎๎๎๎๎๎๎๎๎๎๎๎๎๎๎๎๎๎๎๎๎๎๎
๎๎๎๎๎๎๎๎๎๎๎๎๎๎๎๎ง๎๎๎๎๎๎๎๎๎๎๎๎๎๎๎๎๎๎๎ฐ๎ป๎๎๎๎๎๎
๎๎๎๎๎๎๎๎๎
๎๎๎๎๎๎๎๎๎๎๎๎๎๎๎๎๎๎๎๎๎๎๎๎บ๎๎๎๎๎๎๎๎๎ฐ๎ป๎๎๎๎๎๎๎๎๎๎๎๎๎๎๎๎๎๎๎๎๎๎๎๎๎
๎๎๎๎๎๎๎๎๎๎๎๎๎๎๎๎
components, use a ventilation fan to provide cool operating temperature.
โข ๎๎๎๎๎๎๎๎๎๎๎๎๎๎๎๎๎๎๎
๎๎๎๎๎๎๎๎๎๎๎
โข ๎๎๎๎๎๎๎๎๎๎๎๎๎๎๎๎๎๎
๎๎๎๎๎๎๎๎๎๎
๎๎๎๎๎
โข ๎๎๎๎๎๎๎๎๎๎๎๎๎๎๎๎๎๎๎๎๎๎๎๎๎๎๎๎๎๎๎๎๎๎๎๎๎๎๎๎๎๎๎๎๎๎๎๎๎๎๎๎๎๎
๎๎๎๎๎๎๎๎๎
โข ๎๎๏๎ป๏๏๎๎๎๎๎๎๎๎๎๎๎๎๎๎๎๎๎๎๎๎๎๎๎๎๎๎๎๎๎๎๎๎๎๎๎๎๎๎๎๎๎๎๎๎๎๎๎๎๎๎๎๎๎
๎๎๎๎๎๎๎๎๎๎
Rack Mounting
๎ท๎๎๎๎๎๎๎๎๎๎๎๎๎๎๎๎๎๎ฐ๎ป๎๎๎๎๎๎๎๎๎๎๎๎๎๎๎๎๎๎๎๎๎๎๎๎๎๎๎๎๎๎๎๎๎๎๎๎๎๎๎๎๎๎
๎๎๎๎๎๎๎๎๎๎๎๎๎๎๎๎
๎๎๎๎๎๎๎๎๎๎๎๎๎
Follow these instructions for each side:
1. ๎ต๎๎๎๎๎๎๎๎๎๎๎๎๎๎๎๎๎๎๎๎๎๎๎๎๎๎๎๎๎๎๎๎๎๎๎๎๎๎๎๎๎๎๎๎๎๎๎๎๎ฐ๎ป๎๎๎๎ถ๎๎๎๎๎๎๎๎๎๎๎๎๎๎๎ถ๎๎๎๎๎๎๎๎๎๎๎๎๎๎๎๎๎๎๎๎๎๎๎๎๎๎๎๎๎๎๎๎
mounting brackets are removed.
2. ๎ถ๎๎๎๎๎๎๎๎๎๎๎๎๎๎๎๎๎๎๎๎๎๎๎๎๎๎๎๎๎๎
๎๎๎๎๎๎๎๎๎๎๎๎๎๎๎ฐ๎ป๎๎๎๎๎๎๎๎๎๎๎๎๎๎๎๎๎๎๎๎๎๎๎๎๎๎๎๎๎๎๎๎๎๎๎๎๎๎๎ง๎๎๎๎๎๎๎๎๎๎๎๎๎๎๎๎๎
previously removed screws. Use the smaller supplied screws to secure the bracket to the front panel.
Side Rack
Mounting
Bracket
Larger
Supplied
Screws
Smaller Supplied
Screws
Front Panel
Side Panel
Front Panel
Side Panel
Specyfikacje produktu
Marka: | McIntosh |
Kategoria: | Niesklasyfikowane |
Model: | MX200 |
Potrzebujesz pomocy?
Jeลli potrzebujesz pomocy z McIntosh MX200, zadaj pytanie poniลผej, a inni uลผytkownicy Ci odpowiedzฤ
Instrukcje Niesklasyfikowane McIntosh
9 Paลบdziernika 2024
8 Paลบdziernika 2024
29 Wrzeลnia 2024
16 Wrzeลnia 2024
2 Wrzeลnia 2024
31 Sierpnia 2024
30 Sierpnia 2024
24 Sierpnia 2024
18 Sierpnia 2024
15 Sierpnia 2024
Instrukcje Niesklasyfikowane
- Ontech
- CaviLock
- NGS
- SLV
- Imperia
- Doro
- Erica Synths
- Cropico
- JAYS
- Beha-Amprobe
- Smart
- Razorri
- Bฤm Wireless
- Aqua Medic
- Uniross
Najnowsze instrukcje dla Niesklasyfikowane
29 Stycznia 2025
29 Stycznia 2025
29 Stycznia 2025
29 Stycznia 2025
29 Stycznia 2025
29 Stycznia 2025
29 Stycznia 2025
29 Stycznia 2025
29 Stycznia 2025
29 Stycznia 2025