Instrukcja obsługi Metra 90-3044P
Metra Niesklasyfikowane 90-3044P
Przeczytaj poniżej 📖 instrukcję obsługi w języku polskim dla Metra 90-3044P (3 stron) w kategorii Niesklasyfikowane. Ta instrukcja była pomocna dla 30 osób i została oceniona przez 7 użytkowników na średnio 4.0 gwiazdek
Strona 1/3
IMPORTANT
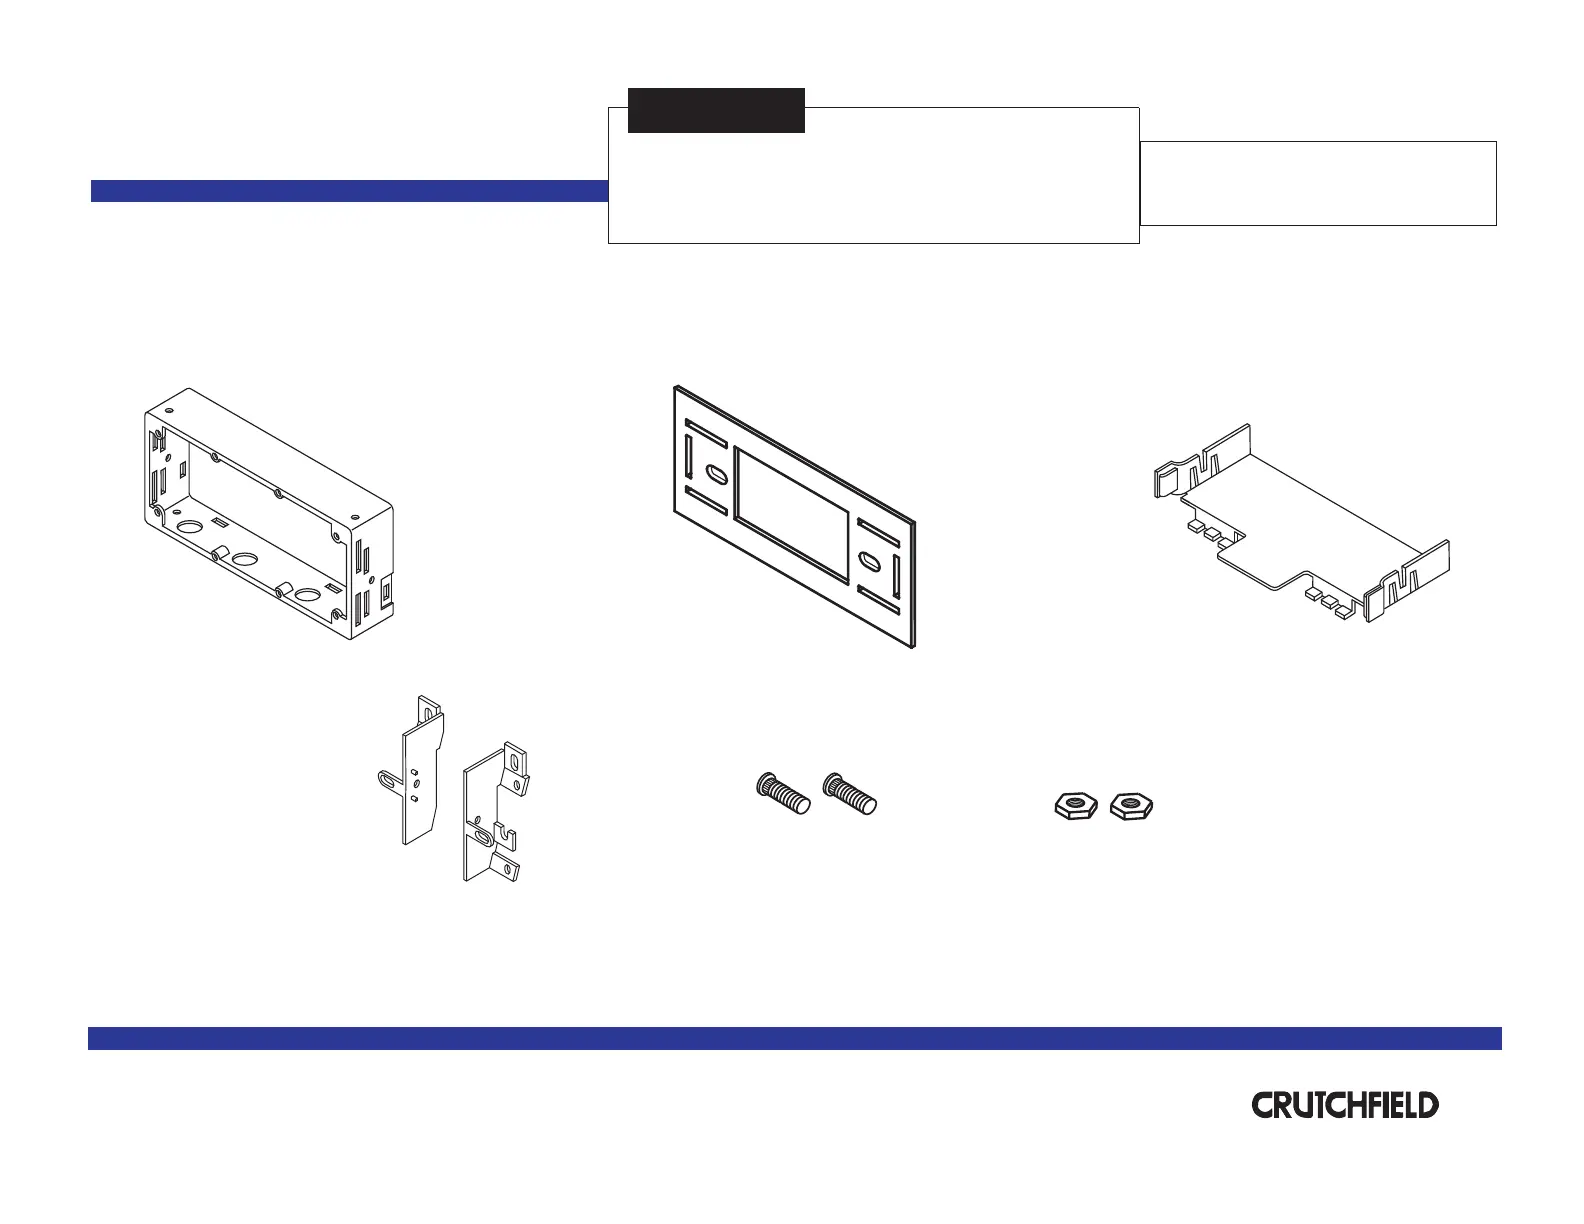
Installation Kit
120 90-3044P
Before starting, compare items on your invoice with items
received.Carefully check through packaging material.
If an item is missing, please call:
Crutchfield
Parts Supplied:
Kit Frame
Support Tray
Chevrolet/GMC
Revision 09/17/03
Kit assembly instructions are on the following pages.
(2) Studs
Page 1 of 3
®
Copyright 2003 Crutchfield Corporation
*120903044P*
Trimplate
(2) 3/8”Nuts
Mounting Brackets
at1-888-955-6000
Specyfikacje produktu
| Marka: | Metra |
| Kategoria: | Niesklasyfikowane |
| Model: | 90-3044P |
Potrzebujesz pomocy?
Jeśli potrzebujesz pomocy z Metra 90-3044P, zadaj pytanie poniżej, a inni użytkownicy Ci odpowiedzą
Instrukcje Niesklasyfikowane Metra

13 Stycznia 2025
13 Stycznia 2025
1 Stycznia 2025
1 Stycznia 2025
11 Grudnia 2024
9 Października 2024
9 Października 2024
9 Października 2024
9 Października 2024
9 Października 2024
Instrukcje Niesklasyfikowane
Najnowsze instrukcje dla Niesklasyfikowane
29 Stycznia 2025
29 Stycznia 2025
29 Stycznia 2025
29 Stycznia 2025
29 Stycznia 2025
29 Stycznia 2025
29 Stycznia 2025
29 Stycznia 2025
29 Stycznia 2025
29 Stycznia 2025