Instrukcja obsługi Metra 99-8274
Metra Niesklasyfikowane 99-8274
Przeczytaj poniżej 📖 instrukcję obsługi w języku polskim dla Metra 99-8274 (8 stron) w kategorii Niesklasyfikowane. Ta instrukcja była pomocna dla 18 osób i została oceniona przez 8 użytkowników na średnio 4.8 gwiazdek
Strona 1/8
Metra. The World’s Best Kits.
®
MetraOnline.com © COPYRIGHT 2024 METRA ELECTRONICS CORPORATION REV. 11/12/24 INST99-8274
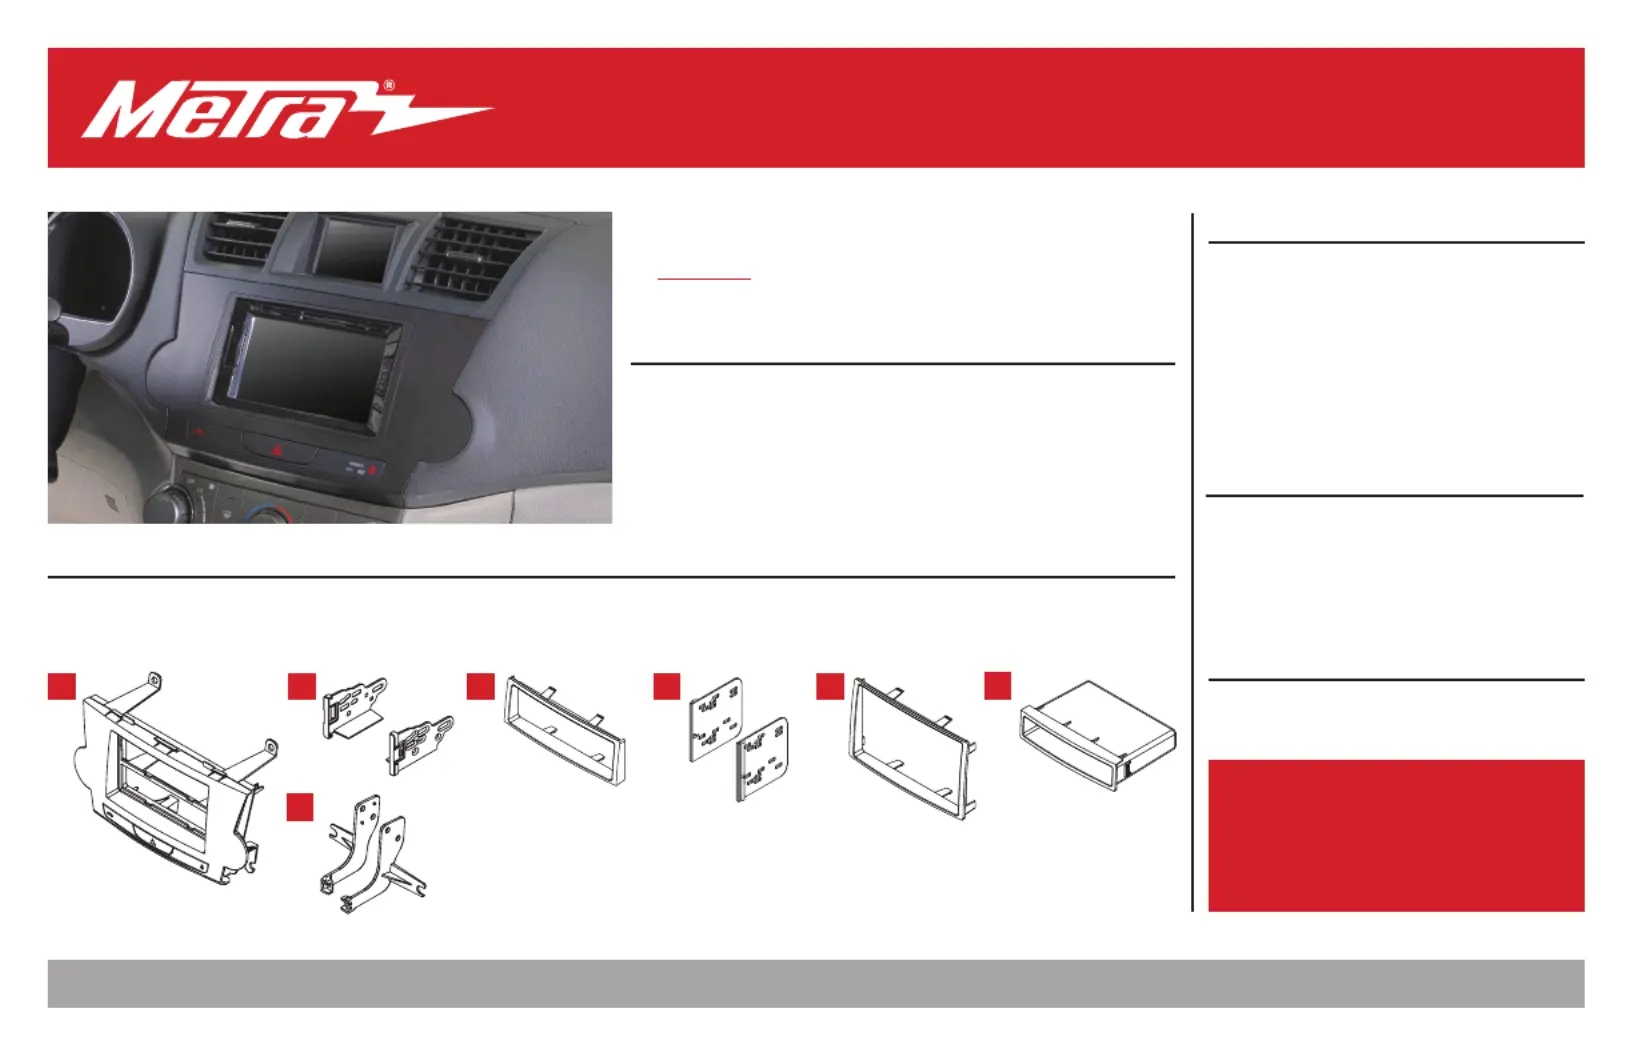
INSTALLATION INSTRUCTIONS
99-8274
Attention! With the key out of the ignition,
disconnect the negative battery terminal
before installing this product. Ensure that all
installation connections are secure before
cycling the ignition to test this product.
KIT FEATURES
KIT COMPONENTS
• A) Radio housing • B) ISO DIN brackets • C) ISO DIN trim plate • D) ISO DDIN brackets • E) ISO DDIN trim plate • F) Pocket • G) Radio housing brackets
• H)
Hazard button harness (not shown)
TOOLS REQUIRED
• Panel removal tool • Phillips screwdriver
• Cutting tool • 10mm socket wrench
TABLE OF CONTENTS
Dash Disassembly...................................................2
Kit Preparation....................................................3-4
Kit Assembly
–DIN radio provision with pocket.........................5
–ISO DIN radio provision with pocket...................6
–ISO DDIN radio provision......................................7
WIRING & ANTENNA CONNECTIONS
(sold separately)
Wiring Harness: 70-1761
See AXXESSINTERFACES.COM for all interface
solutions.
Antenna Adapter: Not required
A B C
F
G
D E
Toyota Highlander (with factory NAV) 2008-2012
Visit for more detailed information about the product and up-to-date vehicle MetraOnline.com
specific applications
• DIN radio provision with pocket
• ISO DIN radio provision with pocket
• ISO DDIN radio provision
• Hazard button with passenger airbag and security light assembly included.
• Painted to match factory dash: 99-8274B = Black, 99-8274BR = Brown
Specyfikacje produktu
| Marka: | Metra |
| Kategoria: | Niesklasyfikowane |
| Model: | 99-8274 |
Potrzebujesz pomocy?
Jeśli potrzebujesz pomocy z Metra 99-8274, zadaj pytanie poniżej, a inni użytkownicy Ci odpowiedzą
Instrukcje Niesklasyfikowane Metra

13 Stycznia 2025
13 Stycznia 2025
1 Stycznia 2025
1 Stycznia 2025
11 Grudnia 2024
9 Października 2024
9 Października 2024
9 Października 2024
9 Października 2024
9 Października 2024
Instrukcje Niesklasyfikowane
Najnowsze instrukcje dla Niesklasyfikowane
29 Stycznia 2025
29 Stycznia 2025
29 Stycznia 2025
29 Stycznia 2025
29 Stycznia 2025
29 Stycznia 2025
29 Stycznia 2025
29 Stycznia 2025
29 Stycznia 2025
29 Stycznia 2025