Instrukcja obsługi Metra 99-7504
Metra Niesklasyfikowane 99-7504
Przeczytaj poniżej 📖 instrukcję obsługi w języku polskim dla Metra 99-7504 (8 stron) w kategorii Niesklasyfikowane. Ta instrukcja była pomocna dla 14 osób i została oceniona przez 4 użytkowników na średnio 4.2 gwiazdek
Strona 1/8
INSTALLATION INSTRUCTIONS FOR PART 99-7504
99-7504
APPLICATIONS
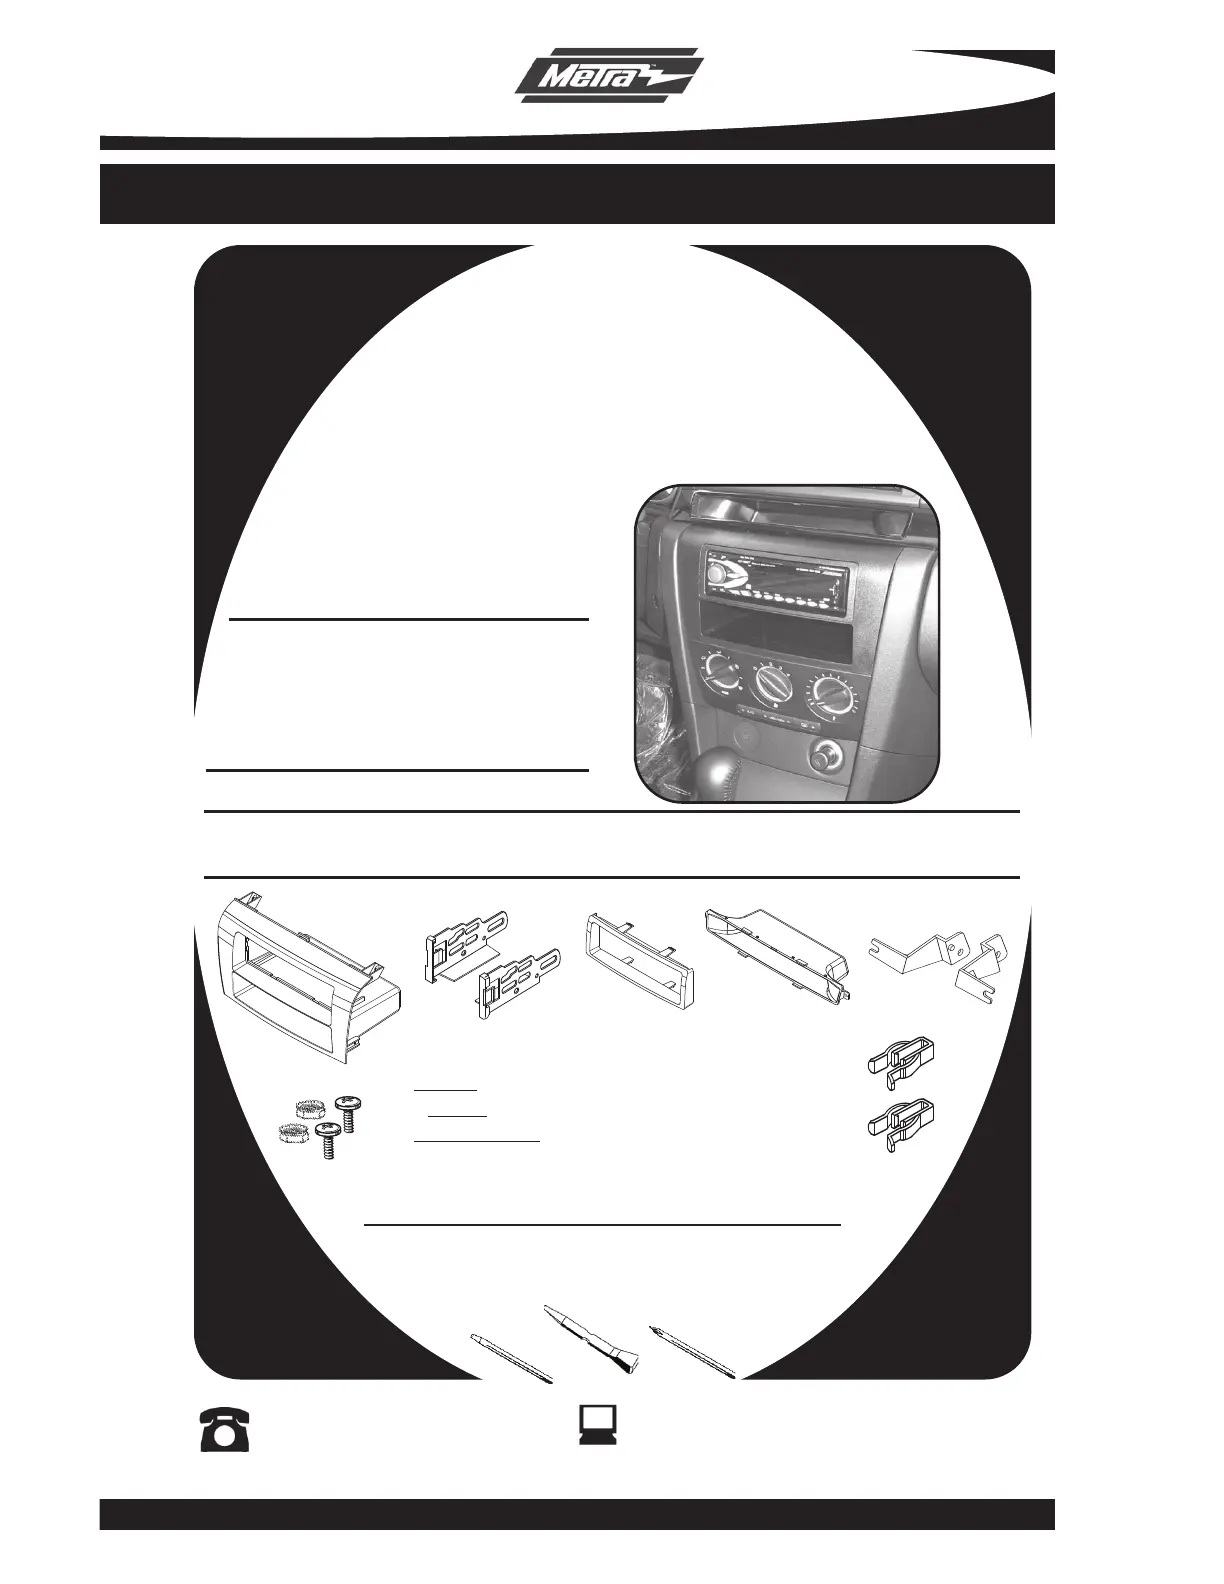
Mazda 3
2004-2009
KIT FEATURES
•DIN Mount Radio Provision with Pocket
•ISO Mount Radio Provision with Pocket
•Bonus Display Replacement Pocket
•Retains Factory Display For Automatic
Climate Controls
A) Radio Housing • B) ISO Brackets • C) Trim Plate • D) Display Replacement Pocket
•E) Display Retention Brackets • F) (2) 3/8”#10 Bolts and (2) #10 Nuts • G) (2) PC-7503 Panel Clips
KIT COMPONENTS
A
Small Flat Blade Screwdriver/ Panel Removal Tool
•Phillips Screwdriver
1-800-221-0932
©COPYRIGHT 2004-2009 METRA ELECTRONICS CORPORATION
www.metraonline.com
B
C
D
TOOLS REQUIRED:
E
F
G
WIRING AND ANTENNA CONNECTIONS (Sold Separately)
Harness:
•70-7903-Mazda harness 2001-up
Antenna Adapter:
•Not required
Specyfikacje produktu
| Marka: | Metra |
| Kategoria: | Niesklasyfikowane |
| Model: | 99-7504 |
Potrzebujesz pomocy?
Jeśli potrzebujesz pomocy z Metra 99-7504, zadaj pytanie poniżej, a inni użytkownicy Ci odpowiedzą
Instrukcje Niesklasyfikowane Metra

13 Stycznia 2025
13 Stycznia 2025
1 Stycznia 2025
1 Stycznia 2025
11 Grudnia 2024
9 Października 2024
9 Października 2024
9 Października 2024
9 Października 2024
9 Października 2024
Instrukcje Niesklasyfikowane
Najnowsze instrukcje dla Niesklasyfikowane
29 Stycznia 2025
29 Stycznia 2025
29 Stycznia 2025
29 Stycznia 2025
29 Stycznia 2025
29 Stycznia 2025
29 Stycznia 2025
29 Stycznia 2025
29 Stycznia 2025
29 Stycznia 2025